Copy Functions
1-4
4
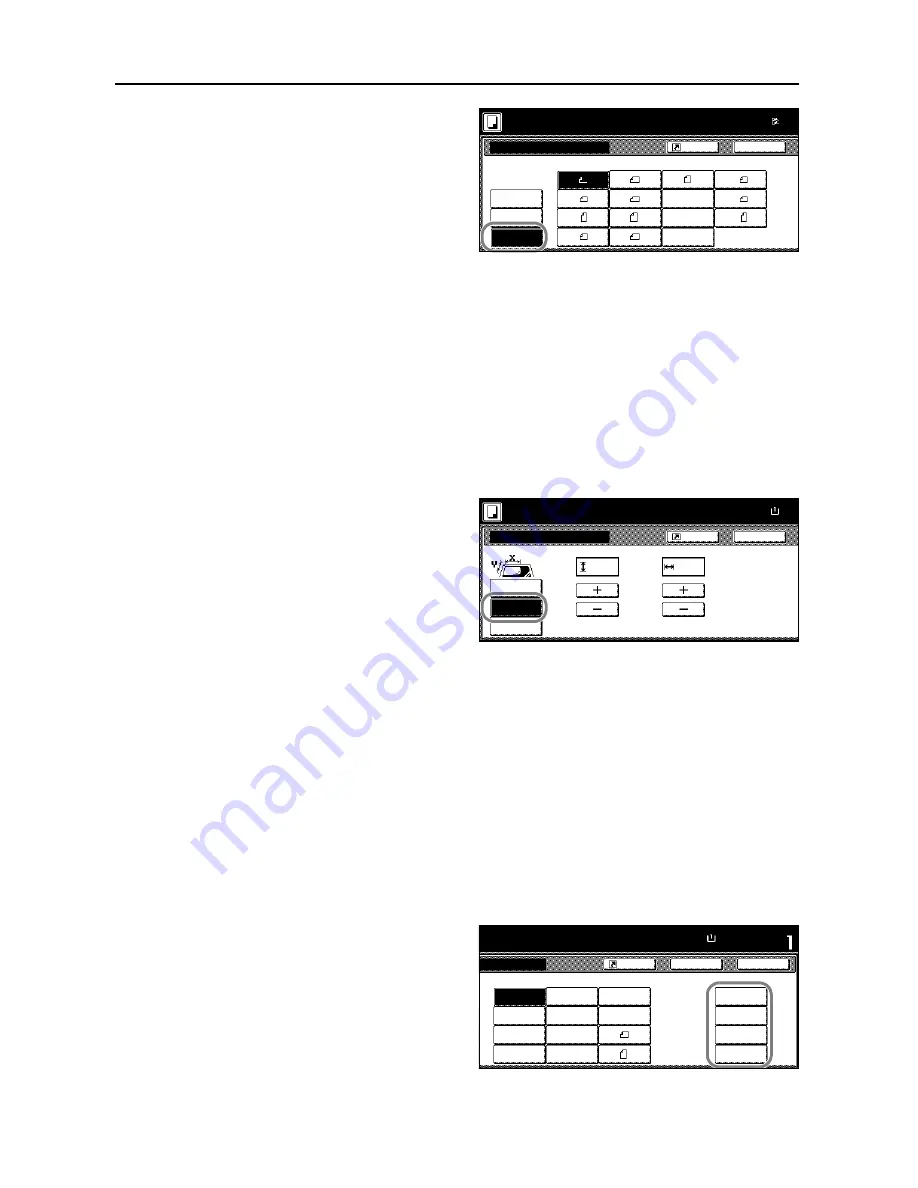
Press [Other stand.Size] ([Others
stand.Size]).
5
Select the original size.
6
Press the
Start
key. Copying begins.
Input Original Size
Follow the steps as below to enter the original size when not listed in the standard sizes.
1
Place the original.
2
Press [Function].
3
Press [Select Orig. Size] ([Select Size Orig.]).
4
Press [Input size].
5
Press [+] or [–] to set the
Y
(height) and
X
(width) sizes.
With the metric models, you may enter the size directly using the numeric keys by pressing
[#-Keys].
6
Press the
Start
key. Copying begins.
Custom Size
Follow the steps as below to specify one of the custom sizes.
1
Place the original.
2
Press [Function].
3
Press [Select Orig. Size] ([Select Size Orig.]).
4
Select the original size from
Custom
Size
(
Use regist
).
Input size
A5
B5
B5
A3
Other
B4
A5
B6
B6
Folio
Back
P.Card
Select
A6
Select Original Size
Paper Size
Shortcut
stand.Size
100%
Ready to copy.
size
( )
Full-Color
8K
16K
16K
OUFUKU
HAGAKI
11×1
Back
Select Original Size
Paper Size
Set original on platen an
scanning range. (Y side,
Shortcut
Select
Other
Input size
stand.Size
X
Y
"
"
100%
( 2~11
5/8
)
( 2~17)
Ready to copy.
size
.
2
.
2
( )
Full-Color
11×8
Close
11×8½"
8½×5½"
5½×8½"
11×17"
Auto
8½×14"
8½×11"
11×15"
8½×13½"
8½×13"
A4
Back
Size
Set
A4
Custom Size
Shortcut
Paper Size
100%
11
11/16
×16
9/16
"
to copy.
( )
Full-Color
11×8½"
11
11/16
×16
9/16
"
11
11/16
×16
9/16
"
11
11/16
×16
9/16
"
Summary of Contents for C2525E
Page 1: ...Advanced Operation Guide C2525E C3225E C3232E C4035E ...
Page 2: ......
Page 16: ...xiv ...
Page 21: ...Copy Functions 1 5 5 Press the Start key Copying begins ...
Page 142: ...Printer Settings 3 48 ...
Page 166: ...Scanner Settings 4 24 ...
Page 300: ...System Menu 7 52 ...
Page 324: ...Job Accounting 8 24 ...
Page 344: ...Troubleshooting 9 20 ...
Page 364: ...Appendix Appendix 20 ...
Page 370: ...Index Index 6 ...
Page 372: ......
Page 373: ... 2007 is a trademark of Kyocera Corporation ...
Page 374: ...2007 2 Rev 1 0 ...


