324
Chapter 7 – Color Workflow
The following options are available:
•
Click
Calibrate
to run the Color Calibration Wizard. This wizard
guides you in the use of the X-Rite DTP34 to create calibration tables,
see
Creating a Calibration Table
on page 324.
•
Select a calibration table from the
Calibration Name
list and select one
of the following options:
Click
Edit
to edit the calibration table, see
Editing Calibration Tables
on page 332.
Click
Delete
to delete the calibration table.
Click
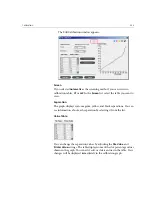
Info
for the Density Graph, see
Reading Color Density Data
on
page 337.
Click
Close
to end a test job and close the Calibration window.
Creating a Calibration Table
1.
In the Calibration window, click
Calibrate
.
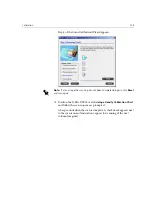
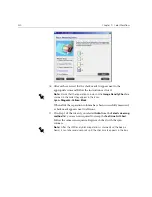
The first step in the wizard is
Printing Start Point Chart
. This step
enables you to detect the point where you start to see toner on the
paper. Before printing the start point chart, you need to set the
following parameters according to the values of your job:
•
Tray
•
Screening method
•
Media type
Summary of Contents for CXP6000 Color Server
Page 2: ...This page is intentionally left blank...
Page 3: ...Spire CXP6000 color server version 4 0 User Guide...
Page 4: ...This page is intentionally left blank...
Page 8: ...This page is intentionally left blank...
Page 28: ...This page is intentionally left blank...
Page 99: ...Spire Web Center 85 Links The Links page enables you to link to related vendors or products...
Page 169: ...Basic Workflows Importing and Printing Jobs 156 Reprinting Jobs 158 Basic Settings 159...
Page 182: ...168 Chapter 4 Basic Workflows Rotate 180 To rotate your job by 180 select Yes Gallop...
Page 190: ...176 Chapter 4 Basic Workflows Coating Select Coated to print on coated paper...
Page 244: ...This page is intentionally left blank...
Page 326: ...This page is intentionally left blank...
Page 327: ...Color Workflow Calibration 314 Default Color Flow 340 Color Tools 358...
Page 416: ...This page is intentionally left blank...
Page 494: ...This page is intentionally left blank...


