122
Chapter 3 – Working From a Client Workstation
7.
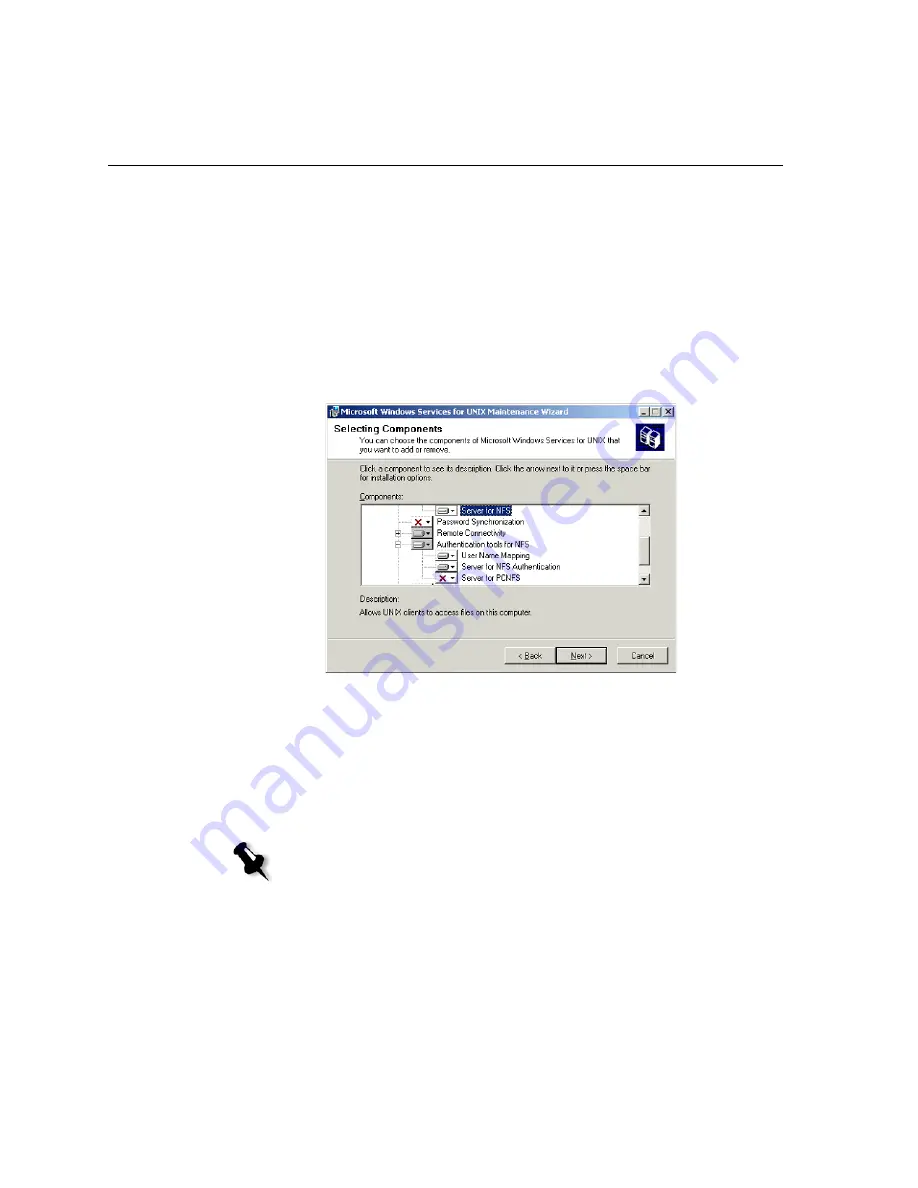
Click the icon that appears next to each component that you want to
install. Under each component, select the items you want to include in
the installation.
Select only the following:
•
Server for NFS
•
Authentication tools for NFS
>
Server for NFS Authentication
•
Authentication tools for NFS>User Name Mapping.
When you have finished specifying all the components to install, click
Next
.
8.
Click
Next
.
A dialog box appears stating that low-level
security settings
need
changing.
9.
Click
Next
.
10.
In the User Name Mapping
dialog box, type the system name of the
computer on which you are installing SFU. Then click
Next
.
Note:
NFS components will not work unless you specify the name of the
User Name Mapping server.
Summary of Contents for CXP6000 Color Server
Page 2: ...This page is intentionally left blank...
Page 3: ...Spire CXP6000 color server version 4 0 User Guide...
Page 4: ...This page is intentionally left blank...
Page 8: ...This page is intentionally left blank...
Page 28: ...This page is intentionally left blank...
Page 99: ...Spire Web Center 85 Links The Links page enables you to link to related vendors or products...
Page 169: ...Basic Workflows Importing and Printing Jobs 156 Reprinting Jobs 158 Basic Settings 159...
Page 182: ...168 Chapter 4 Basic Workflows Rotate 180 To rotate your job by 180 select Yes Gallop...
Page 190: ...176 Chapter 4 Basic Workflows Coating Select Coated to print on coated paper...
Page 244: ...This page is intentionally left blank...
Page 326: ...This page is intentionally left blank...
Page 327: ...Color Workflow Calibration 314 Default Color Flow 340 Color Tools 358...
Page 416: ...This page is intentionally left blank...
Page 494: ...This page is intentionally left blank...


