18-419
18-419
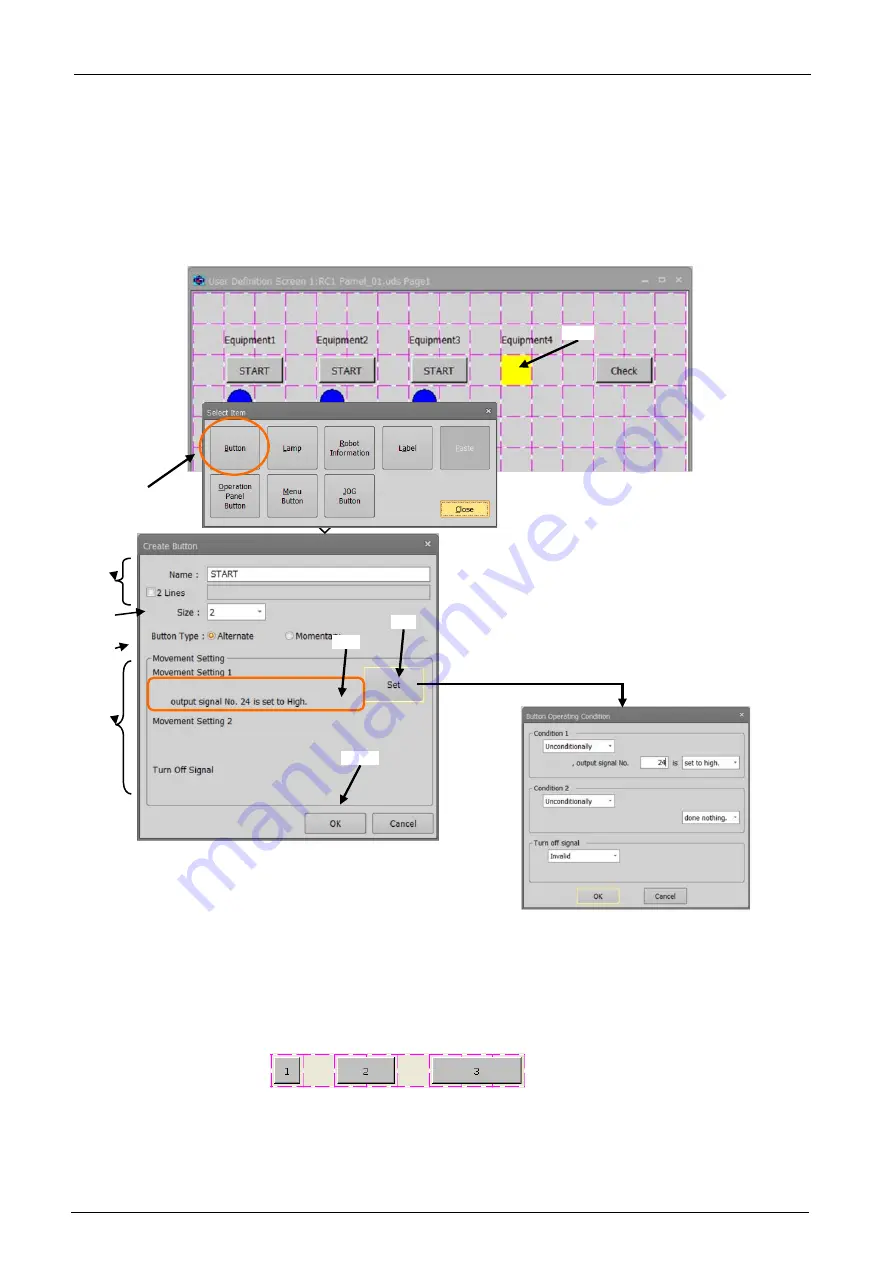
18.3.2.1. Button
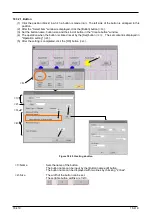
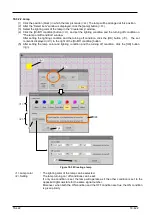
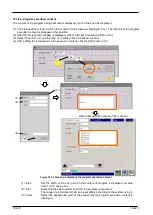
(1) Click the position (block) in which a button is made (<a>).
The left side of the button is arranged in this
position.
(2) After the "Select item" window is displayed, click the [Button] button (<b>).
(3) Set the button name, button size and the kind of button in the "Create button" window.
(4) The operation when the button is clicked is set by the [Set] button (<c>). The set content is displayed in
"Operation setting" (<d>).
(5) After the setting is completed, click the [OK] button (<e>).
Figure 18-29 Creating a button
<1> Name
: Sets the name of the button.
The button name can be input by the [Button name edit] button.
The button name can be displayed with two lines by checking "2 lines".
<2> Size
: The width of the button can be set.
The settable button widths are 1/2/3.
<a>
<b>
<1>
<2>
<3>
<4>
<e>
<c>
<d>
Содержание 3F-14C-WINE
Страница 84: ...8 84 8 84 Figure 8 21 Parameter transfer procedure 1 2 2 ...
Страница 393: ...18 393 18 393 Figure 18 1 Starting the Oscillograph ...
Страница 413: ...18 413 18 413 Figure 18 24 Output to Robot program Selection ...
Страница 464: ...18 464 18 464 Figure 18 72 Starting the Tool automatic calculation ...
Страница 545: ...21 545 21 545 Figure 21 55 Hide display of user mechanism ...
Страница 624: ...24 624 24 624 Figure 24 4 Document output example ...

