WavePro 7Zi
41
WP700Zi-OM-E-RevA
Front Panel Groupings
The front panel is divided into sections based on functions. The following sections explain them in a bit more
detail.
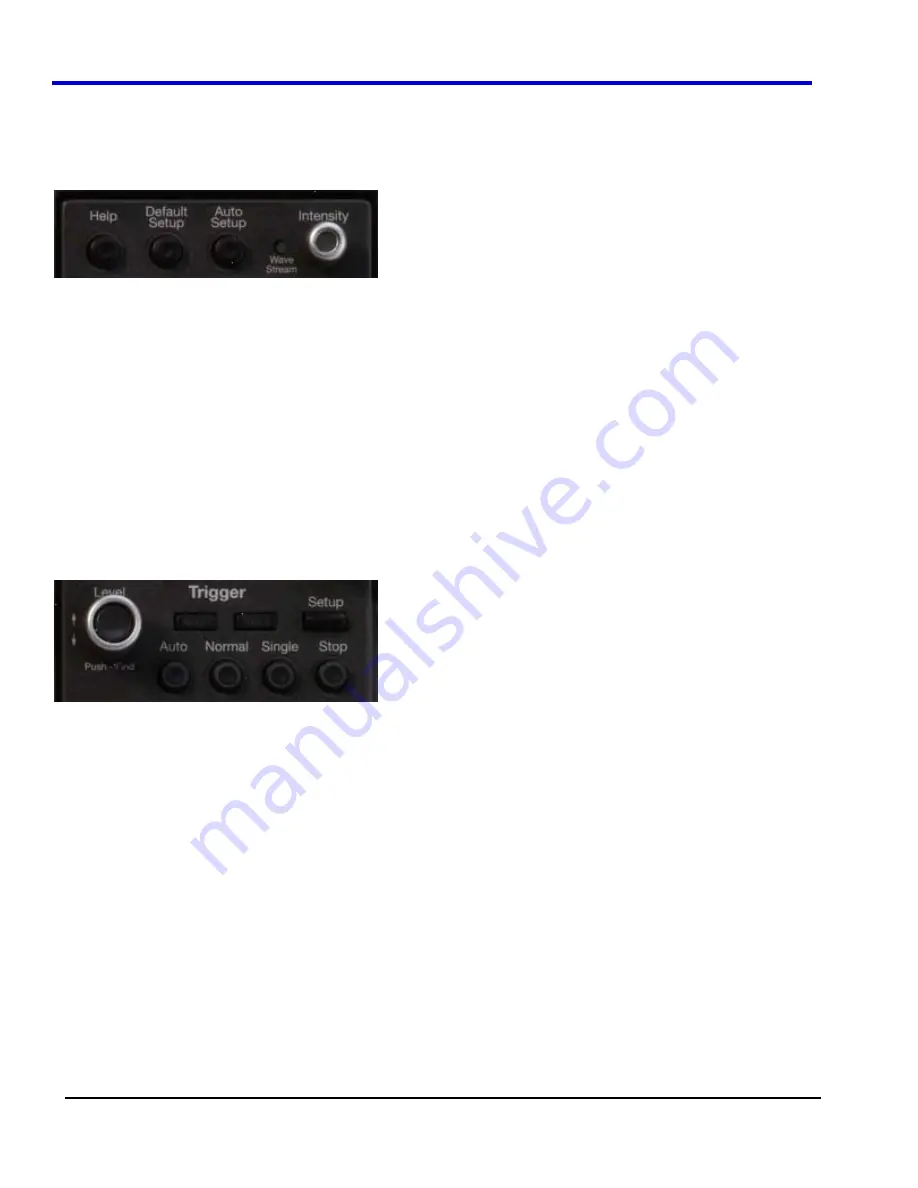
Miscellaneous Setup Controls
x
Help
- Press to open the LeCroy Online Assistant where you can click to open the oscilloscope online help
table of contents, index, or search for a topic using a keyword. If the second monitor is installed, the online
help opens on the second monitor.
x
Default Setup
- Press to reset the oscilloscope's settings to the default configuration. Corresponds with
screen menu selection:
File Recall Setup Recall Default Setup
. For a list of default settings, see
Save/Recall Saving and Recalling Scope Settings
.
x
Auto Setup
- Press once and the
Auto Setup
flyout menu opens. Press the
Auto Setup
button on the
flyout menu to perform a full auto setup. Press a
Channel Find Scale
button on the flyout menu to perform
a quick auto setup for that channel only. Press the A
UTO
S
ETUP
front panel button twice to perform the last
selection from the
Auto Setup
flyout menu (the default is to perform a full auto setup).
x
WaveStream
- Indicates when the acquisition mode is set to WaveStream.
x
Intensity
- Press to toggle between the most recently selected Acquisition/Sampling Mode and
WaveStream mode. When you turn the knob, if WaveStream is ON, the WaveStream display intensity
changes. When you turn the knob, if WaveStream is OFF, changes the Intensity setting. Corresponds with
the screen menu selection:
Display Display Setup
.
Trigger Front Panel Controls
x
Level
- Press to toggle between 50% trigger level and the previous level setting. Turn to change the trigger
threshold level. This level is indicated on the Trigger label.
x
Trigger
- Indicates the trigger status as
READY
and
TRIG'D
. READY is lit when the trigger is armed.
TRIG'D is lit momentarily when a trigger occurs. A fast trigger rate will cause the light to stay lit
continuously.
x
Setup
- Press once to open the
Trigger Setup
dialog. Corresponds with screen menu selection:
Trigger
Trigger Setup
. Press the Trigger S
ETUP
front panel button again to close the
Trigger Setup
dialog.
x
Auto
- Press to turn on
Auto Trigger
mode, which triggers the oscilloscope after a time-out, even if the
trigger conditions are not met.
x
Normal
- Press to turn on
Normal Trigger
mode, which triggers the oscilloscope each time a signal is
present that meets the conditions set for the type of trigger selected.
x
Single
- Press to turn on
Single Trigger
mode, which arms the oscilloscope to trigger once (single-shot
acquisition) when the input signal meets the trigger conditions set for the type of trigger selected. If the
scope is already armed, it will force a trigger.
x
Stop
- Press to prevent the scope from triggering on a signal. If you boot up the instrument with the trigger
in
Stop
mode, the message "no trace available" will be displayed. Press the Trigger A
UTO
front panel
button to display your trace.
Содержание DDA 7 Zi series
Страница 1: ...Operator s Manual WavePro SDA and DDA 7 Zi Series Oscilloscopes ...
Страница 2: ... L R R H HUD RU D D ...
Страница 41: ...Operator s Manual WP700Zi OM E RevA 40 The detachable WavePro Zi front panel ...
Страница 376: ...WavePro 7Zi 375 WP700Zi OM E RevA Absolute Offset Relative ...
Страница 439: ...Operator s Manual WP700Zi OM E RevA 438 ...
Страница 440: ...WavePro 7Zi 439 WP700Zi OM E RevA ...
Страница 544: ...Thank you for purchasing a WavePro SDA or DDA 7 Zi Oscilloscope ...


