HYDRAULIC AND PARK BRAKE SYSTEMS
Bleeding the Hydraulic Brake System
Page 6-24
2007 Carryall 295/295 SE & XRT 1550/1550 SE Gasoline, Diesel and IntelliTach M & S Manual
6
ý
WARNING
• To prevent possible injury from pulling the vehicle off the front jack stands while lifting the
rear, perform the following:
- Position floor jack wheels in the direction the jack will roll as the rear of the vehicle rises.
- Ensure the wheels of the jack are able to roll freely without obstruction.
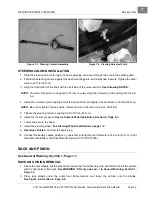
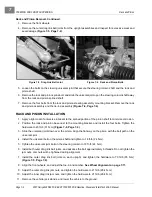
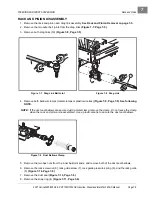
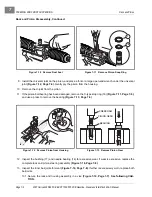
6.3. Start at the brake caliper farthest away from the master cylinder. Attach a clear plastic hose to the
caliper’s bleeder valve and place the other end into a clear container (a clean plastic 16 oz. soda
bottle works fine) filled with enough brake fluid to cover the end of the hose. This prevents air from
being drawn into the caliper during the bleeding process.
6.4. Have an assistant
SLOWLY
depress and release the brake pedal repeatedly until resistance is
encountered when pushing the pedal.
DO NOT VIGOROUSLY PUMP
the brake pedal! Pumping
the pedal can aerate the brake fluid in the master cylinder and brake lines.
6.5. When resistance is felt at the pedal, have the assistant apply gentle downward pressure on the
pedal and hold while slowly opening the bleeder valve, then close the valve fully as the brake pedal
reaches the end of its travel. Continue this process until air bubbles no longer come out of the hose
that is submerged into the fluid in the bottle. Gently tap the caliper and the master cylinder with a
plastic-tipped hammer and repeat the bleeding sequence. This will dislodge air bubbles that tend
to accumulate, allowing for a more complete bleeding process.
6.6. Ensure that no brake fluid gets on the brake rotors or pads. If fluid gets on the brake rotors, they
should be cleaned with brake cleaner. If fluid gets on the pads, they should be replaced as brake
fluid can reduce the brake pad’s effectiveness or even break down the friction material.
6.7. Check the master cylinder fluid level and add fluid if necessary. Always pour fluid into the master
cylinder slowly to avoid creating air bubbles in the reservoir.
See following NOTE.
NOTE:
Do not allow the brake fluid in the master cylinder reservoir to fall below the MIN level mark at any
time during the brake bleeding procedure.
6.8. Once the caliper is bled, tighten the bleeder valve to 25 in-lb (3 N·m), wipe the area of any residual
fluid with a clean rag and have the assistant press on the brake pedal to ensure there are no leaks.
Normal pedal pressure should be used.
6.9. Repeat this process at each brake caliper, starting at the next caliper farthest from the master cyl-
inder.
7. After bleeding, fill the master cylinder reservoir to the MAX level with DOT 5 brake fluid.
8. Tighten the cap on the master cylinder reservoir.
9. Properly label and dispose of the used brake fluid.
10. Inspect the brake system.
See Brake System Inspection on page 6-1.
11. Before a test drive, pump the brake pedal 3 or 4 times. Carefully drive the vehicle and test the function
of the brakes. Check the fluid level to ensure no loss of fluid.
PURGING THE HYDRAULIC SYSTEM
In some cases it may be necessary to completely drain the front, rear, or entire hydraulic brake system of
brake fluid. To completely purge the hydraulic system, perform the following procedure.
1. Perform steps 2 through 6.5 of
Bleeding the Hydraulic Brake System, Section 6, Page 6-22
.
2. Draw 1 qt. (0.9464 L) of the brake fluid into the vacuum-type brake bleeder tool.
3. With the vacuum running, tighten the two top bleeder valves.
Summary of Contents for IntelliTach XRT 1550
Page 2: ......
Page 22: ...1...
Page 54: ...4...
Page 60: ...5...
Page 90: ...6...
Page 114: ...8...
Page 118: ...9...
Page 196: ...11A...
Page 290: ...11C...
Page 468: ...13C...
Page 490: ...14...
Page 498: ...15...
Page 548: ...16...
Page 560: ...Club Car R NOTES...
Page 561: ...Club Car R NOTES...
Page 562: ...Club Car R NOTES...
Page 563: ......

