HYDRAULIC ATTACHMENT SYSTEM
Cylinders
2007 Carryall 295/295 SE & XRT 1550/1550 SE Gasoline, Diesel and IntelliTach M & S Manual
Page 16-27
16
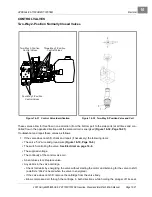
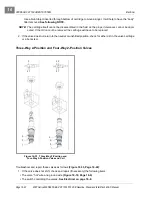
Vehicle Mounted Cylinder Installation
1. If installing a used cylinder, clean inside the attachment ends first. Otherwise, orient cylinder, align
attachment ends and secure with pivot pin(s) and retaining pin(s).
2. Match and connect hoses to fittings
(Figure 16-37, Page 16-26)
. Tighten fittings to 22 ft-lb (30 N·m).
3. Lubricate attachment ends.
See Lubricating The Attachment Arm And Interface, Section 10a,
Page 10a-6.
4. Refill and prime system.
See Priming the Pump, Section 16, Page 16-49.
AUXILIARY CYLINDER (OPTIONAL)
Auxiliary Cylinder Removal
ý
WARNING
• Wear safety glasses to prevent eye injury when any of the following conditions exist:
- Fluids are under pressure.
- Flying debris or loose material is present.
- Engine is running.
- Tools are being used.
CAUT ION
• When repairing hydraulic systems, clean the work area before disassembly and keep all parts
clean. Always use caps and plugs on hoses, tubelines and ports to keep dirt out. Dirt can
quickly damage the system.
NOTE:
Contain and dispose of any leaking oil in an environmentally safe manner.
The following pictures may not show your exact attachment but the procedure is the same.
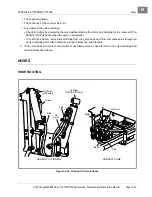
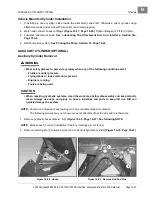
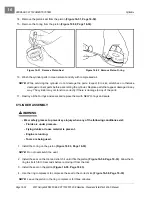
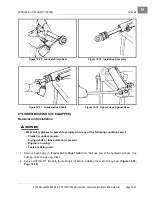
1. Remove hydraulic hoses (items 1 & 2)
(Figure 16-38, Page 16-27)
.
See following NOTE.
NOTE:
Mark hoses for correct installation if factory markings are not found.
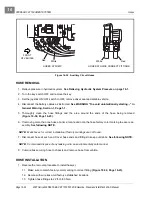
2. Remove retaining pin (1) and pivot pin (2) from rod end of hydraulic cylinder
(Figure 16-39, Page 16-27)
.
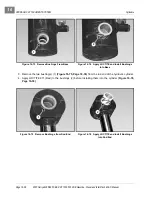
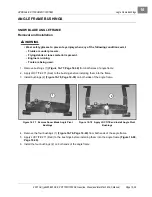
Figure 16-38 Hoses
Figure 16-39 Remove Rod End Pins
1
2
1
2
Summary of Contents for IntelliTach XRT 1550
Page 2: ......
Page 22: ...1...
Page 54: ...4...
Page 60: ...5...
Page 90: ...6...
Page 114: ...8...
Page 118: ...9...
Page 196: ...11A...
Page 290: ...11C...
Page 468: ...13C...
Page 490: ...14...
Page 498: ...15...
Page 548: ...16...
Page 560: ...Club Car R NOTES...
Page 561: ...Club Car R NOTES...
Page 562: ...Club Car R NOTES...
Page 563: ......

