2007 Carryall 295/295 SE & XRT 1550/1550 SE Gasoline, Diesel and IntelliTach M & S Manual
Page 9-1
9
SECTION 9 – REAR SUSPENSION
ý
DANGER
• See General Warning, Section 1, Page 1-1.
ý
WARNING
• See General Warning, Section 1, Page 1-1.
REAR COIL-OVER SHOCK ABSORBER
See General Warning, Section 1, Page 1-1.
The vehicles are equipped with rear coil-over shock absorbers. Standard models are equipped with rear
shock absorbers and coil-over springs designed for standard-duty service. Heavy-duty rear shock absorbers
and coil-over springs are available as an option for heavy-duty service. Unlike the front shock absorbers and
coil-over springs, the rear standard-duty and heavy-duty shock absorbers are designed differently.
See fol-
lowing NOTE.
NOTE:
The standard-duty and heavy-duty rear shock absorber bodies look identical, but they are different
in design internally.
The part number for standard-duty rear shock absorbers is different than the part number for heavy-duty rear
shock absorbers. Ensure that the correct rear shock absorbers and coil-over springs are used for the vehicle’s
load service option when the rear shock absorbers are removed and replaced.
Rear Shock Absorber Removal
1. Chock the front wheels, and loosen both rear wheel lug nuts. Lift the rear of the vehicle with a chain hoist
or floor jack.
See WARNING “Lift only one end...” in General Warning, Section 1, Page 1-2.
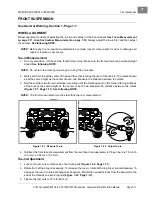
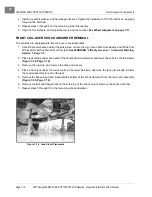
2. Place jack stands under the rear portion of the frame tubes, and lower the vehicle onto the stands
(Figure 9-1, Page 9-2)
.
3. Remove the lug nuts from the wheels, and remove the tires and wheels.
4. Position the floor jack under the center of the hitch frame, and raise the jack arm until the pad touches
the hitch frame.
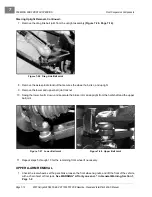
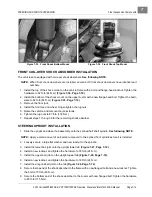
5. Remove the hydraulic line rubber grommet from the brake line bracket
(Figure 9-2, Page 9-2)
.
6. Remove the bottom bolt, flat washer, and flanged locknut.
7. Remove the top bolt, flat washer, and flanged locknut.
8. Remove the coil-over shock absorber.
See following NOTE.
NOTE:
Note the adjustment position of the coil-over spring. New coil-over shock absorbers should be
adjusted to the same position coil spring location as the previous shock absorbers.
Use the adjustment position of the existing shock absorbers as a reference.
9. Repeat steps 5 through 8 for the remaining shock absorber.
Summary of Contents for IntelliTach XRT 1550
Page 2: ......
Page 22: ...1...
Page 54: ...4...
Page 60: ...5...
Page 90: ...6...
Page 114: ...8...
Page 118: ...9...
Page 196: ...11A...
Page 290: ...11C...
Page 468: ...13C...
Page 490: ...14...
Page 498: ...15...
Page 548: ...16...
Page 560: ...Club Car R NOTES...
Page 561: ...Club Car R NOTES...
Page 562: ...Club Car R NOTES...
Page 563: ......

