


IP Office Installation
Page 112
15-601042 Issue 20b (16 July 2009)
IP Office
Procedure: Installing the IP Office Admin Applications
1. Using the
Add or Remove Programs
option in the Windows Control Panel, check that the PC does not already
have a version of the IP Office Admin suite installed.
•
If 'yes' and the suite is a pre-IP Office 3.2 version, remove the existing IP Office Admin suite via Add/Remove
Programs.
•
If the existing suite is IP Office 3.2 or higher, it is possible to upgrade without removing the previous
installation. However, if the system already has a USB Feature Key, the key should be removed prior to
upgrading and then reinserted and the PC restarted.
2. Insert the IP Office Administrator Applications CD. The installation process should auto start. If it does not auto
start, open the CD contents and double-click setup.exe.
3. Select the language you want to use for the installation process. This does not affect the language used by
Manager which will attempt to match your Windows regional setting. Click Next >.
4. Select whether only the current Windows logon account should be able to run the Admin Suite applications or
whether they will be available to all users of the PC. Click
Next >
.
•
The previous selection does not affect the IP Office Feature key server application, if installed. That application
runs as a service whenever the PC is running.
5. If required select the destination to which the applications should be installed. We recommend that you accept the
default destination. Click
Next >
.
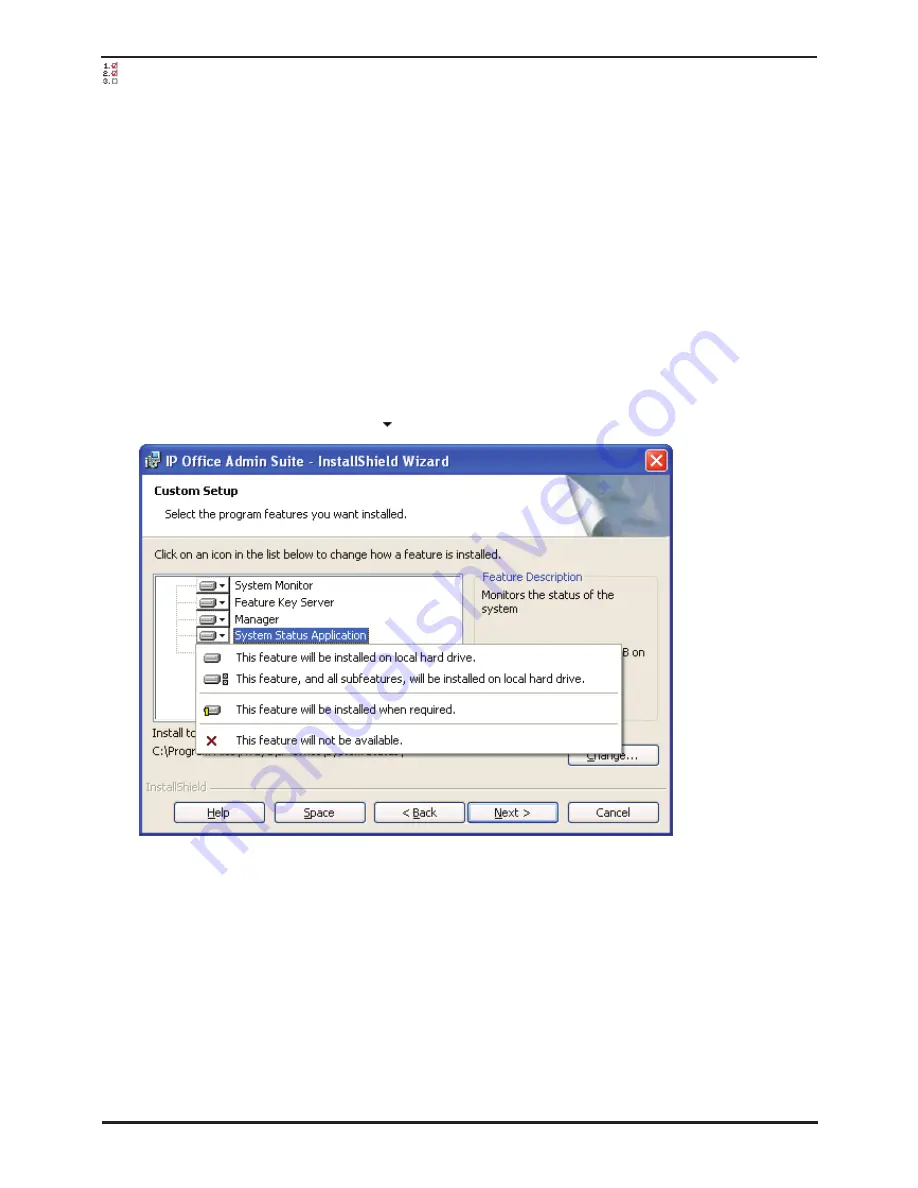
6. The next screen is used to select which applications in the suite should be installed. Clicking on each will display a
description of the application. Click on the next to each application to change the installation selection. When
you have selected the installations required, click
Next >
.
7. For IP Office system installations, ensure that at minimum System Monitor and Manager are selected.
•
Deselect
Feature Key Server
unless this PC will be hosting a Parallel port or USB port Feature Key dongle for
the customer's IP Office system.
8. Click
Install
.
9. Installation of Windows .Net2 components may be required. If dialogs for this appear, follow the prompts to
install .Net.
10.If requested, reboot the PC.
Summary of Contents for IP Office Phone Manager
Page 2: ...15 601042 Issue 20b 16 July 2009 IP Office Installation IP Office ...
Page 7: ......
Page 9: ......
Page 63: ......
Page 64: ...IP Office Installation Page 63 15 601042 Issue 20b 16 July 2009 IP Office Planning Chapter 3 ...
Page 69: ...IP Office Installation Page 68 15 601042 Issue 20b 16 July 2009 IP Office ...
Page 75: ......
Page 109: ......
Page 141: ......
Page 157: ...IP Office Installation Page 156 15 601042 Issue 20b 16 July 2009 IP Office ...
Page 165: ...IP Office Installation Page 164 15 601042 Issue 20b 16 July 2009 IP Office ...
Page 197: ...IP Office Installation Page 196 15 601042 Issue 20b 16 July 2009 IP Office ...
Page 391: ......
Page 409: ......
Page 410: ...IP Office Installation Page 409 15 601042 Issue 20b 16 July 2009 IP Office ...