IO-390-D Series Engine Maintenance Manual
© 2020 Avco Corporation. All Rights Reserved
73-10
March 2020
Page 253
IO-390-D Series Engine Maintenance Manual
73-10 - ENGINE FUEL AND CONTROL – DISTRIBUTION MAINTENANCE
1.
Fuel System Inspection
WARNING
DO NOT SMOKE OR HAVE AN OPEN FIRE/FLAME OR USE ANY
DEVICES THAT CAN MAKE SPARKS DURING THIS INSPECTION.
FLAMES OR SPARKS CAN CAUSE FUEL IGNITION WHICH CAN CAUSE
SERIOUS BURNS, INJURY, OR DEATH.
CAUTION
TO ENSURE CORRECT ENGINE OPERATION AND FLIGHT SAFETY,
THERE MUST NOT BE ANY FUEL LEAK AND ALL FUEL LINES MUST
BE SECURED WITH CLAMPS (PER THE “FUEL LINE INSPECTION”
PROCEDURE IN THIS CHAPTER). IDENTIFY AND CORRECT THE
CAUSE OF ANY FUEL LEAK.
NOTICE:
This inspection is to be done every 100 hours.
A.
Make a copy of the Fuel System Inspection Checklist at the end of this chapter and complete
this checklist for this inspection.
NOTICE:
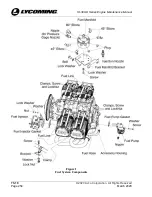
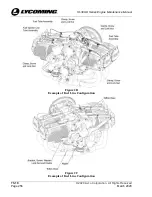
Figure 1 is a general conceptual reference figure of fuel system components. Some
of the IO-390-D engine models contain fuel system components made up of
different configurations and part numbers. Refer to the applicable latest edition of
the
IO-390-D Series Engines Illustrated Parts Catalog
for part number details.
B.
Examine the fuel pump for secure attachment and damage. Replace a damaged or
malfunctioning fuel pump. Tighten any loose fasteners per the “Fuel Pump Replacement”
procedure in this chapter.
C.
Examine the fuel manifold (Figure 1) for damage, leaks, and loose fittings or connections.
Tighten any loose fittings or connection. Replace a damaged fuel manifold per the “Fuel
Manifold Replacement” procedure in this chapter.
D.
Examine the fuel injector for damage, leaks, and loose fittings or connections. Tighten any
loose fittings or connection per the “Fuel Injector Installation” procedure in this chapter.
Replace a damaged fuel injector per the “Fuel Injector Replacement” section in this chapter.
E.
Examine each injection nozzle (Figure 1) for damage or wear; replace a damaged or worn
injection nozzle per the “Injection Nozzle Replacement” procedure in this chapter.
F.
Examine fuel line fittings for damage or leaks. Make sure all fuel line fittings and
connections are secure and correctly installed/torqued per the “Fuel Line Installation”
procedure in this chapter. If tightening does not correct a fuel leak, replace the fitting.
G.
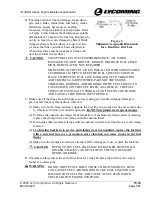
Complete the “Fuel Line Inspection” procedure in this chapter.
H.
Make sure the mixture control and throttle linkage have full travel, freedom of movement.
I.
Lubricate the linkage per the aircraft manufacturer's instruction.
J.
Operate the engine and look for leaks. Identify and correct the cause of any leak or
malfunction. If leaks or malfunctions were found and corrected, operate the engine again to
make sure it is operating correctly and there is no leak anywhere.
K.
Do not return the engine to service unless the engine is operating correctly and does not have
any leaks.

