IO-390-D Series Engine Maintenance Manual
72-20
© 2020 Avco Corporation. All Rights Reserved
Page 142
March 2020
IO-390-D Series Engine Maintenance Manual
Crankshaft Inspection Checklist for IO-390-D Series Engines (Cont.)
CAUTION
LYCOMING ENGINES NO LONGER APPROVES STRAIGHTENING OR
GRINDING OF BENT CRANKSHAFT FLANGES TO RESTORE
MAXIMUM RUN-OUT. IF THE CRANKSHAFT FLANGE IS BENT,
REPLACE THE CRANKSHAFT. DO NOT TRY TO STRAIGHTEN OR
GRIND THE CRANKSHAFT FLANGE. (REFER TO THE LATEST
REVISION OF SERVICE BULLETIN NO. SB-201)
Item
Comments
Findings/
Corrective Action
Done
Measure the crankshaft flange
thickness and compare it with the
dimensions below to calculate the
minimum permissible thickness.
If the crankshaft flange is
bent, replace the crankshaft.
Do NOT straighten or grind
a bent crankshaft. Refer to
the latest revision of Service
Bulletin No. 201 for any
additional details.
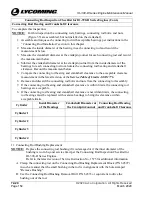
Crankshaft Flange Thickness
Inches
Millimeters
Inches
Millimeters
0.440 ± 0.010
11.176 ± 0.254
0.420
10.668
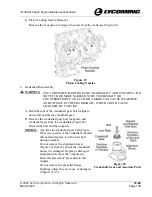
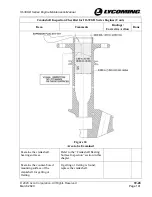
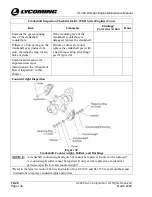
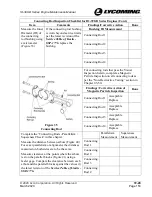
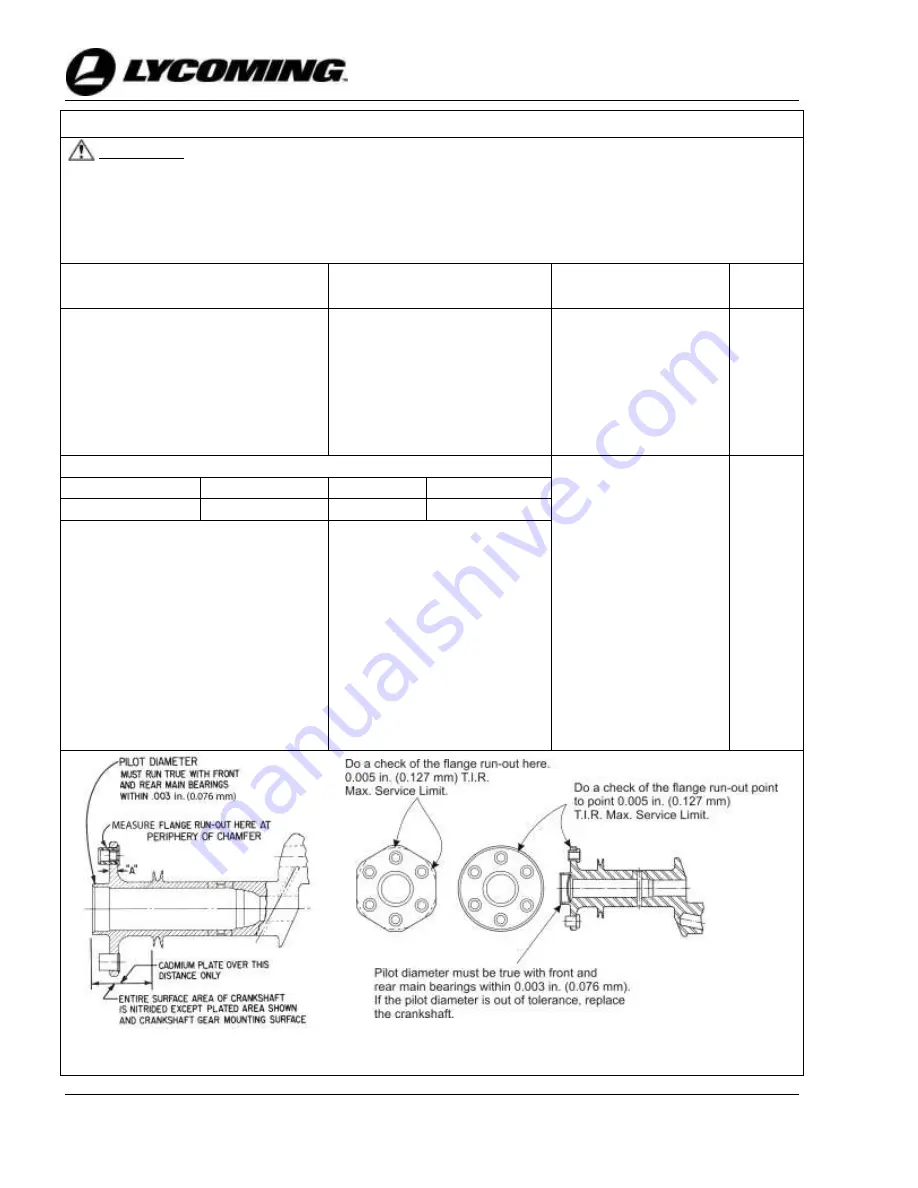
Measure the run-out of the
crankshaft flange with a dial
indicator at the location shown in
Figures 25 and 26. The maximum
Total Indicator Reading (TIR)
must not be more than 0.005 in.
(0.127 mm). As shown in Figure
25, make sure that the pilot
diameter runs true with the front
and rear main bearings within
0.003 in. (0.076 mm).
If run-out exceeds 0.002 in.
(0.051 mm) total indicator
reading, replace the
crankshaft.
Do not try to repair or grind
a warped or bent crankshaft
flange.
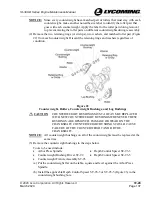
Figure 25
Crankshaft Flange
Figure 26
Crankshaft Flange Run-out and Pilot Diameter
Measure the front face of the
crankshaft flange between the
flange bushings and the edge
of the chamfer.


