IO-390-D Series Engine Maintenance Manual
72-30
© 2020 Avco Corporation. All Rights Reserved
Page 218
March 2020
IO-390-D Series Engine Maintenance Manual
F.
Compress each of the two top compression piston rings several times with your fingers to
make sure the rings are situated freely and loosely in the groove.
G.
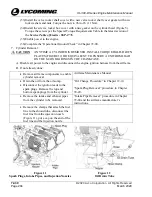
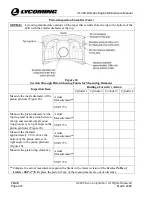
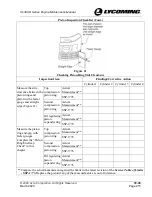
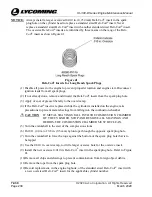
To ensure correct installation, measure the side clearance of the rings in the grooves with a
feeler gage and a straight edge (Figure 21). If the actual measurement is greater than the
maximum allowable side clearance, per the latest revision of the
Service Table of Limits -
SSP-1776
, replace the piston.
NOTICE:
A field run-in must be completed any time one or more cylinders are removed.
Refer to the latest revision of Service Instruction No. SI-1427 and the “Field Run-
In” chapter of the
IO-390-D Series Engine Installation and Operation Manual.
12.
Piston Installation
A.
Clean the pistons as per instructions in the “Piston Cleaning” procedure in Chapter 05-30.
B.
Apply lubricant specified in the latest revision of Service Instruction No. SI-1059 to the
piston pin and the ID of the piston pin hole.
CAUTION
DO NOT ATTEMPT TO TURN THE CRANKSHAFT UNLESS THE
CONNECTING RODS ARE SUPPORTED.
C.
Turn the crankshaft so that when the Number 1 piston is inserted, it will be at TDC of its
firing stroke, with both tappets on the base circle of the camshaft lobes.
D.
Remove the Torque Hold-Down Plates (ST-222) from the crankcase.
E.
Install the piston on the connecting rod where the number stamped on the bottom of the
piston head is upright and readable (not upside-down.)
F.
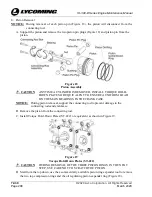
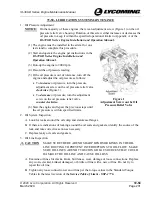
Insert the piston pin into the piston and through the connecting rod (Figure 18) to ensure the
entire length of the piston pin is lubricated move the piston pin back and forth until it is
centered.
NOTICE:
If the original piston pin is tighter than a palm push fit, look for burrs or slight carbon
in the pin bore of the piston. Remove any burrs with a stone. Remove carbon
deposits as per instructions in Chapter 5-30. If a new piston or piston pin is installed,
use a pin that will give a palm push fit at 60º to 70ºF (15º to 20ºC).
G.
Insert a piston pin plug at each end of the piston pin.
H.
Complete a check of the clearance between the piston and each piston pin plug. Refer to the
latest revision of the
Service Table of Limits - SSP-1776
for acceptable clearance limits.
I.
Install the piston rings on the piston per the “Piston Ring Replacement” procedure.
J.
Apply a generous coating of a mixture of 15% pre-lubricant (STP or equivalent) and 85%
SAE 50 mineral-base aviation-grade lubricating oil (unless otherwise directed per the latest
revision of Service Instruction No. SI-1059) to the piston rings, working the mixture into the
ring grooves.
K.
Apply lubricant specified in the latest revision of Service Instruction No. SI-1059 to the
piston pin plug faces.

