IO-390-D Series Engine Maintenance Manual
© 2020 Avco Corporation. All Rights Reserved
72-50
March 2020
Page 237
IO-390-D Series Engine Maintenance Manual
18.
Oil Sump Installation
A.
Clean the mating flange and interior of the
oil sump with mineral spirits.
B.
Remove all gasket material on the flange.
Make sure the oil sump has no cracks or
damage, is clean and has no dirt, debris, or
other foreign object matter that could
contaminate the oil supply for the engine.
C.
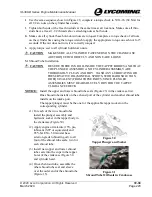
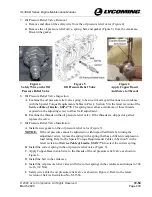
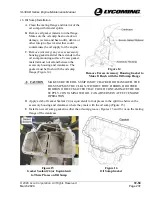
Remove (cut away) any excess accessory
housing gasket material that extends to the
oil sump mounting surface. Excess gasket
material must not extend between the
accessory housing and crankcase. The
gasket must be flush with the oil sump
flange (Figure 14).
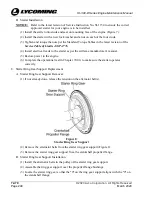
Figure 14
Remove Excess Accessory Housing Gasket to
Make It Flush with the Oil Sump Flange
CAUTION
MAKE SURE THE OIL SUMP IS NOT CRACKED OR DAMAGED. THE
OIL SUMP MUST BE CLEAN, WITHOUT DIRT, DEBRIS, OR OTHER
FOREIGN OBJECT MATTER THAT COULD CONTAMINATE THE OIL
SUPPLY. CONTAMINATED OIL CAN ADVERSELY AFFECT ENGINE
OPERATION.
D.
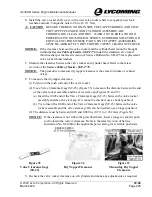
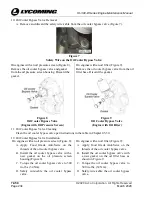
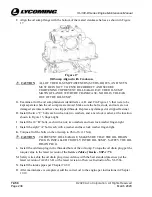
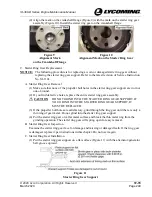
Apply a dab of Gasket Sealant #4 (or equivalent) to four places in the split line between the
accessory housing and crankcase where they mate with the oil sump (Figure 15).
E.
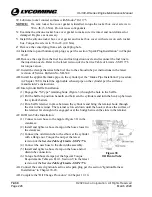
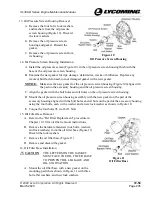
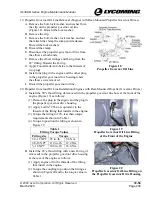
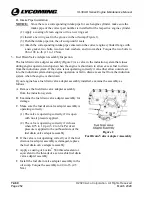
Install a new oil sump gasket in either the oil sump groove (Figures 13 and 16) or on the mating
flange of the crankcase.
Figure 15
Gasket Sealant# 4 (or Equivalent)
to Three Places on Oil Sump
Figure 16
Oil Sump Gasket

