IO-390-D Series Engine Maintenance Manual
© 2020 Avco Corporation. All Rights Reserved
72-20
March 2020
Page 155
IO-390-D Series Engine Maintenance Manual
C.
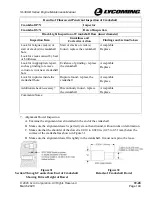
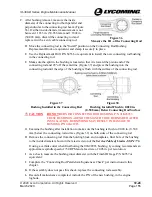
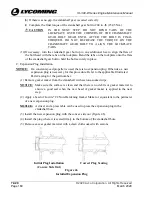
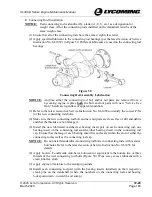
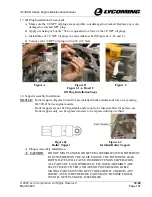
After bushing removal, measure the inside
diameter of the connecting rod both parallel and
perpendicular to the connecting rod beam (Figure
36). If either inside diameter measurement is not
between 1.1833 in. (30.056 mm) and 1.1848 in.
(30.094 mm), discard the connecting rod and
replace it with a serviceable connecting rod.
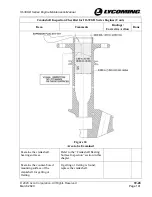
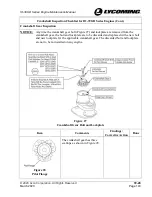
Figure 36
Measure the I.D. of the Connecting Rod
D.
Move the connecting rod to the "Install" position on the Connecting Rod Bushing
Replacement Block or equivalent and clamp it securely in place.
E.
Use the Replacement Drift P/N 64536 or equivalent to install the new connecting rod bushing
in the connecting rod.
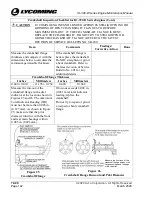
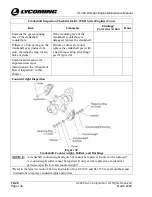
F.
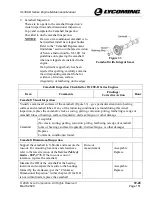
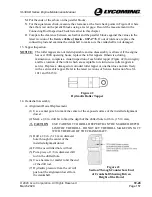
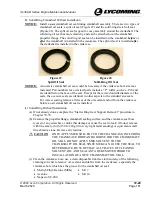
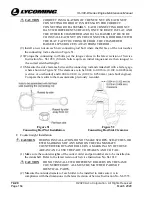
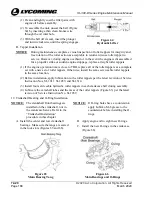
Make sure the split in the bushing is located so that it is toward the piston end of the
connecting rod and 45° off the centerline (Figure 37) and press the bushing into the
connecting rod until the edge of the bushing is flush with the surface of the connecting rod.
Figure 37
Bushing Installed in the Connecting Rod
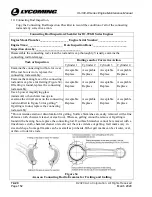
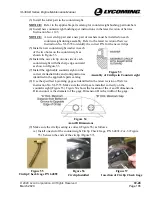
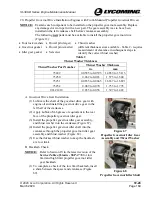
Figure 38
Bushing Installed Flush to 0.020 in.
(0.508 mm) Below Connecting Rod Surface
CAUTION
DO NOT
BURNISH CONNECTING ROD BUSHING P/N 01K28983.
THESE BUSHINGS ARE NOT DESIGNED TO BE BURNISHED AFTER
INSTALLATION. BURNISHING MAY RESULT IN DAMAGE TO
BUSHING P/N 01K28983.
G.
Examine the bushing after installation to make sure the bushing is flush to 0.020 in. (0.508
mm) below the connecting rod surface (Figure 38) on both sides of the connecting rod.
H.
Remove the connecting rod from the holding block and complete a final bore of the bushing
to the inside diameter shown in the latest revision of the
Service Table of Limits - SSP-1776
.
If using a carbide cutter when final boring the 01K28983 bushing, Lycoming recommends an
approximate spindle speed of 730 RPM and a feed rate of .003 in. per revolution.
I.
As a check, measure the bushing inner diameter with the Finish ID Gage P/N 64767 or
equivalent.
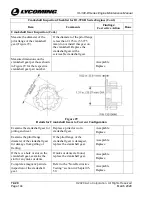
J.
Complete the “Connecting Rod Parallelism/Squareness Check” per instructions in this
chapter.
K.
If the assembly does not pass this check, replace the connecting rod assembly.
L.
Record all maintenance completed, include the P/N of the new bushing, in the engine
logbook.

