IO-390-D Series Engine Maintenance Manual
© 2020 Avco Corporation. All Rights Reserved
72-50
March 2020
Page 233
IO-390-D Series Engine Maintenance Manual
7.
Oil Pressure Relief Valve Removal
A.
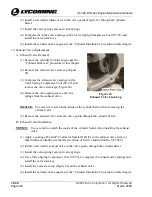
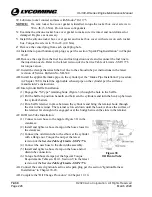
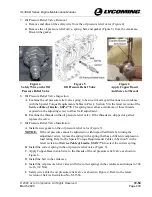
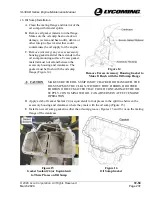
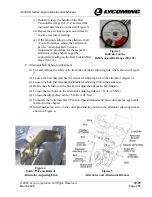
Remove and discard the safety wire from the oil pressure relief valve (Figure 4).
B.
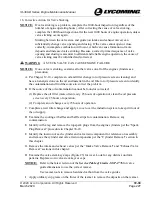
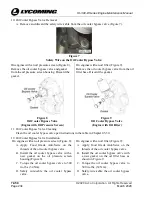
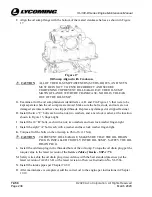
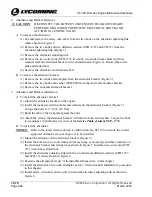
Remove the oil pressure relief valve, spring, ball, and gasket (Figure 5) from the crankcase.
Discard the gasket.
Figure 4
Safety Wire on the Oil
Pressure Relief Valve
Figure 5
Oil Pressure Relief Valve
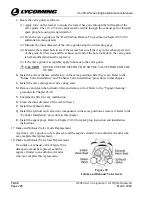
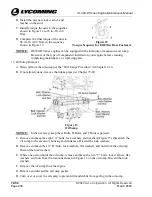
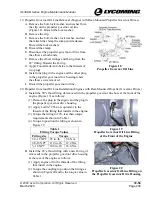
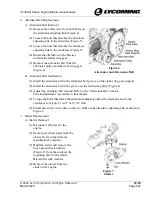
Figure 6
Apply Copper Based
Anti-Seize to Threads
8.
Oil Pressure Relief Valve Inspection
A.
Examine the oil pressure relief valve spring to be sure it meets specifications in accordance
with the Special Torque Requirements Tables in Part 1, Section V in the latest revision of the
Service Table of Limits - SSP-1776
. The spring must allow a minimum of three threads
exposed on the adjusting screw to allow field adjustment.
B.
Examine the threads on the oil pressure relief valve. If the threads are stripped or galled,
replace the valve.
9.
Oil Pressure Relief Valve Installation
A.
Install a new gasket on the oil pressure relief valve (Figure 5).
NOTICE:
If the oil pressure cannot be adjusted to within specified limits by turning the
adjustment screw, replace the spring with a spring that has a different compression
load rating. Refer to the Special Torque Requirements Tables in Section V in the
latest revision of
Service Table of Limits - SSP-1776
to select the correct spring.
B.
Install the correct spring in the oil pressure relief valve (Figure 5).
C.
Apply Copper-Based Anti-Seize to the threads of the oil pressure relief valve as shown in
Figure 6.
D.
Install the ball in the crankcase.
E.
Install the oil pressure relief valve (with the correct spring) in the crankcase and torque to 300
in.-lb. (34 Nm).
F.
Safety wire/cable the oil pressure relief valve as shown in Figure 4. Refer to the latest
revision of Service Instruction No. SI-1566.

