IO-390-D Series Engine Maintenance Manual
© 2020 Avco Corporation. All Rights Reserved
73-10
March 2020
Page 265
IO-390-D Series Engine Maintenance Manual
B.
Fuel Injector Installation
(1)
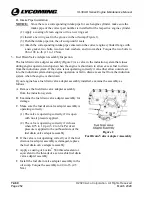
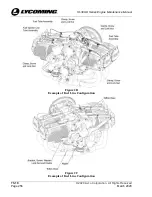
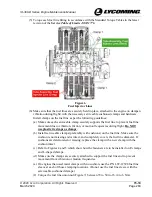
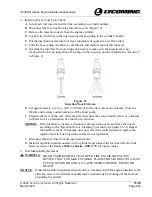
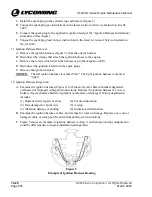
Align the fuel injector on the engine with a new gasket (Figure 8).
Figure 8
Fuel Injector
(2)
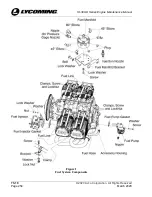
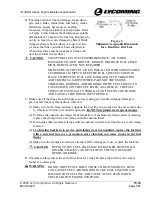
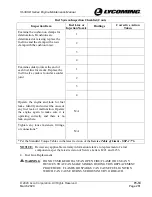
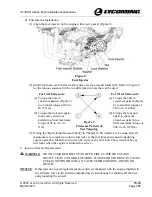
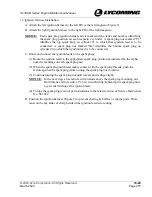
Install four nuts, each with a washer and a new lock washer hand tight. Refer to Figure 9
for the torque sequence for the two different size nuts that can be used:
For 1/4-20 size nuts:
Figure 9
Crisscross Pattern of
Nut Torquing
For 5/16-18 size nuts:
(a)
Torque the nuts in
crisscross pattern (Figure 9)
to an initial torque of 48 in.-
lb. (5 Nm).
(a)
Torque the nuts in
crisscross pattern (Figure
9) to an initial torque of
90 in.-lb. (10 Nm).
(b)
Torque the four nuts again
in the same crisscross
pattern to a final maximum
torque of 96 in.-lb. (11
Nm).
(b)
Torque the four nuts
again in the same
crisscross pattern to a
final maximum torque of
204 in.-lb. (23 Nm).
(3)
During the “Operational Ground Check” in Chapter 72-00 (which is to be done after all
maintenance is complete), look for fuel leaks at the fuel lines and connections during
engine operation. Identify and correct the cause of any fuel leak. There must not be any
fuel leaks when the engine is returned to service.
6.
Injection Nozzle Replacement
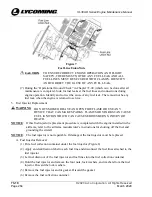
WARNING
DO NOT SMOKE OR HAVE AN OPEN FIRE FLAME OR USE ANY
DEVICE THAT CAN MAKE SPARKS. FLAMES OR SPARKS CAN CAUSE
FUEL IGNITION WHICH CAN CAUSE SERIOUS BURNS, INJURY OR
DEATH.
NOTICE
: If this injection nozzle replacement procedure is completed with the engine installed in
the airframe, refer to the airframe manufacturer’s instructions for shutting off the fuel
and grounding the aircraft.


