Hotline: +49 5251 688865-99
Hotline: +49 5251 688865-99
Hotline: +49 5251 688865-99
Hotline: +49 5251 688865-99
Hotline: +49 5251 688865-99
. Operating Manual grandMA Version 5.4
73
73
73
73
73
3.6 SOLO function
3.6 SOLO function
3.6 SOLO function
3.6 SOLO function
3.6 SOLO function
The SOLO function is, so to say, the counterpart of the Highlight function. SOLO will bring all dimmers not
selected to a vlaue of 0. I.e. sequences, effects etc. will still run, but are no longer visible. This does not apply to
Fixtures that had activated the NO MASTER function in SETUP / FIXTURE PATCH, and whose dimmer values will
not be modified. The SOLO function can be activated as Quikey (see 9.2) or by using the HIGHLIGHT hardkey.
In SETUP / DEFAULTS, set the Button to HIGHLIGHT IS SOLO;
The Hardkey will then have the SOLO function (LED is on) or no function at all (LED is off). The HIGHLIGHT Quikey
will then also behave like the HIGHLIGHT hardkey.
If the Button is on HIGHLIGHT NORMAL, the Highlight Hardkey will execute its normal function, and the SOLO
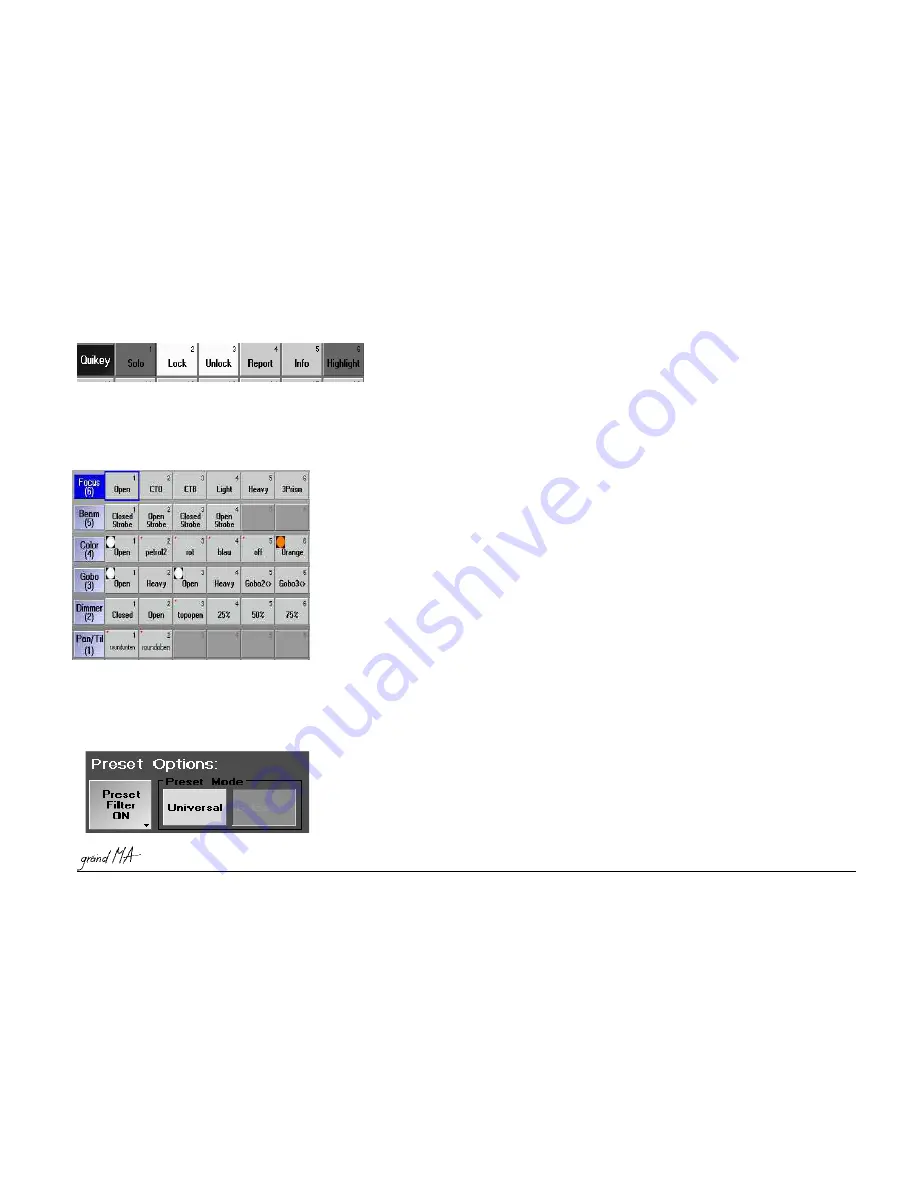
function can only be activated using the Quikey
Pictures of the gobos are displayed only if they are
stored in library.
3 . 7
3 . 7
3 . 7
3 . 7
3 . 7 Creating and calling up Presets
Creating and calling up Presets
Creating and calling up Presets
Creating and calling up Presets
Creating and calling up Presets
There are certain values for the functions of fixtures, which will be needed again and again, for example the
values for individual colours of the color wheel. These values can be programmed as presets in the respective
PRESET window and then be reselected.
If you have presets for the fixtures be created automatically (CREATE PRESETS), these pre-recorded presets will
be available in the respective windows.
2.1
2.1
2.1
2.1
2.11 Creating Presets automatically
1 Creating Presets automatically
1 Creating Presets automatically
1 Creating Presets automatically
1 Creating Presets automatically
Create a window for all presets you want to use - select them from preset-pools.
In the GROUP window, select those fixtures, for which you want to create a Preset, by a touch or mouse
click (fixtures have to be displayed in yellow in the FIXTURE window).
Select the Preset group for which you want to create a Preset on the display, using the Touchscreen or by a
left mouse click on the title bar. For example: In the Preset window PAN/TILT.
Values and positions can be changed by:
- Encoders (all functions and the assignment will be displayed on the right display above the encoders),
- Trackball (only PAN /TILT), if activated,
- Level Wheel (only for dimmer values),
- Middle mouse key (left click on a value in the FIXTURE or CHANNEL window; drag the mouse while holding the
middle mouse key will change the value).
- Switch on the Trackball by pressing the TRACKBALL ON button (the integrated LED must be on). Now you can
control the selected fixtures via the trackball (PAN/TILT) . Changed (active) values will be displayed in the OUT-
PUT window by a red background colour.
There are two types of Presets:
There are two types of Presets:
There are two types of Presets:
There are two types of Presets:
There are two types of Presets:
- Selective: Can only be used for those Scanners, for which it was saved. Will be indicated by a red triangle in
the left upper corner of the saved Preset button.
- Universal: Can be used for all Scanners of the
same
same
same
same
same
type, even if not all will be saved.
Additionally you can store presets including several functions on one key. These presets can be created in any
preset group. Preset Filter ON: only the functions (Attributes) of this Preset group will be stored into this preset;
with Preset Filter OFF, all currently active functions will be stored into this Preset.
- While
holding down
holding down
holding down
holding down
holding down
the STORE key, make a preselection by pressing the appropriate button (Universal,
Selective, Preset Filter ON or OFF).
- Release STORE key (STORE LED comes on). Select the required location in the PAN/TILT window on the display
by a simple touch or with left click of the mouse. These Pan & Tilt values are now stored in
this
this
this
this
this
location (STORE
LED is off).


