Hotline: +49 5251 688865-99
Hotline: +49 5251 688865-99
Hotline: +49 5251 688865-99
Hotline: +49 5251 688865-99
Hotline: +49 5251 688865-99
. Operating Manual grandMA Version 5.4
145
145
145
145
145
8 . 4
8 . 4
8 . 4
8 . 4
8 . 4 Remote Control by MIDI
Remote Control by MIDI
Remote Control by MIDI
Remote Control by MIDI
Remote Control by MIDI
On the rear of the grandMA, you will find the MIDI IN, MIDI THRU and MIDI OUT sockets. Assigned commands can
be called up using e.g. an external MIDI keyboard or sequencer. Devices like these can be plugged into the Midi IN
socket. Only note commands are currently supported. The incoming signals will be automatically transferred to
MÍDI THRU. Also Midi Show Control (MSC) can be processed or sent.
8 . 4 . 1
8 . 4 . 1
8 . 4 . 1
8 . 4 . 1
8 . 4 . 1 Midi Show Control
Midi Show Control
Midi Show Control
Midi Show Control
Midi Show Control
The console can receive MSC commands which will be used to trigger the Master sequence only.
Push the key “Midi Show Control“ within the Tools menu; the menu Configuraton Midi Show Control will be
opened.
To receive MSC, set the device or the groups into the window „Midi IN“. You can switch between Midi Enabled
and Midi via Ethernet via the key below the window „Midi IN“. After pushing the key „Store“ all settings will be
stored and the function will be started
To send MSC, set the device or the group into the window „Midi OUT“. By the key „Send“ you can change
between sending Device, Group or ALL.. You can switch between Midi Enabled and Midi via Ethernet via the key
below the window „Midi OUT“. After pushing the key „Store“ all settings will be stored and the function will be
started.
8 . 4 . 2
8 . 4 . 2
8 . 4 . 2
8 . 4 . 2
8 . 4 . 2 Assigning Playback Buttons
Assigning Playback Buttons
Assigning Playback Buttons
Assigning Playback Buttons
Assigning Playback Buttons
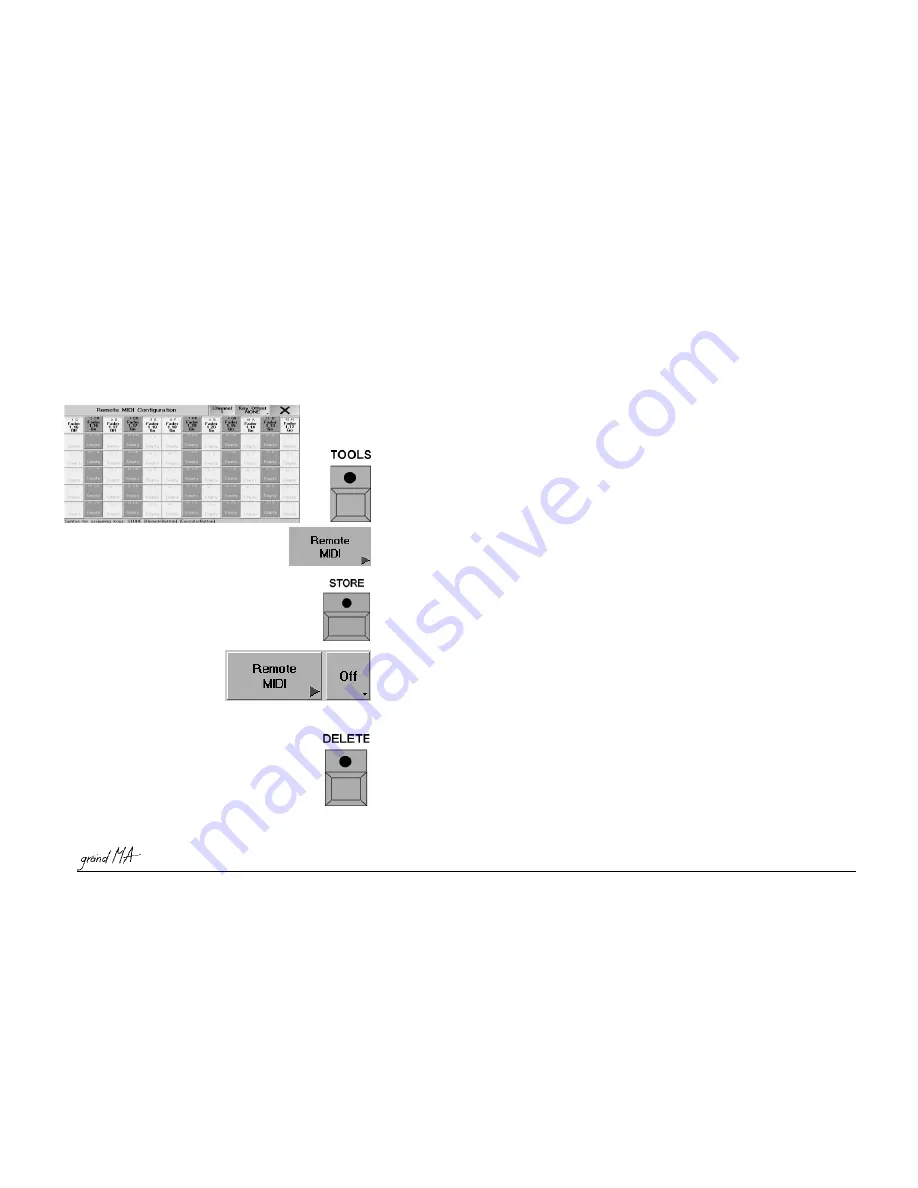
Press the TOOLS key once.
Call up the MIDI REMOTE CONFIGURATION menu using the REMOTE key.
Press the STORE key once (LED is on).
Select a key in the MIDI REMOTE CONFIGURATION menu.
Press the Playback button that you want to assign. The selected button will now be assigned.
The assigned Playback buttons will be displayed on the individual keys of the MIDI REMOTE CONFIGURATION
menu. Only EXECUTOR buttons can be assigned to the respective MIDI note.
8 . 4 . 3
8 . 4 . 3
8 . 4 . 3
8 . 4 . 3
8 . 4 . 3 Selecting the MIDI Channel
Selecting the MIDI Channel
Selecting the MIDI Channel
Selecting the MIDI Channel
Selecting the MIDI Channel
Pressing the Channel key will open a menu in which you can select one of the 16 Midi channels by a mouse
click.
8 . 4 . 4
8 . 4 . 4
8 . 4 . 4
8 . 4 . 4
8 . 4 . 4 Assigning the Pitch
Assigning the Pitch
Assigning the Pitch
Assigning the Pitch
Assigning the Pitch
By pressing the KEY OFFSET key, you can transpose the incoming notes by one octave downwards. This can be set
for up to three octaves.
8 . 4 . 5
8 . 4 . 5
8 . 4 . 5
8 . 4 . 5
8 . 4 . 5 Deleting Assignments
Deleting Assignments
Deleting Assignments
Deleting Assignments
Deleting Assignments
To delete an assigned Playback button, press the DELETE key once (LED is on). Press the Key once.
8 . 4 . 6
8 . 4 . 6
8 . 4 . 6
8 . 4 . 6
8 . 4 . 6 Using the MIDI Input
Using the MIDI Input
Using the MIDI Input
Using the MIDI Input
Using the MIDI Input
In the TOOLS menu, you can switch the MIDI input function on or off using the ON / OFF Key.
If the MIDI input is active, you can call up the assigned keys by pressing the respective note keys on the MIDI
keyboard. For optical convenience, the key in the MIDI REMOTE CONFIGURATION menu will have a red


