background image

MA Lighting Technology GmbH . Dachdeckerstr. 16 . D-97297 Waldbüttelbrunn . www.malighting.de  eMail: [email protected]

44

44

44

44

44

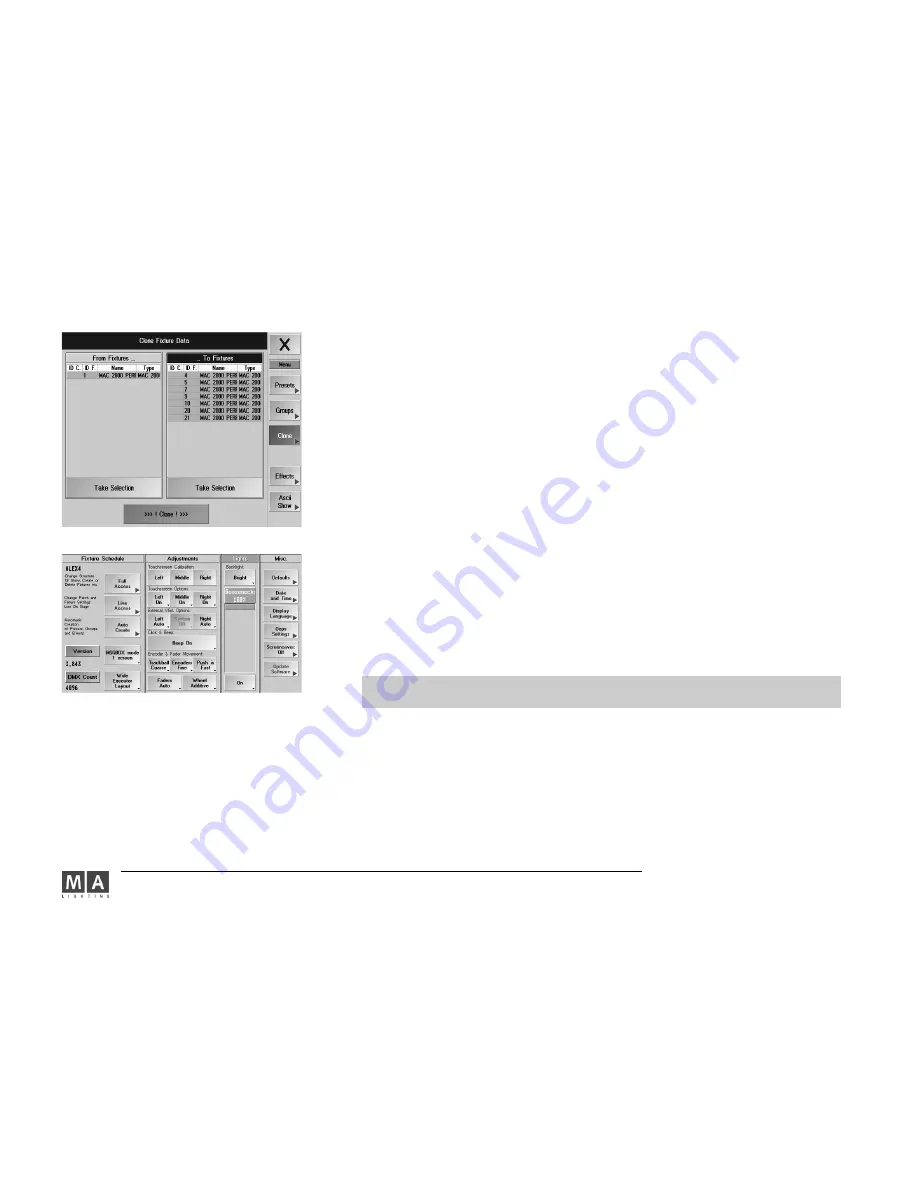
SETUP- Menu g Light + UltraLight

With the respective keys, the touch screens can be switched on or off. It is possible that a fault may cause the
mouse to freeze in one position and can no longer be operated. In this case, the touchscreens can be switched
off. For this, use function key F9 on the keyboard.

F9 will switch off all three touchscreens (emergency switch). To switch the touchscreens back on use the

mouse.

To toggle the mouse function on both external monitors on and off. In AUTO mode, the software will recognize if
a monitor is connected or not and will switch the mouse function for the external monitors on or off, accordingly.
OFF 

will not allow

will not allow

will not allow

will not allow

will not allow

 any mouse function, while ON will keep the mouse function 

activated

activated

activated

activated

activated

 at all times.

With this key, the grandMA’s internal speaker be switched on or off (not available on older grandMAs).
To set the sensitivity of trackball and the encoders to coarse, fine or extra fine (16bit resolution).
With the PUSH key, you can set the Encoder’s sensitivity when holding it down and turning.

Switching between the Motorfader functions (Executor Fader, Channel Fader)- not available on the MICRO

AUTO:

- Executor Faders: When switching between the Pages, the Motorfaders will automatically pick up the values

  stored last.

- Channel Faders: Faders adjust to the called-up values of the allocated channels.

MANUAL:

- Executor Faders: When switching between the Pages, the stored values will be called up, but the Faders will


   nnnnnooooot 

follow. To change a stored value, you have to use the Fader to manually set it to a higher or lower

   value.

- Channel Faders: Faders do not adjust automatically to the called-up values of the assigned channels. To

   change a stored value, you have to use the Fader to manually set it to a higher or lower value.

- DISABLED:

Fader

Fader

Fader

Fader

Fadersssss      without f

without f

without f

without f

without fun

un

un

un

un ccccction

tion

tion

tion

tion

- Executor Faders: When switching between the Pages, the stored values will be called up, but the Faders will

   not follow.

- Channel Faders: Faders do not adjust automatically to the called-up values of the assigned channels.

After switching from MANUAL to AUTO, you have to change the PageNo once so that the motor fader

work again.

The wheel’s functions for the dimmers:

- Additiv: All dimmer values will be changed simultaneously. If they reach “0“  or “FF“, they will be aligned.

- Incremental: All dimmer values will be changed simultaneously. If they reach “0“  or „FF“, the respective

   intervals will be maintained.

- Prop.+: All dimmer values will be changed in percentages and will reach “0“ simultaneously.

- Prop.–: All dimmer values will be changed in percentages and will reach “FF“ simultaneously.

Please note, that with PROP+ a change of the value “0“ is not considered a change.

Please note, that with PROP– a change of the value “FF“ is not considered a change.

- Switch between “Light“ and “Dark“ display background illumination.

- The desk lamp can be switched either on or off with the ON/OFF key. The brightness of the desk lamp can be

   changed using a left mouse click on the blue bar or using the touchscreen. On the ULTRALIGHT and MICRO, you

   can only switch the brightness of the console lamp from FULL to HALF and vice versa.

Summary of Contents for grandMA

Page 1: ...nual Full Size Light Ultra Light Micro Replay Unit onPC Offline Version 5 4 October 2004 english...

Page 2: ...117 17 17 17 17 6 1 Effect Pool 117 6 2 Editing Effect Groups 118 6 3 Executing an Effect Group 121 6 4 Customizing an Effect Group 122 6 5 Effect Groups in Cues 123 6 6 View ALL RUNNING EFFECTS menu...

Page 3: ...of programming and even an automatic effect synthesizer 1 1 4 1 1 4 1 1 4 1 1 4 1 1 4 Flexible Setup configuration Flexible Setup configuration Flexible Setup configuration Flexible Setup configuratio...

Page 4: ...Hardware Hardware Hardware Hardware Hard Disk Drive resp CF and 3 5 Floppy Drive 12 MB flash memory for self contained operating system not on the ultra light and Micro Protection against radio interf...

Page 5: ...off after approximately another 3 minutes or another 12 minutes when CONTINUE is pressed If this occurs this occurs this occurs this occurs this occurs the console will automatically save all automati...

Page 6: ...s connected in aggregate does not exceed the maximum rated output of the extension cord The rated output of the units plugged into the socket should in aggregate not exceed 10 amperes 14 If the power...

Page 7: ...cking executors SELECTkey 13 P P P P Page flipping age flipping age flipping age flipping age flipping for Channel fader Executor fa der and Executor buttons 14 Playback buttons Playback buttons Playb...

Page 8: ...rs Encoders Encoders Encoders Encoders To set the attribute values such as Gobo Pan Tilt times etc 5 Manual Time Setting Manual Time Setting Manual Time Setting Manual Time Setting Manual Time Setting...

Page 9: ...ues Groups Executors etc in combination with numeric keypad 14 Manual Timing Manual Timing Manual Timing Manual Timing Manual Timing Setting for Executor Buttons 16 Blind Freeze Clear keys Blind Freez...

Page 10: ...oft Keyboard on the TFT display 10 MA key MA key MA key MA key MA key without function 11 COMMAND key COMMAND key COMMAND key COMMAND key COMMAND key to bring up the Command menu 12 Manual Time Settin...

Page 11: ...Micro COMMAND WINDOW Micro COMMAND WINDOW Micro This menu contains most of the Functions of a big grandMA desk Pressing the Background button the Command Window can temporary be removed from the scree...

Page 12: ...e TFT Display Encoder below the TFT Display The currently chosen function is displayed above the appropriate Encoder The currently set value for the last activated lamp is displayed below the respecti...

Page 13: ...ptions can be opened by clicking on an individual Fixture or Channel OOPS Function OOPS Function OOPS Function OOPS Function OOPS Function By pressing the OOPS key you can undo step back the last 20 o...

Page 14: ...d SOFT TOUCH Keyboard On the grandMA light and ultra light and Micro you can call it up by pressing the KEYBOARD key In the upper left cell the entered text will be displayed Using the touch screen yo...

Page 15: ...ets Spreadsheets Spreadsheets Spreadsheets Spreadsheets comparable to those used in Excel or Access Click and drag with the left mouse key and you can select a range of cells not on all screens possib...

Page 16: ...name via keyboard STORE any cell in the preset COLOUR window Stores the values as a color preset enter name via keyboard STORE one of the VIEW keys on the right hand side of the displays Stores the la...

Page 17: ...TE LIST TE LIST TE LIST When storing a cue to an Executor already containing a cue the grandMA offers the option to create a second cue and start a cue list which may be replayed as a Chaser or seque...

Page 18: ...l Access menu can you modify the complete Show If using the console in the Multi User mode you can access this menu only from a console 2 2 2 2 2 2 2 2 2 2 All Access When adapting a Show a copy will...

Page 19: ...pt the chosen lamp type and close the window To load a lamp type from floppy press the Floppy button Now the Scanners present on the floppy will be displayed and can be selected and loaded For conveni...

Page 20: ...t by the console Consoles in Slave operation or fixtures whose signals are output over the MA Net cannot execute this function Now the selected and patched fixtures can bei positioned in a 3D stage di...

Page 21: ...r on the x y and z axis or rotation around the x y and z axis check out results in the STAGE window The values set will be displayed in the back part of the table Press and simultaneously turn the Enc...

Page 22: ...he menu Press Save to save the settings Press Don t Save to discard the settings Press Cancel to stay in this menu The ALIGN function will be of great help and save you quite some time 2 2 4 Adjusting...

Page 23: ...in the Type column dark blue You can also select several or all fixtures Shortly press the Encoder right to the Display The Choose Fixturetype window will open Select a fixture that was already prese...

Page 24: ...r more cells under Master and press the Encoder Now select No and press the Encoder one more time If GRANDMASTER FADER is switched off this will be indicated by a No in the respective cell Func Pan Fu...

Page 25: ...t by pressing the Encoder once If a color has been assigned this will be displayed in the respective cell Close menu with X RGB Lamps and LED Beamer without dimmer RGB Lamps and LED Beamer without dim...

Page 26: ...is means that movements in the visualizer and on stange will differ DEFAULT This value will be output if no CUE Sequence Preset or Direct Access addresses the fixture or dimmer channel This setting ca...

Page 27: ...ures are groups in which several Attributes are combined In the Fixture Sheet the first line will display all Features available Below the individual Features the respective Attributes are displayed P...

Page 28: ...Features or Attributes Inserting deleting or moving Features or Attributes Inserting deleting or moving Features or Attributes Inserting deleting or moving Features or Attributes Inserting deleting or...

Page 29: ...deleted the Attributes will automatically be added to the Free Attributes In this column the Attributes of the selected group will be displayed By selecting an Attribute this will be removedfrom this...

Page 30: ...a different DMX address from the next channel onwards To change the setting select a cell and press the Encoder Now select Yes and press the Encoder one more time Attribut Listing of the individual f...

Page 31: ...Types button Make your entries or modifications as indicated 1 9 1 9 1 9 1 9 1 9 General Operation All fixtures that are currently used in the Show will be displayed in the upper part of the Displays...

Page 32: ...after leaving the Full Access menu and pressing the SAVE button Momentarily the created fixture can only be used for this Show If you want to have this fixture available in the general Library on har...

Page 33: ...ell and pressing the Encoder No will be indicated this means that the presets will be not automatically generated Visualize Here you can define what else is to be displayed in the Fixture Stage Sheet...

Page 34: ...bedisplayed together with Degrees as unit In this case 270 to 270 would be displayed For Strobe Hz and for Gobo_Rotate RPM would appear here Fixed values Open will be displayed if the set value is O...

Page 35: ...from percent to decimal or when pressing the key once more to hexadecimal Clicking on a desired point in the diagram will bring up cross wires Above the diagram the value of the current position is d...

Page 36: ...oder choose the Visulize Effect fro the menu in this case Gobo 1 or Gobo 2 position the frame in the EXTRA column using the Encoder the CHANGE GOBO menu will appear use the arrow to open the folder ov...

Page 37: ...DMX XLR sockets of the Assigning the DMX XLR sockets of the Assigning the DMX XLR sockets of the Assigning the DMX XLR sockets of the grandMA grandMA grandMA grandMA grandMA DMX outputs A to D on the...

Page 38: ...control purposes 2 2 2 2 2 9 9 9 9 9 2 2 2 2 2 Configuring the internal DMX ports 1 A 8 H Configuring the internal DMX ports 1 A 8 H Configuring the internal DMX ports 1 A 8 H Configuring the interna...

Page 39: ...X Now the converter for this DMX port is configured and the menu will be closed For the DMX Hub from the Artistic Licence Company this button must be on Delayed Output for all other units this setting...

Page 40: ...tive Active Active Active Active will be displayed for the assigned DMX outputs and inputs PATHPORT Node Configuration First choose a DMX converter to be adjusted in the table By pressing the Edit Nod...

Page 41: ...t can directly patched in the DMX Sheet select fixture in fixture sheet with mous or touch press button Assign LED lits press empty space in the DMX sheet the fixture will be patched if the fixture ne...

Page 42: ...g groups automatically 1 2 Creating groups automatically 1 2 Creating groups automatically 1 2 Creating groups automatically 1 2 Creating groups automatically If the Groups button is pressed green bac...

Page 43: ...file with the ALQ extension you can load the Show by pressing the button It is not possible to transfer Scanner data The Default User Settings 2 8 2 8 2 8 2 8 2 8 Saving or Loading Profiles will be lo...

Page 44: ...the stored values will be called up but the Faders will n n n n no o o o ot t t t t follow To change a stored value you have to use the Fader to manually set it to a higher or lower value Channel Fade...

Page 45: ...tivate By pressing this key you will reach the UPDATE SOFTWARE menu The operating system the operating software as well as the console software and the fixtures can be updated from this menu 12 12 12...

Page 46: ...lso used as the default for the Effect Speed Crossfade Reload Permanent Crossfade Reload Permanent Crossfade Reload Permanent Crossfade Reload Permanent Crossfade Reload Permanent Here you can define...

Page 47: ...ignal will be indicated in the smaller right part of the window including indication of the recognised BPM Beats per minute By moving the BPM slider the beat can be set The next possible beat will be...

Page 48: ...atically used by a connected GPS receiver Pressing the button will open the GPS Info GPS Info GPS Info GPS Info GPS Info menu In this menu you can modify the settings for a NMEA GPS receiver connected...

Page 49: ...istrator working with a default user profile The user management is not show dependent It is affecting all shows on your desk The Micro has only one default user no login and no User profiles Parts of...

Page 50: ...hese profiles for a particular show or for other shows in which this console is used 2 16 3 Creating a new User 2 16 3 Creating a new User 2 16 3 Creating a new User 2 16 3 Creating a new User 2 16 3...

Page 51: ...Desk Software are enabled Some grandMA operators may find it helpful to create an user with playback rights only for their own personal use After they have finished programming they log in as this pla...

Page 52: ...or select Everthing for complete profile confirm with COPY User with rights higher than PLAYBACK can press Copy and change profiles of other user not his own profile Save save current settings indepe...

Page 53: ...R fader or EXECUTOR button Here as opposed to the EXECUTOR Sheet all values or times can be displayed separately for an entire sequence Cues are displayed vertically with channel and fixture data disp...

Page 54: ...system with date GrandMA Main program with date If this line is displayed in green the unit supports 4096 DMX channels IO SUBSYSTEM Program for the second built in computer Motorola Internas system lo...

Page 55: ...hile holding down its opponent will scroll to the beginning or to the end If there is an active popup dialog on screen the UP and DOWN hard keys work as UP and DOWN cursor keys for navigation inside t...

Page 56: ...nce The SELECT VIEW window will open Enter a name for the VIEW using the keyboard The new name will be displayed in the top line By pressing the keys 1 5 selected key will turn dark grey you can selec...

Page 57: ...vidually using the NEXT PREV key Or Or Or Or Or Press the FIXTURE key for a fixture group or the CHANNEL key for dimmer groups LED is on Pressing the ENTER key will lock the Fixture or Channel in the...

Page 58: ...coder wheel on the right of the respective touchscreen or the up down key 3 3 3 3 3 3 3 3 3 3 3 3 3 3 3 Moving GROUP keys within a window Moving GROUP keys within a window Moving GROUP keys within a w...

Page 59: ...below the right TFT display all functions of the encoders will be displayed directly on the screen The various functions can now be toggled by pressing the FEATURE key or or or or or The Trackball af...

Page 60: ...ting the programming work of another user Changes will be indicated by different colors in the Fixture Channel and Fader sheet red background these values were set by the user of this console only the...

Page 61: ...Function The ALIGN Function The ALIGN Function The ALIGN Function The ALIGN Function The ALIGN function allows you to apply ratios to ranges of parameters Four different modes modes modes modes modes...

Page 62: ...ue bar on the side of the name and all functions Press PAUSE key 1x LED is on Click on fixture or fixture key in the Group Window or click on fixture in the Fixture Sheet You can also park single para...

Page 63: ...you can modify the IND FADE time or IND DELAY time individual Fade Delay Times for the selected fixtures using the encoders While modifying you can use different options Choosing options Choosing opti...

Page 64: ...ered angle to shift the effect The TOP button in combination with a target will synchronize the effect modulators 3 4 5 3 4 5 3 4 5 3 4 5 3 4 5 Deactivating values individually Knock out Deactivating...

Page 65: ...ture With the key you can switch to the next Fixt ure With the X key you can close the window 3 4 7 3 4 7 3 4 7 3 4 7 3 4 7 AUTO SORT Function in the FIXTURE Window AUTO SORT Function in the FIXTURE W...

Page 66: ...odified If the background is red something has been changed in this function If pressing the Sorting Readout button displayed with a green font Sort by With the respective key you can determine accord...

Page 67: ...y in the CHANNEL SHEET SHEET SHEET SHEET SHEET The individual dimmer channels can be accessed directly at any time Select the channels which you wish to modify selected channels will be displayed in y...

Page 68: ...nels In CHANNEL mode the individual channel values can be set with the Faders The respective channel can be hidden using the physical key under the Fader In order to modify the selection or or or or o...

Page 69: ...GN key pressed 3 times LED is on When changing the activated values the value of the selected Channel Fixture s in the middle will be taken as the starting value will not be changed The value of the f...

Page 70: ...oder Individual Fade Delay Time When carrying out modifications different options can be used These options can be necessary when times for Scanners and Dimmers are changed simultaneously Selecting op...

Page 71: ...displayed with green font Layer Display only Values and Outputs in the FADER CHANNEL window possible By pressing the respective keys the following basic values will be displayed Values only Values ar...

Page 72: ...you can enter a new number via keyboard confirm with ENTER The new number will automatically be taken over The Channel window can be deleted by pressing the Delete Window key By pressing the X key th...

Page 73: ...use select them from preset pools In the GROUP window select those fixtures for which you want to create a Preset by a touch or mouse click fixtures have to be displayed in yellow in the FIXTURE windo...

Page 74: ...up a preset Fixtures Dimmers have to be displayed in yellow Now the individual presets can be called up for the selected Fixtures The called up presets and their names will be displayed in the FIXTURE...

Page 75: ...by pressing the EDIT key right after the modification followed by the NEXT key Before the activation of the new selected preset a window will open where you can store the 1st preset by pressing the OK...

Page 76: ...ample activate Preset 1 and save it with an additional value as Preset 2 In the Preset Pool Preset 2 will be displayed with a black frame indicating an Embedded Preset Create Preset 3 in the same way...

Page 77: ...ears now select the window to be deleted The VIEW Name will be maintained but without any contents All assignments to VIEW keys are now deleted Deleting a MACRO Deleting a MACRO Deleting a MACRO Delet...

Page 78: ...l be selected and so forth This function can also be operated by using the NEXT PREV keys Groups Groups Groups Groups Groups Here you can define the number of fixtures that are to be moved simultaneou...

Page 79: ...tivated dark green background By shortly pressing the button you can switch on activated or off deactivated the storing function When storing only the activated functions will be stored To store press...

Page 80: ...Blind Modus Blind Modus Blind Modus The Blind mode will separate the stage output from the programmer i e when changing values being in the Blind mode the values of the stage output will remain as the...

Page 81: ...es will automatically be adapted Enter the virtual axes in SETUP FIXTURE TYPE CHANNELS of FIXTURE TYPES using the SPECIALS button SPECIALS Select the fixtures in NORMAL mode Use the mouse or the touch...

Page 82: ...you run the risk of changing the stage setting just like that Undo unwanted changes using OOPS except with MICRO WIZZARD in the SETUP mode Here you can arrange fixtures in geometrical figures e g squ...

Page 83: ...es without changing the form itself CALCULATE FOLLOW With this function you can transfer the real fixtures positions to the SETUP of the grandMA console The STAGE view will then display the actual pos...

Page 84: ...sed in PAGES You can work on all PAGES simultaneously Changing pages only effects what you currently have physical access to NOT what is currently playing back When using motor faders those motor fade...

Page 85: ...tings all fixture and channel values All for Selected Devices All All All All All values of the selected selected selected selected selected fixtures and channels will be stored the fixture channel nu...

Page 86: ...er will be reset to default again Store Values Store Values Store Values Store Values Store Values Active Values Will store only the active values only the active values only the active values only th...

Page 87: ...ll be subtracted from the already existing cue If you wish to remove from a cue simply use the same EXECUTOR Fader or EXECUTOR button once again The STORE window will appear as above In order to remov...

Page 88: ...ng Cues Set a Cue 4 1 4 1 4 1 4 1 4 1 Creating Cues Press the STORE key once LED is on Press the SEQUENCE key once LED is on Enter the number of the Sequence using the numeric keypad Press the CUE key...

Page 89: ...default sequences can also be operated by using a combination of a command e g GO Pause OFF and simultaneously pressing ENTER Hold the SELECT button down and click on the desired Executors no effects...

Page 90: ...u can now fade in the selected sequence Default setting for the Fader can be changed to fade just upwards or in both directions 2 13 2 13 2 13 2 13 2 13 Settings in the DEFAULTS menu below the Executo...

Page 91: ...of the PAGE and the sequence name The second line will give you the functions of the columns No Number of Cue NAME Name of Cue MIB Activate MIB Move In Black function individually for each cue Activat...

Page 92: ...s in the sequence Select the Cue that you want to change red cell in the Name column Press the Edit Cue key LED in the EDIT key starts flashing All values of the Cue will now be played back on stage a...

Page 93: ...tch this button to Out Out Out Out Out Now you can modify this time with the Encoder Out Fade If no FADE or DELAY times are indicated none are stored in this CUE Changing all times of one or more Cues...

Page 94: ...lue background which will display the profile as a graphics press SELECT PATH The selected profile will appear in the PATH column For some of the pre defined profiles the curve position may partly lie...

Page 95: ...y stored in this Cue will be copied The tracked information will be disregarded The Cue will be copied as it would actually be realized on stage That means all previous steps will be taken into accoun...

Page 96: ...t side of New Number By pressing the REN UMBER key the Cue will be renumbered If you want to renumber not only one but several Cues select the respective Cues Enter the new number for the first Cue on...

Page 97: ...he Cue MIB Activate MIB Move In Black function individually for each cue Activate it by selecting a cell and shortly pressing on the encoder on the right side of the display Activation is confirmed by...

Page 98: ...times will be adjusted in terms of percentage FORWARD Chaser runs forward REVERS Chaser runs backwards BOUNCE Chaser runs forward then backwards and so on RANDOMLY Chaser plays back individual steps...

Page 99: ...al INFADE SNAPDELAY Defines the trigger point for snapping channels in the chase 4 4 1 4 4 1 4 4 1 4 4 1 4 4 1Modifying values of separate Chaser steps Modifying values of separate Chaser steps Modify...

Page 100: ...regardless at to whether those fixtures channels have already been used in this cue By pressing this key you can toggle between only last called Executor and all possible Executors Only last called Ex...

Page 101: ...window The REPORT function allows you to create a printed overview of sequences An Excel file will contain all fixtures involved with their respective values sorted in by Cues You can also create repo...

Page 102: ...g on the CommandLine report_sequ_24_cue_2_thru_5 confirm with ENTER the report will appear on the right display the Cue values are arranged in columns the parameters of individual fixtures in rows To...

Page 103: ...created The ASSIGN menu will appear in the middle TFT display Another way to enter the ASSIGN menu is via the EDIT menu The title bar will display the selected EXECUTOR FADER or BUTTON 5 1 1 5 1 1 5...

Page 104: ...s XF B If Split Crossfade is active you can use the Fader to fade in the next Cue when pushing the fader upwards or downwards If Split Crossfade is not active not active not active not active not acti...

Page 105: ...TOR window Load Pressing the button on the right TFT display will open a chart for this sequence where you can select and directly load the next cue to be played back in the sequence LOAD CUE Start th...

Page 106: ...Values that were played back in a Cue remain unchanged for each susequent Cue until they are modified or overwritten by a later Cue LTP principle Therefore you do not have to program values which do n...

Page 107: ...LOOP and to execute the next Cue of the sequence RESTART OPTIONS RESTART OPTIONS RESTART OPTIONS RESTART OPTIONS RESTART OPTIONS If the Restart with first cue key is pressed the Sequence will restart...

Page 108: ...g and calling up Fixtures and Dimmer GROUPS Submaster Options The Settings key must be pressed dark background If the POSITIVE ENABLE key is pressed this Group Master is the Master Fader for all dimme...

Page 109: ...s The Sound Menu will open by touching the lower part of this window not the headline or or or or or If SOUND HOLD SOUND HOLD SOUND HOLD SOUND HOLD SOUND HOLD is selected you can adjust the given HOLD...

Page 110: ...assignments may no longer work 5 2 5 2 5 2 5 2 5 2 Small EXECUTOR Window Small EXECUTOR Window Small EXECUTOR Window Small EXECUTOR Window Small EXECUTOR Window grandMA grandMA grandMA grandMA grandMA...

Page 111: ...E key you can toggle the font size used in the EXECUTOR sheet between Huge Big and Small With the DELETE WINDOW key you can delete the Executor sheet or close the Options window using the CLOSE key In...

Page 112: ...t stored Text GREEN Downfading dimmer values Text RED Blocked values Button TIME FADE DELAY times will be displayed If the FIX key is pressed dark background all selected selected selected selected se...

Page 113: ...dow in the following manor 1 Select one or more cells in the Tracking Sheet 2 Choose the DELETE CUE ONLY UNBLOCK or BLOCK command 3 Execute the command by choosing the source Selection All Channels of...

Page 114: ...s by pressing the PAGE Keys in the display By clicking on the respective PAGE Keys you can call up the PAGE 5 5 2 5 5 2 5 5 2 5 5 2 5 5 2 Executor Fader P Executor Fader P Executor Fader P Executor Fa...

Page 115: ...plete P Copy or move complete Pages with Executor Faders ages with Executor Faders ages with Executor Faders ages with Executor Faders ages with Executor Faders and and and and and buttons buttons but...

Page 116: ...all all active MACROS Pressing the DETAILS key will open the View ALL RUNNING EFFECTS menu 6 6 View ALL RUNNING EFFECTS menu CURRENT PAGE OFF Switches off all all all all all Executors of the current...

Page 117: ...eneric effect has been used when creating a cue 6 1 1 6 1 1 6 1 1 6 1 1 6 1 1 Creating an Effect Group Creating an Effect Group Creating an Effect Group Creating an Effect Group Creating an Effect Gro...

Page 118: ...any selection do not select any Fixtures or Dimmers but press the TAKE SELECTION key once The cell will now display a Zero The key of this Effect Group will be indicated in red in the Effect Pool Fil...

Page 119: ...ng and storing virtual forms Pressing the SELECT key will adopt the function the window will close discarding any modifications when pressing CANCEL Dir direction In this column an arrow indicates in...

Page 120: ...using the Encoder below Clicking the Encoder once will automatically set the value to 0 You can also use the ALIGN function to set this value 3 4 1 3 4 1 3 4 1 3 4 1 3 4 1 ALIGN function Rate Display...

Page 121: ...ly will set the value to ALWAYS and the Effect will be executed during the whole period 6 2 2 6 2 2 6 2 2 6 2 2 6 2 2 Deleting individual Effects Deleting individual Effects Deleting individual Effect...

Page 122: ...Assigning Special Masters If INDIVIDUAL is selected default setting you can adjust the speed only by using the SPEED encoder Bounce If this key is pressed dark background the whole Effect Group will f...

Page 123: ...n calling up Effect Groups its size speed and softness can be faded in or out If in the Effect Group a FADE TIME is set the intensity and speed or softness of the Effect Group will automatically be fa...

Page 124: ...ps will be switched off The lower part of the menu shows all Effect Group calls performed since the last Cue was stored including their respective playback parameters When storing the next Cue all cal...

Page 125: ...e Fixture faster If the extended lines and consequently the longer ways for the Fixture are to be transmitted with the same speed you have to press the EQUALIZE DOTS key once The form can be modified...

Page 126: ...ure Sheet select the FEATURE to be executed by the modulator here Dimmer in the Fixture Sheet In the Select menu select for which features the modulator values are supposed to be valid In order to do...

Page 127: ...ncoder below the Screen enter the value und confirm with ENTER All entries are executed immediately and can be controlled from the STAGE view or even better from the 3D VISUALIZER delete the settings...

Page 128: ...t for a BITMAP Effect Assign the fixtures in the setup In SETUP you can create a matrix that will be visible in the Stage view that helps creating Bitmap effects press SETUP press FULL ACCESS press ST...

Page 129: ...w of the Bitmap Editor so that it is advisable to check them in the STAG view LEFT RIGHT RIGHT LEFT places the ID number starting point to the left right margin BOTTOM TOP TOP BOTTOM places the ID num...

Page 130: ...have an assigned dimmer value these cells will be kept grey scale according to dimmer value and you can select the next cells Each selected cell will immediately loose its dimmer value this way you ca...

Page 131: ...tmap 1 1 into the selected layout SCALE TO FIT WIDTH will scale the bitmap to the optimum width for the selected layout SCALE TO FIT HEIGT will scale the bitmap to the optimum height for the selected...

Page 132: ...and end points PHASE here you can enter the angle to shift the effect RATE stands for the ratio d set ACT ON depending on the setting and type of BITMAP the buttons below are active bright values can...

Page 133: ...pool Or if the effect had been placed on a fader or a button start the effect using the fader or button As is the case with the effects you can modify the speed while the effect is running WARNING If...

Page 134: ...he major advantages of the new Timecode System Here the major advantages of the new Timecode System Here the major advantages of the new Timecode System Here the major advantages of the new Timecode S...

Page 135: ...imecode control bar for the desired timecode show when touching a key in the timecode pool Use the cells with the cd player like symbols to control the show playback Using the command line Using the c...

Page 136: ...xt menu of the timecode pool context menu of the timecode pool context menu of the timecode pool context menu of the timecode pool This can be accessed by right clicking on the headline of the Timecod...

Page 137: ...ptions menu you will record with internal or external synchronisation Automatic Recording can also be started from the command line in a similar way to recording a macro STORE TIMECODE X ENTER or STOR...

Page 138: ...eady existing track is very similar to adding a new track Choose the track that you want to change with the track encoder or by touching it Press the TRACK FUNCTIONS key Select CHANGE EXECUTOR from th...

Page 139: ...arge number of tracks in your show but currently you are only interested in some of them Select these tracks and press the SORT key The selected tracks will be sorted and displayed at the very top of...

Page 140: ...ts on given tracks will be selected C AFTER TIME Events that are after the current time will be selected Selecting the Current Event Selecting the Current Event Selecting the Current Event Selecting t...

Page 141: ...r press the XY encoder The movement will be relative if you use the signs otherwise it will be absolute Editing an Event Editing an Event Editing an Event Editing an Event Editing an Event You can onl...

Page 142: ...first case a pattern of XGoUp XgoDn XGoUp Xend is recorded while in the second case only XGoUps are recorded Nevertheless you can change the global crossfade mode afterwards without affecting the play...

Page 143: ...ayback keys Assigning Playback keys press TOOLS press TOUCHBOARD REMOTE The menu REMOTE TOUCHBOARD CONFIGURATION displays the commands Empty means that there is no command assingned to this button Pre...

Page 144: ...igned Playback buttons Fader will be displayed on the individual keys Only EXECUTOR buttons and faders can be assigned to the respective DMX channel 8 3 2 8 3 2 8 3 2 8 3 2 8 3 2 Assigning DMX Channel...

Page 145: ...8 4 2 8 4 2 8 4 2 8 4 2 8 4 2 Assigning Playback Buttons Assigning Playback Buttons Assigning Playback Buttons Assigning Playback Buttons Assigning Playback Buttons Press the TOOLS key once Call up th...

Page 146: ...O key once LED is on The SELECT MACRO window will open Enter a name for the Macro using the keyboard Press the TIMED key will turn dark gray if the Macro is to be executed over the same amount of time...

Page 147: ...lumn all stored commands are displayed one by one For each command the time between steps where the macro was recorded is displayed in the DELAY column This times can be edited or ignored for playback...

Page 148: ...een two positions Pressing 1x The head will be turned so that it is pointing to the same position but with different values for Pan Tilt All lights that have 360 degrees or more of Pan and 270 degrees...

Page 149: ...gered at the calculated time for dusk 2 15 2 15 2 15 2 15 2 15 Menu TIME DATE Time If ABSOLUTE is selected in this line under Start a time can be set for the Macro to start If DAWN SUNRISE SUNSET or D...

Page 150: ...functions of hard keys Some keys have more than one function due to space considerations Some hard keys have an alternative function at the second or even the third push These keys are Hard key Hard...

Page 151: ...K lamp will be on indicating that the PC keyboard is now locked to command line operation If the PC keyboard is locked you can not use it for other operations like naming presets etc But another push...

Page 152: ...ter 3 using PC keyboard command line Plus Minus Go Back with no time Go Forward with no time ALL ALL QUIKEY All selection with ODD EVEN ALL_CHASES ALL_C CONSOLE Accessing all executors with chases ALL...

Page 153: ...ton of executor section FADERBUTTON2 FADERBUTTON2 Hit Executor Lower button of executor section FADERBUTTON3 FADERBUTTON3 Hit Executor Upper button of executor section FEATURE FE 2 x PRESET Single fea...

Page 154: ...MOVE MO MOVE Move source at destination NEXT N NEXT Next device of current selection ODD OD QUIKEY ODD selection with ALL EVEN OFF OF OFF Off switch something off ON ON ON On switch something on OOPS...

Page 155: ...ugh to enter ranges TIMECODE TI CONSOLE Timecode show TOGGLE TOG CONSOLE Toggle running status of executor TOP TOP TOP Call first cue of executor TOUCH_BTN TO CONSOLE Remote Analog input button UNPRES...

Page 156: ...st of object The only exception from this rule is the AT command AT can follow a list of object The only exception from this rule is the AT command AT can follow a list of object The only exception fr...

Page 157: ...s FLASH_DOWN _OFF Temporary down flash of executor FLASH_UP _OFF Temporary up flash of executor GO Go forward GO Go backwards GOTO Goto cue LEARN Learn speed LOAD Prepare next step of executor wait fo...

Page 158: ...lumn FIXTURE A complex light that has more than just a dimmer channel FEATURE A feature inside a fixture like PAN or IRIS FORM A 1 or 2 dimensional path used by effects GROUP A collection of fixtures...

Page 159: ...e 100 IF In selections THRU In ranges UNPRESS After executing keywords Immediate Keywords Immediate Keywords Immediate Keywords Immediate Keywords Immediate Keywords These keywords expect no additiona...

Page 160: ...ne will appear CHANNEL 1 ENTER If the command line is empty the current default keyword is shown by a LED in the physical key b the command line window The following keywords can be the default keywor...

Page 161: ...tarting keyword a As starting keyword a As starting keyword reduces the current selection Everything that follows after the minus will be interpreted as a selection CHANNEL FIXTURE GROUP SEQU CUE EXEC...

Page 162: ...TIME button 4x SNAPDELAY press TIME button 5x Cue No for the Default Executor Cue No Executor No for the respective Executor You can also enter multiple times for several Cues of a sequence at the sa...

Page 163: ...performs 1 If there is a selection CLEAR_SELECTION 2 If there is an activation CLEAR_ACTIVE 3 If there is stage output from programmer CLEAR_ALL CLEAR_ACTIVE CLEAR_ACTIVE CLEAR_ACTIVE CLEAR_ACTIVE CL...

Page 164: ...Z can be range lists Range lists with X and Y Z are not allowed Therefore CUE 1 THRU 10 SEQU 1 is valid CUE 1 TRUE 10 SEQU 1 THRU 5 is invalid a as starting keyword as starting keyword as starting ke...

Page 165: ...aster functionality MACRO You can not delete a macro that is currently recording MIDI_BTN PAGE Deleting a page will delete all executors on that page PRESET Deleting single presets is done with the sy...

Page 166: ...ENTER or hit key in preset pool window c c c c c Continue EDIT UPDATE procedure with NEXT PREVIOUS Continue EDIT UPDATE procedure with NEXT PREVIOUS Continue EDIT UPDATE procedure with NEXT PREVIOUS...

Page 167: ...ormed on all listed executors with a fade overwrite INSERT MOVE Change visible number of effect LABEL Change name of effect c c c c c as target for the following executing commands as target for the f...

Page 168: ...switch back to value mode upon ending of the next command line operation FADER FADER FADER FADER FADER Classification Classification Classification Classification Classification object keyword Format...

Page 169: ...every executor that follows after FLASH_DOWN reduces its intensity channels to zero with no time FLASH_DOWN executor list ENTER FLASH_DOWN executor list ENTER FLASH_DOWN executor list ENTER FLASH_DOWN...

Page 170: ...selections Assuming that we have two groups we will use real names to make it clearer PAR64 includes ALL PAR64 lamps FRONT_TRUSS includes ALL lamps on the front truss PAR64 IF FRONT_TRUSS ENTER PAR64...

Page 171: ...SERT INSERT INSERT Classification Classification Classification Classification Classification operational keyword INSERT source objects AT destination ENTER Example INSERT GROUP 10 THRU 15 20 AT 1 ENT...

Page 172: ...ENTER Z ENTER Using EXEC in this command will always link the remote to the middle executor button X must be in the range from 1 to 72 MOVE MOVE MOVE MOVE MOVE Classification Classification Classifica...

Page 173: ...ge 1 amount dimmers divided by 20 For executor pages in range 1 64 PAGE X ENTER PAGE X ENTER PAGE X ENTER PAGE X ENTER PAGE X ENTER Will select fader and button executor page together b b b b b As tar...

Page 174: ...mporary dialog windows and message boxes you can use the PREVIOUS key to move the input focus in that window to the left Together with NEXT and ENTER you can for example choose the appropriate answer...

Page 175: ...e of the same type If no object is given a new cue is stored into the default executor If the destination of the store command is not empty you will be asked for confirmation In case of storing over e...

Page 176: ...executor list ENTER TOP executor list ENTER b b b b b In an assign command In an assign command In an assign command In an assign command In an assign command this function can be assigned to an exec...

Page 177: ...assification Classification Classification Classification object keyword a a a a a as starting keyword given view buttons will be called as starting keyword given view buttons will be called as starti...

Page 178: ...you switch off Autosave select your Archive Medium hard disk on the console file server external memory to be set using FileServer in Archive Media When Autosave is active the time to the next saving...

Page 179: ...can use it later when needed This way you can also transfer demo shows standard settings etc to others 1 1 1 1 11 4 Deleting the current show 1 4 Deleting the current show 1 4 Deleting the current sh...

Page 180: ...k 1 7 Loading a Show from Floppy disk 1 7 Loading a Show from Floppy disk press BACKUP press Floppy DISK press LOAD Show insert the floppy containing the Show press OK operation can take some minutes...

Page 181: ...1 1 11 1 1 1 1 1 1 1 1 10 Loading a Show from an external Hard Disk 0 Loading a Show from an external Hard Disk 0 Loading a Show from an external Hard Disk 0 Loading a Show from an external Hard Disk...

Page 182: ...show it is not possible to do that in the PARTIAL SHOW READ function Data transfer here you can select elements of the imported show Elements having the same name will be overwritten or merged dependi...

Page 183: ...ect the fixtures and press on the Encoder next to the screen the colors of the selected fixtures will change or Select in the WIZARD NO NEW DEVICES DEFAULT will always be executed if no other change w...

Page 184: ...ll be merged with the copied elements Here a concise overview Remove unchanged Items Will delete all elements in the overview that were not changed i e these elements will not exist in the current sho...

Page 185: ...ossible if the first three number groups of the grandMAs IP addresses are identical e g 192 168 177 X press SETUP press UPDATE SOFTWARE select a console from the table If a console is not being displa...

Page 186: ...tem version from the harddisk press 3 on the keyboard You will see a list with all shows in all system versions existing on this harddisk By pressing one of the displayed keys a b c the respective sho...

Page 187: ...Cancels the actual load task Without a floppy disk inserted you will get an error message on the display Confirm with key no 1 This procedure is also valid for many other Pop Up menus of the grandMA F...

Page 188: ...s running text on the display Executor Fader P Executor Fader P Executor Fader P Executor Fader P Executor Fader Page Down K age Down K age Down K age Down K age Down Key no 2 ey no 2 ey no 2 ey no 2...

Page 189: ...nd Diskdrive Integrated Harddisk and Diskdrive Integrated Harddisk and Diskdrive Integrated Harddisk and Diskdrive The harddisk does not only save a backup for the operating system but leaves enough s...

Page 190: ...uence with individual timings per step Go button mode Auto Timed Sound Steps can include loops with counter or timer 14 3 14 Executor Faders and Buttons 14 3 14 Executor Faders and Buttons 14 3 14 Exe...

Page 191: ...14 3 20 Operating system 14 3 20 Operating system 14 3 20 Operating system 14 3 20 Operating system 14 3 20 Operating system Operating system for industrial applications named VXWORKS no DOS no WINDO...

Page 192: ...o with grandMA 3D PC 15 1 15 1 15 1 15 1 15 1 Preparing the network settings Preparing the network settings Preparing the network settings Preparing the network settings Preparing the network settings...

Page 193: ...ground it is not enabled for network connections above item Allow Invitations The Master priority will only interest you when you want to create sessions with more than 3 units By clicking into the ce...

Page 194: ...rwritten by the first unit that had created the even on the 3D will always be overwritten by the first unit that had created the even on the 3D will always be overwritten by the first unit that had cr...

Page 195: ...ed on or off by using the Exe Sync button in the World pool See Worlds Worlds Worlds Worlds Worlds next page As backup we recommend getting advice from the MA hotline see below or your local distribut...

Page 196: ...P TIPP TIPP TIPP TIPP Working with Worlds Working with Worlds Working with Worlds Working with Worlds Working with Worlds For the programming programming programming programming programming creating t...

Page 197: ...Network Monitor not for MICRO 15 8 Remote Network Monitor not for MICRO In the menu Tools Remote Network all remotes e g PDA s are displayed Button Disconnect Remote disconnect the selected remotes Wi...

Page 198: ...Show at any time if the Master console fails or the connection is interrupted manually Both the connected consoles will always always always always always run the same same same same same Show 16 2 2...

Page 199: ...ds Please note that the slave s assignment of executor faders and buttons restores to the hardware default after the console is once re booted 16 3 2 16 3 2 16 3 2 16 3 2 16 3 2 Connecting consoles wi...

Page 200: ...ng nodes or hubs they might be used to easily link two or more grandMA consoles As the built in EtherNet card of the grandMA console autosenses the used connection media there is no need to configure...

Page 201: ...connection at a maximum length of 100 metres The cable is always equipped with 8 pole RJ 45 crimp connectors Twisted pair cable to be used for 10 Base T with RJ 45 connectors Pin numbers on RJ 45 conn...

Page 202: ...0 Base 2 port is in use anything connected to the 10 Base T outlet is ignored and vice versa If you want to connect more consoles at one time or the use of a ArtNet DMX Node is required a 10 100 Base...

Page 203: ...ards grandMA Replay Unit as of SN 38 onwards grandMA MICRO with all devices Consoles with lower serial numbers must be upgraded with 256 MB RAM and a 100MBit network adapter Start a session press TOOL...

Page 204: ...mily with ROM update from 17 03 2003 Fujitsu Siemens Pocket Loox 710 recommended by MA Lighting HP iPaq H4155 HP iPaq H 5550 BT as access points as of 12 2003 ASUS SpaceLink WL 300 recommended by MA L...

Page 205: ...up to 6 remote controls ATTENTION selected fixtures apply for all connected units and for the console The flow chart shows the Views available in the PocketPC On the following pages you ll find a desc...

Page 206: ...onal task different symbols to make orientation easier black pressing shortly or long will bring up a menu black reference to the next menu you could open To set values by the Cursor you can define th...

Page 207: ...right can adjust the next parameter e g if in COLRMIX the parameter CM1 is set the vertical Cursor adjusts CM1 the horizontal Cursor may adjust this setting CM2 Chat set the acoustic signal on off Cur...

Page 208: ...with SELECT VIEW or pressing the key The keys shown are equal to those on the console any entry will also be displayed on the console e g Select Fixture in COMMAND and blind i e without displaying th...

Page 209: ...eature enter in the following sequence Fade Delay numeric value time dimension must have a red background ENTER blue background short toggle hours minutes seconds long marked dimension will get a red...

Page 210: ...marked and frame around the Feature blinks changes the values of the chosen parameter only with activated Change Parameter in the Button menu with feature PAN TILT change values in PAN and TILT with o...

Page 211: ...will be displayed displays the current Sheet toggle Fixture Sheet Fader Sheet Channel Sheet short Selection for Cursor Scroll scrolling in the Sheet for Cursor Values to change the values of the marke...

Page 212: ...in the conventional way entry 2_0 will yield a value of 20 SINGLE DIGIT VALUE ENTRY Entries performed over the numeric block will be done in factors of ten entry 2 will yield 20 0_5 will become 5 and...

Page 213: ...reen press one of the buttons and select a new function After the second press on CHANGE FUNCTION the chosen functions will be executed Buttons with functions differing from the default setting have a...

Page 214: ...ax 12 masters if more masters are created scroll to the next page with also 12 masters P P P P Patch atch atch atch atch Note on the console FULL ACCESS may NOT be opened in the SETUP Only LIVE ACCES...

Page 215: ...re Groups Pull Dowm menu of the Features Presets toggle Fixture Presets Pool toggle Groups Presets Groups toggle Groups Presets jump to the next Group button jump to the next Group area press OPTIONS...

Page 216: ...turer s address Manufacturer s address Manufacturer s address Manufacturer s address Manufacturer s address Dachdeckerstra e 16 D 97297 Waldb ttelbrunn Germany declares that the product Name of produc...

Page 217: ...the version number have to correspond 4 36X Some anti virus programs like e g NORTON ANTIVIRUS can disturb the interplay with the 3D deactive these programs Hard disk failure or not present or cable d...

Page 218: ...nsole no fixtures will appear are placed on moved positions no or the wrong channels will be triggered Choose SETUP FULL ACCESS in FIXTURE LAYER the group to which this fixture belongs in the menu bel...

Page 219: ...hen be entered anew Sorry The consoles have different version numbers and will therefore not be recognized by the network Update the consoles to the current software version All fixtures of a Cue can...

Page 220: ...orrectly In general it is advisable to let the console switched on and have the show run via the AGENDA menu Can I re patch a fixture during a show e g because a malfunction has occurred Being in a sp...

Page 221: ...on in Europe Installation follow safety instructions after Batterz 4 years 2 3 workdays Simple installation by experienced amateur not UL and MICRO Hard disk 3 5 years 2 3 workdays should be in stock...

Page 222: ...vice engineers F3 RIGHT TOUCH SCREEN TO RIGHT EXTERNAL SCREEN not on the MICRO To transfer the contents of the right screen to an external monitor Some menus e g SETUP will only be displayed on the ri...

Page 223: ...t selected not selected but grey green yellow last fade on master starting value 0 sequence has reduced the value DOWN Dimmer not selected not selected but grey magenta yellow last fade on master star...

Page 224: ...rwise not affected even if they are currently running The master sequence can also be fixed green orange When scrolling through the pages fixed sequences can cover other sequences on the same position...

Page 225: ...Background black empty DMX channel is not patched dash DMX channel is patched no values will be output by the current cue Colors used for the screen display in the Group Sheet Colors used for the scr...

Page 226: ...not executed An entry was missing or a command was not possible because e g a triggered button was empty Green Macro was executed Blue Time code was executed Colors used for the VIEW BUTTONS Colors us...

Page 227: ...tracked and have to set them to 0 Dimmer value green value has been reduced Dimmer value red Blocked value the value that was defined by the previous cyan colored value will be saved Changes on the pr...

Page 228: ...the Screen Display in the SEQUENCE POOL Colors of the Screen Display in the SEQUENCE POOL Colors of the Screen Display in the SEQUENCE POOL Colors of the Screen Display in the SEQUENCE POOL Colors of...

Page 229: ...24 225 colors 33 colors used for the screen display 223 Colums 72 COMMAND 1 208 Command Line Commands 97 Command Line Order 91 Command Overview 152 Command Reference 156 Command Time 209 COMMAND WINDO...

Page 230: ...a 18 57 108 FIXTURE editing a 18 Fixture Layer 19 22 FIXTURE odd numbered or even numbered 118 FIXTURE OPTION 65 FIXTURE patching a 18 FIXTURE SCHEDULE 18 FIXTURE selected 63 FIXTURE selecting a 18 F...

Page 231: ...6 OFF EXECUTOR 116 OFF PAGE 116 ON 104 173 On Overwritten 107 One Shot 122 OOPS 13 173 OOPS settings 45 Oops Settings 5 Out 105 Outdelay 91 OUTFADE 91 OUTFADE TIME 85 Output Window DMX 41 Overview Com...

Page 232: ...CH POSITION 83 SUB NET addresses 38 SubNet 39 subnet mas 204 Summer Time 48 SWAP 104 SWOP 105 175 SWOP_OFF 175 Sync Start 122 T Table 118 TEMP 105 175 Temp 104 TEST OUT 20 Throw Out Station 195 THRU 1...

Reviews: