MA Lighting Technology GmbH . Dachdeckerstr. 16 . D-97297 Waldbüttelbrunn . www.malighting.de eMail: [email protected]
42
42
42
42
42
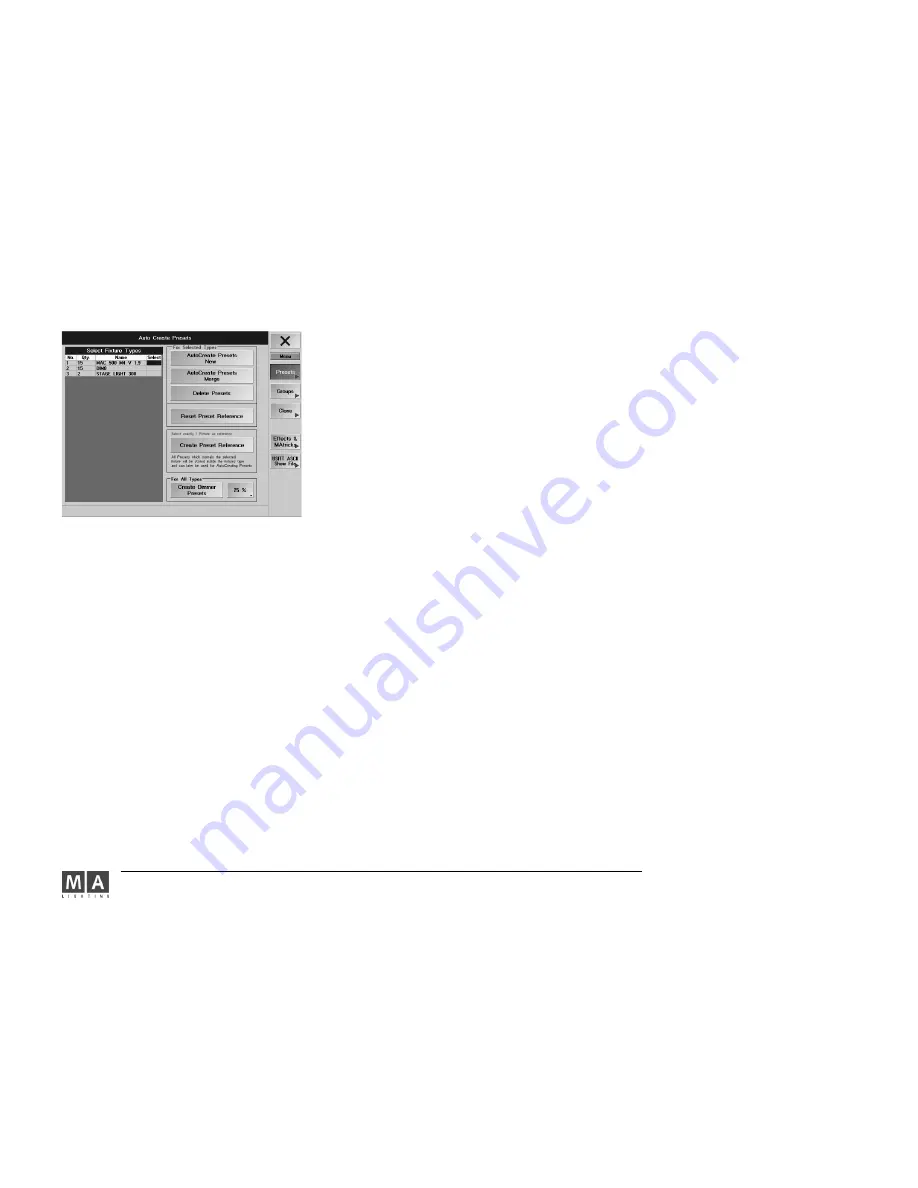
created for these Scanners or Dimmers.
By pressing the
Autocreate Prests New button, you can create
individual
individual
individual
individual
individual
Presets for
each
each
each
each
each
Scanner type.
The created Presets will now be available in the individual PRESET windows. See also:
2.7.
2.7.
2.7.
2.7.
2.7.
Function Sets -
Names (Channel Values) and Presets
By pressing the
Autocreate Presets Merge button, you can create the Presets for all Scanner types
simultaneously. Same names of different Scanners will be displayed on
one
one
one
one
one
PRESET button.
By pressing the
Delete Presets button, you can delete the Presets of the selected Scanners and Dimmers.
By pressing the button
Reset Presets References you can delete all self created preset references and the
presets created from the function sets from library.
To save self-created Presets of a Reference Scanner, select the appropriate Scanner (in the Fixture Sheet). Press
the “Create Preset Preference“ button. The Presets will now be saved to the Fixture in the USER Library in this
Show (same name, can only be distinguished by its version number). If you sign-on further Fixtures of this type
(same version), you can load the created Presets with CREATE NEW PRESETS (see item
33333
). To use this Fixture with
the self-created Presets in other Shows or on other consoles, too, you have to save this Fixture in the USER
Library on disk or floppy.
2.5
2.5
2.5
2.5
2.5
Updating the Fixture Library (USER Library)
By pressing the “Create Dimmer Presets“ button, you can creatPresets in differently adjustable levels for each
Dimmer channel. The Presets can bei adjusted in 4 levels (5, 10, 20, or 25%) by pressing the button on the right.
2.1
2.1
2.1
2.1
2.11.2 Creating groups automatically
1.2 Creating groups automatically
1.2 Creating groups automatically
1.2 Creating groups automatically
1.2 Creating groups automatically
If the Groups button is pressed (green background), you are in the Auto Create Groups menu.
In the upper table, all Scanner and Dimmers are displayed that are used in the current Show.
In the lower table, all “Fixture Layer“ are displayed that are used in the current Show.
On the right of each Scanner and Dimmer, you’ll find the Select column. By choosing a cell and pressing the
Encoder on the right of the Display, these are selected and the display switches to Yes. When creating groups,
groups will be created only for these Scanners or Dimmers.
By pressing the CREATE GROUPS button, one ODD button will be created for each Scanner type, with which you
can select all odd-numbered Scanners simultaneously. One EVEN button to select all even-numbered Scanners,
and an ALL button, to select all of the two.
By pressing the CREATE SINGLE GROUPS button, you can create a single button for each Scanner type in the
GROUP window.
2.1
2.1
2.1
2.1
2.11.3 Clone Fixture - Copying Fixture data globally (cloning)
1.3 Clone Fixture - Copying Fixture data globally (cloning)
1.3 Clone Fixture - Copying Fixture data globally (cloning)
1.3 Clone Fixture - Copying Fixture data globally (cloning)
1.3 Clone Fixture - Copying Fixture data globally (cloning)
Press
Clone button (green background) to open the Clone Fixture Data menu.
You can clone (copy)
all data of one or more fixtures globally. In this, all Preset, Group, Cue and Effect data are
cloned from the first fixture/s (From Fixtures...) to the target fixture/s (...To Fixtures). If you select the same
number of fixtures on each side, the data of the first will be transferred to the first, of the second to the second,
etc.
Select the fixture/s that you want to clone (Fixture Sheet). If you want to clone several fixtures, you have to
observe the sequence in which you select them. Pressing the left Take Selection button will display the fixtures
in the left table
(From Fixtures...).


