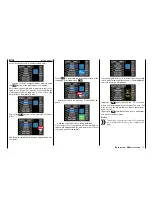
Touch the
BACK
button at the top left of the display
to return to the "Transmitter setting" sub-menu.
Examples
• On a large model, you want to control each aileron
flap using two or more servos:
Assign the same
input
(control channel) to the rele-
vant
outputs
(servo connections). In this case, as-
sign one of the two default aileron control channels 2
+ 5 as an
input
depending on the left or right wing.
• On a large model, you want to control the rudder
using two or more servos:
Assign the same
input
(control channel) to the rele-
vant
outputs
(servo connections). In this case, de-
fault rudder channel 4.
Notices
• The maximum number of available lines (out-
puts) corresponds to the maximum number of
servos that can be connected to each receiv-
er.
• You can use the "
Transmitter output
" op-
tion, of the
mz-24
HoTT Pro transmitter to
switch the transmitter control function as de-
sired, or assign the same control function to
several outputs. For the sake of clarity, it is
strongly recommended to only use one of the
two options.
Assigning one channel to two receivers
As mentioned above, you can use the "receiver out-
put" option to distribute the 12 control channels of
the
mz-24
HoTT Pro transmitter to
two receivers
as
desired.
The numbering of the outputs (servo connections) and
the maximum number of available lines (outputs) cor-
responds to the maximum number of servos that can
be connected to the respective receivers. Follow the
same procedure as above.
RF ON/OFF
In this line, you can manually turn the transmitter's RF
transmission off and back while the transmitter is cur-
rently turned on, For example to be able to chance
model memory or to change model type .
Notice
The next time the transmitter is turned on or a
model is switched, the OFF setting is reversed.
To manually turn the high-frequency transmis-
sion of your transmitter on or off, touch the corre-
sponding button in the "RF ON/OFF" line:
Touch
Tip
Alternatively it is also possible to tap on the RF switch
symbol in the basic menu of the transmitter to recall a
function similar to the RF emission.
Touch
RF type
(country setting)
The specific RF type needs to be set to satisfy the
relevant guidelines (FCC, ETSI, IC, etc.).
To switch your transmitter's country setting between
"NORMAL" or "USA", touch the button to the right of
"RF type":
Touch
RANGE TEST
The integrated range test reduces the transmitter out-
put so that you can perform a function test at a dis-
tance of less the 100 m.
Perform the range test for the
Graupner
-HoTT system
according to the following instructions. It is useful to
have an assistant to help you with the range test.
1. Install the receiver(s) already bound to the trans-
mitter into the model as described.
2. Switch the transmitter on and wait until the receiv-
er/s indicate/s a correct function connection. You
are now able to monitor servo movements.
71
Base menu - Transmitter setting
Summary of Contents for mz-24 PRO
Page 13: ...13 Personal notes...
Page 19: ...19 Personal notes...
Page 37: ...37 Personal notes...
Page 59: ...Touch 59 Base menu Model selection...
Page 79: ...79 Personal notes...
Page 89: ...89 Personal notes...
Page 115: ...115 Personal notes...
Page 153: ...Helicopter model function menus Common function menus 153 Personal notes...
Page 169: ...169 Personal notes...
Page 187: ...187 Personal notes...
Page 199: ...199 Personal notes...
Page 207: ...Fixed wing model function menus System menus 207 Personal notes...
Page 211: ...211 Personal notes...
Page 219: ...219 Personal notes...
Page 237: ...237 Personal notes...
Page 238: ...238 Personal notes...
Page 239: ...239 Personal notes...


