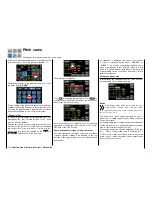
Since at this early point in the trainer system pro-
gramming an operable PUPIL transmitter will not be
connected to a TEACH transmitter, the transmitter im-
mediately reacts with acoustical alarms to switches
connected during the switch assignment. At the same
time, a warning message flashes every second at the
top left in the transmitter's main display (see the figure
at the end of the section, "Wireless HoTT system").
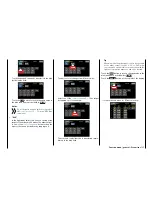
Open the switch that has just been assigned.
First, in the value field under "TYPE", change the de-
fault
RF
to
DSC L
in the bottom line to the right in
order to switch the DSC connection to "signal input":
If the connection to the PUPIL is NOT made with a
two-pin DSC socket but rather a three-pin T/P jack
by
Graupner
, for a correct connection to a PUPIL
transmitter, the modulation type PPM(10, 16, 18 or
24) must be set in the PUPIL transmitter independent
of the type of modulation used in the TEACH trans-
mitter.
PUPIL transmitter settings
The model to be controlled by the PUPIL
must be pro-
grammed with all its functions
including trimming and
any mixed functions in a model memory of TEACH
transmitter. If applicable, the HoTT receiver of the rel-
evant model must also be bound to the
TEACH
trans-
mitter. In principle, a HoTT PUPIL transmitter can be
connected to a TEACH transmitter with the classic
35/40 MHz range since the required PPM signal re-
quired by the TEACH transmitter is normally always
applied to the DSC socket of a HoTT transmitter.
Almost any transmitter from the past and current
Graupner
product line with at least 4 control functions
can be used as the PUPIL transmitter. The PUPIL
transmitter should however be equipped with the cur-
rent connection module for PUPIL transmitters. The
module should be connected to the transmitter board
in accordance with the provided installation instruc-
tions.
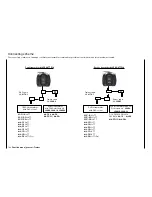
The specified cable is used to connect to the TEACH
transmitter (see the next two pages).
More information can be found in the main
Graupner
FS catalogue and on the Internet at
www.graupner.de
.
The control functions of the PUPIL transmitter must
act directly on the control channels without any inter-
mediate mixers, i.e. the receiver outputs
With transmitters of the series "
mc", "mx"
or
"mz",
it is best to assign the model name "PUPIL" to a free
model memory activated with the required model type
("wing" or "heli"), and adapt the control arrangement
(mode 1 … 4) and "THR min or PITC min front/rear" to
the PUPIL's preferences. All other settings as well as
mixing and coupling functions are made in the TEACH
transmitter and are transmitted by the TEACH trans-
mitter to the receiver.
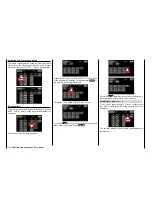
With transmitters of the "
mz- 18/24"
series, also
touch the value field under "TYPE" in the bottom line
of the "
T/P
" sub-menu at the bottom right of the dis-
play to switch it to
DSC S
and hence switch the rear
DSC transmitter connection to "signal output":
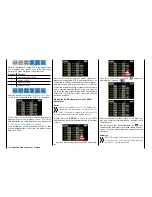
With a
mx-20
HoTT,
mc-16
HoTT,
mc-20
HoTT
or
mc-32
HoTT PUPIL transmitter, adapt the mod-
ulation types to the
number of control channels
to be
transferred in the line "DSC OUTPUT" of the "
BASE
"
menu For example, the signal package with modula-
tion type "PPM10" only contains control channels 1
… 5, and channels 6 and higher are not included. In
order for the PUPIL to use one or more of channels 5
and above, select one of the modulation types that
includes the required channels. If in addition PUPIL
mode is to be used with an existing model memory
instead of a newly initialized one in one of the afore-
mentioned transmitters, make sure to enter "HoTT" in
the "Module" line of the "
BASE
" menu. Otherwise, the
PPM signal at the DSC socket may be inverted.
If you wish to assign other control functions to the
TEACH transmitter in addition to the functions of the
two control sticks (1 … 4), assign control elements
to the
inputs
in the "
Control assignment
" menu of
the PUPIL transmitter that correspond to the released
function inputs 5... 12
in the "
Trainer
" menu of the
TEACH transmitter.
142
Function menu | general - Trainer
Summary of Contents for mz-24 PRO
Page 13: ...13 Personal notes...
Page 19: ...19 Personal notes...
Page 37: ...37 Personal notes...
Page 59: ...Touch 59 Base menu Model selection...
Page 79: ...79 Personal notes...
Page 89: ...89 Personal notes...
Page 115: ...115 Personal notes...
Page 153: ...Helicopter model function menus Common function menus 153 Personal notes...
Page 169: ...169 Personal notes...
Page 187: ...187 Personal notes...
Page 199: ...199 Personal notes...
Page 207: ...Fixed wing model function menus System menus 207 Personal notes...
Page 211: ...211 Personal notes...
Page 219: ...219 Personal notes...
Page 237: ...237 Personal notes...
Page 238: ...238 Personal notes...
Page 239: ...239 Personal notes...


