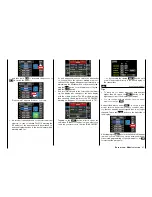
Touch
Analogous to the previously described displays, touch
the corresponding option field to change a current
value, and raise or lower the value by touching the
+
and
–
buttons at the right side of the display the ap-
propriate number of times.
The adjustment range is ±125 % in the "D/R" line and
±100 % in the "EXP" line.
Touch the
RES
button to reset a changed value in a
blue (active) value field to the default value.
If you desire a switch between two variants, you can
assign a switch or a control in the CTL line, as de-
scribed in the "
Control and switch assignment
" para-
graph.
Once all you have adjusted all the DR/EXPO func-
tions, touch again the
WIZ.
button at the top left to
switch to the next adjustment phase:
"Pitch curve"
In the "PITCH MIN." line of this display you can ad-
just to your preferences the movement direction of the
pitch stick so as, through the remaining options, the
pitch curve.
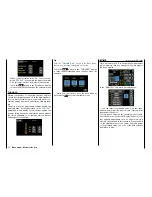
1. Line "PITCH MIN."
Through this option you can easily reverse the
control direction of the pitch control stick from
the standard pre-set position "pitch min back" to
"pitch min forward", and vice versa, by tapping on
the
BACK
or
FORWARD
button in the "Pitch min"
line:
Touch
After tapping on this button it will appear a safe-
ty query:
Touch
NO
to terminate the procedure. Tapping
on
YES
confirms the procedure and reverses the
movement direction of the pitch stick WITHOUT
any visual changes in the display:
2. Setting the pitch curve
Tip
After having completed the program assisted model
programming and the setting of the phases in the
"
PHASE
" sub-menu of the functions phase specific
menus can be programmed.
Basic operating steps
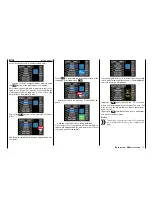
• Button
ST OFF
/
ST ON
Touch this button to turn the graphic and nu-
meric display of the control stick position on
and off, for example:
With the control element (gas/pitch control
stick), a vertical green line is moved synchro-
nously in the graph between the two endpoints
"L" and "H". The momentary control stick po-
sition is also displayed numerically in the line
"IN"(put) (-100 % to +100 %). The intersection
of this line with the curve is identified as "OUT-
"(put) and can be varied at the support points
between -125% and +125%. The control sig-
nal which is changed in this way then affects all
of the following mixing and coupling functions.
•
ENT
button
Touch the button at the bottom right of the dis-
play to set up to 5 additional points between
the two endpoints "L" and "H".
In the following example, the control stick is ex-
actly between the middle and end of its path,
at +50% of the control path, and generates an
output signal that is also +50% due to the lin-
ear characteristic.
48
Base menu - Model selection
Summary of Contents for mz-24 PRO
Page 13: ...13 Personal notes...
Page 19: ...19 Personal notes...
Page 37: ...37 Personal notes...
Page 59: ...Touch 59 Base menu Model selection...
Page 79: ...79 Personal notes...
Page 89: ...89 Personal notes...
Page 115: ...115 Personal notes...
Page 153: ...Helicopter model function menus Common function menus 153 Personal notes...
Page 169: ...169 Personal notes...
Page 187: ...187 Personal notes...
Page 199: ...199 Personal notes...
Page 207: ...Fixed wing model function menus System menus 207 Personal notes...
Page 211: ...211 Personal notes...
Page 219: ...219 Personal notes...
Page 237: ...237 Personal notes...
Page 238: ...238 Personal notes...
Page 239: ...239 Personal notes...


