Notice
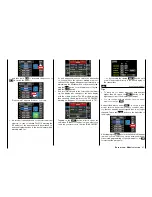
The settings that appear in this display af-
fect the same records as those at a com-
parable location in the "TRIM" display of
the "
THR.CRV
" sub-menu (see next column)
which is why changes always affect each other.
After you finish making your settings, touch the
WIZ.
button at the top left of the display to leave
this menu and go to "Pitch curve":
Touch
Touch the
WIZ.
button again in the "Pitch curve" dis-
play …
Touch
… To leave the assistant and to open the next sub-
menu ...
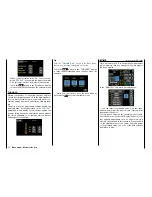
"Throttle curve"
The throttle curve can be specified by up to 7 points,
the so-called support points, along the entire control
stick travel:
Support points can be set, changed and deleted in
the same manner as described in the previous sec-
tion, "
Pitch curve
". First specify the throttle curve us-
ing three points, that is, the two end points "L" and
"H", as well as the other set point "1" in the control
center in order to harmonize the motor performance
curve with the pitch curve.
Tip
The value shown in the top left "throttle limit" line indi-
cates basically the status or the position of the throttle
limit.
Further information about setting throttle curves can
be found in the description of the
THROTTLE CURVE
menu.
Notice
The associated controller does not have any ef-
fect if an undefined point is selected (in the basic
version of the relevant curve mixers, only the
points "L" and "H" are set).
Tips
The settings that appear in this display affect the
same records as those at a comparable location in
the "TRIM" display of the "
Pitch curve
" sub-menu
which is why changes always affect each other.
• After having completed the program assisted model
programming and the setting of the phases in the
"
PHASE
" sub-menu of the functions phase specific
throttle curves can be programmed.
Touch the
WIZ.
button in the "Throttle curve" display
to leave the assistant and open the next sub-menu: ...
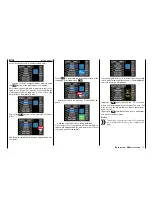
"Gyr/Gover"
(Gyro/Governor)
Within this display, you can make initial basic settings
as needed for your gyro and/or for any
governor
that
is used in your model.
Tip
After having completed the program assisted mod-
el programming and the setting of the phases in the
"
PHASE
" sub-menu of the functions menu all the op-
tions contained in this menu all the phase specific values
can be programmed.
52
Base menu - Model selection
Summary of Contents for mz-24 PRO
Page 13: ...13 Personal notes...
Page 19: ...19 Personal notes...
Page 37: ...37 Personal notes...
Page 59: ...Touch 59 Base menu Model selection...
Page 79: ...79 Personal notes...
Page 89: ...89 Personal notes...
Page 115: ...115 Personal notes...
Page 153: ...Helicopter model function menus Common function menus 153 Personal notes...
Page 169: ...169 Personal notes...
Page 187: ...187 Personal notes...
Page 199: ...199 Personal notes...
Page 207: ...Fixed wing model function menus System menus 207 Personal notes...
Page 211: ...211 Personal notes...
Page 219: ...219 Personal notes...
Page 237: ...237 Personal notes...
Page 238: ...238 Personal notes...
Page 239: ...239 Personal notes...


