background image

Notice

If you switch, through the switch assigned 
here, 

 OFF 

, you turn off not only the phase 

trim described here, but at the same time the 

functions described at the begin of this section under 
"ACT" = 

 INH 

 or 

 OFF 

.

Lines RATE A / B

A symmetrical or an asymmetrical effect can be de-
fined for each flap pair. If in the 

CTL Set

 sub-menu 

you leave (have left) the travel settings of the switch 
assigned to the flap trimming to +100 %, then here 
you can input values within 5 and 20 % which should 
be enough.
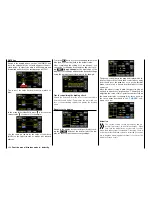
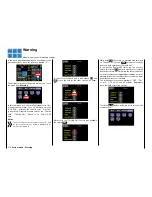
Switch to the desired phase, and touch the value field 
to be set with a finger or the provided stylus: 

Touch

The color of the value field switches from black to 
blue:

In the active (blue) value field, press 

 + 

 to increase 

the current value within a range of ±100% and 

 – 

 to 

reduce it, for example:

Use same procedure with the other values to be set, 
as well as any inboard aileron "AILE2L" and "AILE2R".
Touch the 

RES

 button to reset a changed value in the 

blue (and hence active) field to the default value.
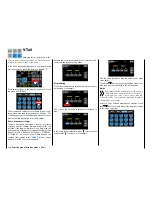
After completing the settings for the ailerons, you 
can switch to the page for setting the flaps by touch-
ing 

 NEXT 

 at the right edge of the display to set the 

flaps and enter the desired settings using the proce-
dure described above, for example:

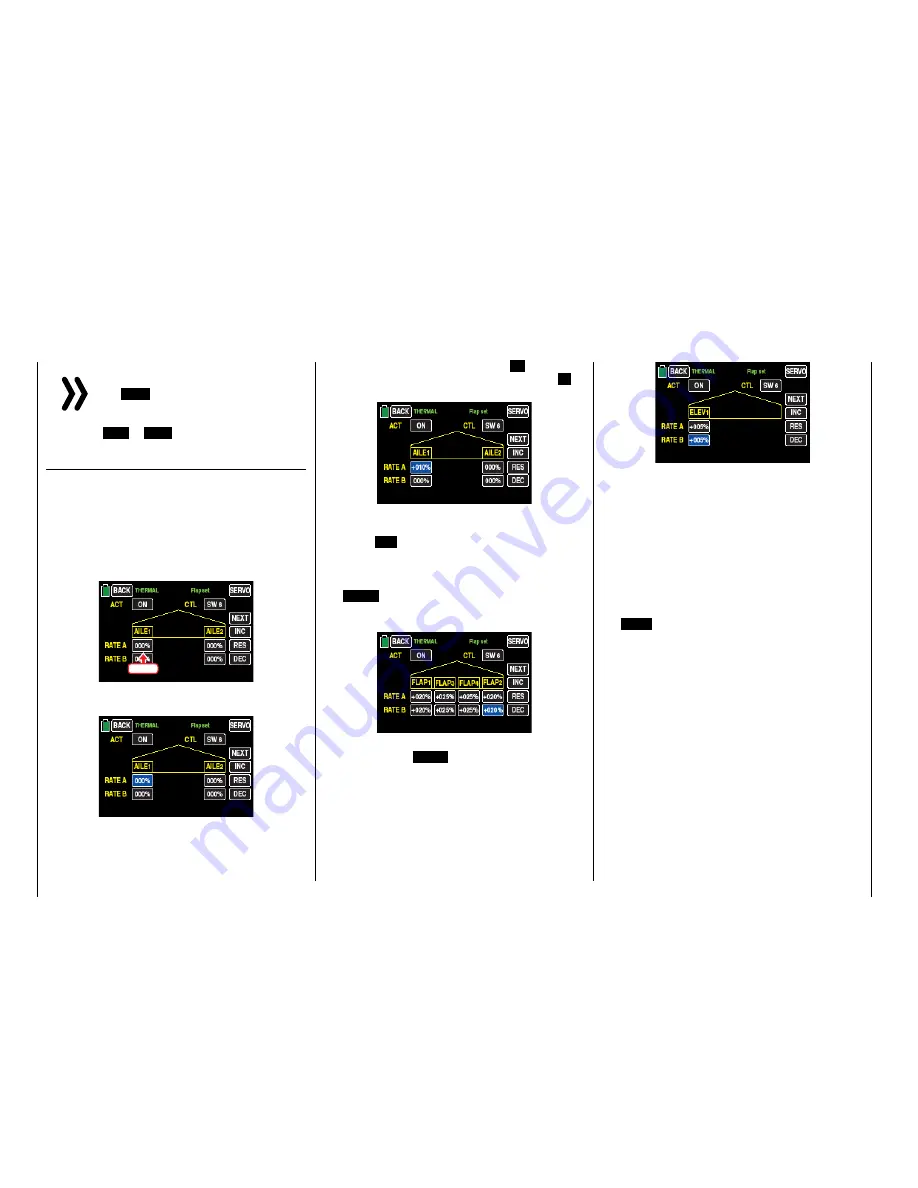
Finally, you can switch to the page for setting the ele-
vator by touching 

 NEXT 

 at the right edge of the dis-

play to set the elevator and enter the desired settings 
using the procedure described above, for example:

Tip

Standardly in the "

CTL Set

" sub-menu to the inputs 

"CH5  ... CH12" NO control is assigned. However, you 
can assign a control or switch at any time and hence 
set different flap positions within a phase as described 
in this section. In contrast the 

Variant of a flaps trimming


described in the "program examples" allows to trim the 
flaps specifically for the phases through only one control 
element within all the phases.

After you have finished making your settings, touch 
the 

BACK

 button at the top left of the display to return 

to the menu selection.

198

Function menu | Airplane models - Flaps settings

Summary of Contents for mz-24 PRO

Page 1: ...C o p y r i g h t G r a u p n e r S J G m b H Part 2 Programming manual Manual No S1006 PRO 12channelHoTT2 4GHztransmitter mz 24Pro...

Page 2: ...Base menu Control switch setting 90 Throttle limit function 94 Transmitter output 96 Telemetry 98 Announces 118 Function menu Phase 120 D R EXP 124 THR CRV 128 What is a mixer 132 General information...

Page 3: ...find in many places in the man ual numbers page number or strings in blue charac ters for example www graupner de Clicking or tap ping on brings you directly to the related target System menu Control...

Page 4: ...ety reasons In all other cases by switching on the transmitter the RF module will be switched on too and in the center of the display it will appear the message At the same time audible warning signal...

Page 5: ...from the receiver an tennas If the transmitter antenna is too close to the receiver antennas the receiver will overdrive and the red LED on the receiver will shine to indicate that no signal is recei...

Page 6: ...can switch to other sub menus Starting with the green BASE menu the selection displays appear as follows it should be noted that the blue function menu de scribed from page 120 Function menu contains...

Page 7: ...and the display which can be accessed by tap ping on T and detailed described from page 225 is displayed for graphic representation of the telemetry data e g so 7 Operating the displays...

Page 8: ...offered by the Pitch curve menu for helicopters models and Throttle curve for all the oth er model types Touch SET with a finger or the provided stylus to go directly to the TX ctl display Transmitter...

Page 9: ...e top right then deleted by touching the BACK button at the top left in the dis play In specific cases stop operating the model as soon as possible and charge the transmitter The red number at the top...

Page 10: ...trol With the HoTT system direct servo control using a diagnostic ca ble is not possible for technical reasons The standard two pin DSC socket on the back of the mz 24 HoTT Pro transmitters functions...

Page 11: ...ard has been inserted in the transmitter at least once the card is ready for use directly after the transmitter is turned on If the transmitter is turned on after the memory card is inserted the styli...

Page 12: ...by e mail Importing and exporting model memories To exchange data between transmitters of the same make or to backup data model memories can be cop ied to the inserted memory card or from the memory...

Page 13: ...13 Personal notes...

Page 14: ...lso be set in the receiver the receiver emits a warning in the form of a beep that repeats approximately once per second Note the installation instructions for the receiver re ceiver antennas and serv...

Page 15: ...talled parts at an easily accessible location in the model Servo cables may not be wound around antennas or run next to them Note that the cables can shift under the influence of acceleration during f...

Page 16: ...s both safety and vibration protection for your servos when the servo fixing screws are properly tightened The follow ing figure shows how to correctly mount a servo The brass spacers are inserted fro...

Page 17: ...flight simulation to determine if there are any problems with the system or the programming of the model Always follow the instructions under Range test WARNING If the range and function test as well...

Page 18: ...ng them Never attempt to charge dry batteries An acute ex plosion hazard exists All batteries must be charged before each use To pre vent short circuits first plug the banana plugs of the charging cab...

Page 19: ...19 Personal notes...

Page 20: ...70mA due to its bidirectional function Apart from the above considerations it is generally recommendable to connect the receiver to the power supply using two cables As usual connect cable 1 to the 6...

Page 21: ...h suitable chargers and are comparably robust In addition this type of cell can undergo significantly more charging discharging cycles than conventional LiPo batteries The comparatively high rated vol...

Page 22: ...can result in the release of gas fire and explosion or other problems The electrolyte and electrolyte vapors within lithi um ion lithium polymer batteries are hazardous to health Avoid direct contact...

Page 23: ...ing the infrared thermometer No 1963 However the battery may not be dis charged using the transmitter s charging socket This socket is not designed for this purpose Additional instructions on handling...

Page 24: ...low and should not be confused with the control connection on the printed circuit board The selected control mode and the settings TX OUT SET line of the CTL Set sub menu transmitter setting of the ba...

Page 25: ...re easily available in the paragraph Controls and switches assignment Logical switch Through this option two switches controls and or logical switches or the favorite combination of them can be interc...

Page 26: ...mitter as well as any control stick ST1 ST4 and controls identified as DVx SLx or DTx or any switch identified as S1 S8 The following window appears in the display af ter touching the corresponding bu...

Page 27: ...accessory display will appear immediately af ter the switch assignation Completely independently from the yellow arrow which only indicates the actual position you can confirm in this display by touch...

Page 28: ...desired switch it will be assumed in the output menu for example Notice Therefore do not forget to program the related selected logical switch in the Logical sw sub menu Tips Through the logical switc...

Page 29: ...retrim the elevator while approaching a landing once the throttle con trol stick is moved beyond the switching point Turn the stop watch on and off to measure the op erating time of electric motors 29...

Page 30: ...f both control sticks The options that are chosen depend on the individ ual preferences of the model pilot The compatibility with the Control modes 1 4 ways is however rec ommended connect the control...

Page 31: ...ty fea tures of the Thr Limit a governor should be connected to receiver output 6 instead of receiver output 8 in the adjacent receiver configuration More information on this subject can be found on p...

Page 32: ...otice The servos must be connected to the receiver in the indicated sequence Outputs that are not re quired are simply not assigned Follow the instructions on the following pages Fixed wing models wit...

Page 33: ...u REV SUB Rudder correct elevator reversed Switch servos 3 4 on the receiver The elevator is correct rudder is reversed Invert the servo 3 4 in the sub menu REV SUB AND switch them in the receiver Del...

Page 34: ...rottle Cut 66 TX ctl Transmitter controls 68 Timer Timer 74 Fail Safe Fail Safe 80 Trim Step Trim step 82 Servo Servo monitor 86 CTL Set Control setting 90 Out Swap Transmitter output 96 Telemetry Tel...

Page 35: ...Aileron setting 182 Wing MIX Wing mixer 188 Flap MIX AILE and FLAP mix 192 Flap set Flap setting 196 Airbrake Airbrake settings 200 Trainer Trainer system 141 Logical sw Logical switch 148 Sequence S...

Page 36: ...me Menu Page ST mode Stick mode 208 Warning Warning instructions 210 Etc Set Various settings 212 Display Display settings 216 Stick Cali Stick calibration 220 MP3 MP3 Player 222 T Telemetry display T...

Page 37: ...37 Personal notes...

Page 38: ...of the actually active model memory is shown in the upper part of the display and the mod el type of the active model memory is indicated by the icon right underneath For example the model type Heli...

Page 39: ...global bound In the following representation the model memories 1 2 and 3 are left as example on memory specific HoTT Synchronization and the memories 4 5 and 6 have been switched to transmitter speci...

Page 40: ...signal is emitted from its transmitter MODEL specific bound receivers react exclu sively to the signal coming from the specifically assigned model memory An accidental use thor ough a non specificall...

Page 41: ...that has already been assigned but is no longer required Tap on the NEW button on the right side of the display Touch After tapping on NEW a selection window will appear in which you can select one op...

Page 42: ...ways a program predefined procedure which begins with the input of the model name Model name Switch between uppercase and lowercase and vice versa with the CAPS button at the bottom edge of the screen...

Page 43: ...ing the top but ton labeled Normal After you select a wing type the following display ap pears Tail type in which you can specify the type of your tail Finish your entry by selecting Propulsion type F...

Page 44: ...us the options to configure the required options will be proposed according to the model type previously selected Since the programming of a helicopter with the help of an assistant will be soon descr...

Page 45: ...mix of functions in the transmitter as is usually the case with flybar systems the menu item Swash page normally does not appear on the multifunction menu 2 Servo The swashplate is shifted axially fo...

Page 46: ...he WIZ button at the top left to go to the next option 3Sv 2Nick Symmetrical three point axis as before but rotat ed 90 one roll servo on the side and two nick servos front and rear 4Sv 90 Four point...

Page 47: ...rol deflections can be set for each switch position between 0 and 125 of the normal control travel EXP allows a more sensitive control of the model in the central position of the respective control fu...

Page 48: ...a safe ty query Touch NO to terminate the procedure Tapping on YES confirms the procedure and reverses the movement direction of the pitch stick WITHOUT any visual changes in the display 2 Setting th...

Page 49: ...y position of the control stick and not to the position of the point Y axis button Y axis Activate this function by touching the button at the bottom edge of the display You can then move an active re...

Page 50: ...turning on the rounding function by pressing this button for example Touch Notice The curves portrayed here are for demon stration purposes only and do not repre sent real pitch curves TRIM button The...

Page 51: ...ed one or more mixers in the lines of the Mixer column In the POINT column specify the support point s to be trimmed To select a point touch the button in the POINT column in the desired line with a f...

Page 52: ...s or the position of the throttle limit Further information about setting throttle curves can be found in the description of the THROTTLE CURVE menu Notice The associated controller does not have any...

Page 53: ...ed mode and reduc ing the gyro gain in fast roundtrips and aerobatics Values up to 125 are possible for example Based on these phase specific settings offset the gyro gain can also be proportionally v...

Page 54: ...h the Throttle Cut option in the Base menu there is an alternative emergency off function Touch the WIZ button in the THR HOLD display to leave the assistant and open the next menu for example which y...

Page 55: ...g will always be functional If in contrast the same model is copied in another transmitter the receiver MUST be bound again to the transmitter changes accordingly and on the right near ORIGIN appears...

Page 56: ...red to the memory card inserted in the card slot of the transmitter Select the desired model memory as for example the model memory 02 from the list offered in the model sel display Tap on the field w...

Page 57: ...fter a short while the message Please Wait ap pears while the selected model is being initialized Once the process is completed all the warning mes sages will disappear and the display returns to the...

Page 58: ...r of the field switches from black to blue Tap on the CPY button right on the bottom Touch Additional information and buttons appear at the bot tom right Touch the desired target memory The color of t...

Page 59: ...Touch 59 Base menu Model selection...

Page 60: ...nge the model type Touch Touch As described in detail in the section Manually pro gramming the basic settings of a new model the manual configuration of a model memory starts with a safety query Touch...

Page 61: ...pe Touch and change the wing type in the display Wing Type that appears by touching the desired new wing type Use the same procedure for all of the selectable fields The entire process is concluded by...

Page 62: ...he button at the right edge of the display to gradually increase the current value and touch the button to lower the value in the active value field Touch the RES button to reset a changed value back...

Page 63: ...travel of 100 since for example the rudder would contact the elevator if the allowed mechanical travel was more than 100 As long as only the rudder is used this is not a problem It becomes a problem h...

Page 64: ...g that the transmitter and receiv er outputs have not been switched A change in the control mode therefore does not influ ence the numbering of the servos 1 Setting the servo direction With this optio...

Page 65: ...ervo is always adjusted directly independent of all other trim and mix settings Notice Note that if the neu tral position is ad justed strongly ser vo travel on one side may be restricted since the to...

Page 66: ...in the SET line is less than the current servo position that is the current servo position represented by the green arrow to the left of the bar graphic is above the switching threshold represented b...

Page 67: ...locked by default BLK Depending on the switch position the display of this field switches to ON or OFF To recall the graphic display of the servo travels of the Servo menu servo monitor and to activat...

Page 68: ...ioned situation lasts GLOBAL transmitter specific synchronized re ceivers react to the signals of all of the global bound model memories of their transmitter this explains why for safety reasons a mod...

Page 69: ...time at the latest GR 16 and GR 24 and similar receivers The red LED flashes on the receiver Hold down the SET button on the receiver until af ter about 3 seconds the flashing red LED flashes red gre...

Page 70: ...with the warning text the RF module of your transmitter is switched on but there is no connection with the receiver Then switch the receiver system on and or bind correct ly the receiver and repeat th...

Page 71: ...maximum number of servos that can be connected to the respective receivers Follow the same procedure as above RF ON OFF In this line you can manually turn the transmitter s RF transmission off and ba...

Page 72: ...erruption in the link within a range of about 50 m at any time attempt to reproduce it 7 If the model has a motor turn it on to also check interference resistance 8 Move further away from the model un...

Page 73: ...a start to be saved in the memory card inserted in the memory card slot and it will stop as soon as the transmitter or the RF module are switched off Notice The AUTOLOG option remains switched ON or O...

Page 74: ...1 and TIMER2 To program the timer 1 or timer 2 it is preferable to start in the MODE line by checking the value field directly to the right By default UP is provided as a synonym for counting forward...

Page 75: ...ansferred by touching the RES button Notice If a started and then stopped timer is switched from forward to backward counting or vice versa by touching a relevant button only the remaining time on the...

Page 76: ...nged is automatically transferred to the TIMER line when this switch is acti vated You can alternately touch the RES button LAP SW lap switch Ground requirement for the use of the laps counter is 1 Th...

Page 77: ...tton at the top left to go back to the Timer setting display Lap timer alarm As soon as the lap times have been recorded as de scribed before you cannot only save and in a second time read them but yo...

Page 78: ...me use the operating time meter Batt time which measures the total oper ating time of the transmitter A switch cannot be assigned The timer is automatically reset to 0 00h when the voltage of the tran...

Page 79: ...79 Personal notes...

Page 80: ...ion determines the response of the receiver both by directly switching on the receiver system and when there is an interruption in transmis sion from the transmitter to receiver The servos connected t...

Page 81: ...smitter and receiver systems and re peat the process Tip By tapping on the needed F S button in the MODE column the stored fail safe position can be recalled and changed as described Unchanged F S val...

Page 82: ...is displayed the name of the phase 1 which is indicated by the name NORMAL or PHASE 1 As soon as you will have defined one or many other phases in the PHASE menu you will be able to switch among thos...

Page 83: ...memory is changed or after long periods between flights the last safe trimming positions are available in the middle positions of the respective trimming dis play of the control functions 1 4 Say for...

Page 84: ...splay follows the storage of their trim options accordingly CO global or SE phase The possible trim amount is 30 Programming Touch the button in the line of the desired control such as Digital Trim 1...

Page 85: ...anent ON position As consequence of pushing the switch the deviation of the control sticks positions 2 4 from the related neutral positions are stored as trim value within max imum 30 in about 1 secon...

Page 86: ...e middle position of the servo You can therefore quickly check your settings without having to turn on the receiver This does not relieve you of the responsibility however of carefully testing all the...

Page 87: ...otice Only start a servo test in a model memory creat ed for this purpose without any mixer Otherwise unforeseeable servo deflections will occur To activate the servo test function use a finger or the...

Page 88: ...iated controls starting from the neutral position will be simultaneously and continuously moved back and forth between 100 and 100 during the set period All of the servos that are active in the model...

Page 89: ...89 Personal notes...

Page 90: ...d control element erroneously actioned also has then no influence on your model if it is not ac tive it means when it is not assigned to any function As needed you can therefore assign all of the afor...

Page 91: ...control ele ment remember that the proportional dials and ro tary controls are only recognized after a pause and therefore need to be activated for slightly longer If the travel is no longer sufficien...

Page 92: ...yed the name of the phase 1 which is indicated by the name NORMAL or PHASE 1 As soon as you will have defined one or many oth er phases in the PHASE menu you will be able to switch among those phases...

Page 93: ...um of 0 0 s and touch the RES button to reset the changed value back to the default To recall the graphic display of the servo travels of the Servo menu servo monitor and to activate the Servo test fu...

Page 94: ...hich allows them to be reliably started and stopped without additional intervention The gas limit function elegantly solves this problem by limiting the position of the throttle servo or the per forma...

Page 95: ...ntrol of the throttle pitch control stick to move the marking of the trim ming position into the motor OFF position Notice The position of the throttle pitch control stick is irrelevant when the gas l...

Page 96: ...r transmitter out puts for example Touch the RES button to reset a changed value in the blue and hence active field to the default value Notice Any subsequent changes to the settings such as servo tra...

Page 97: ...In addition several receiver outputs can be assigned the same control function For the sake of clarity it is strongly recommended to only use one of the two op tions 97 Base menu Transmitter output...

Page 98: ...er distance see next page Therefore also the reaction to control buttons or setting changes has normally within a te lemetry connection a delay This does not constitute an error When adjusting the rem...

Page 99: ...iations are described below If you have bound a receiver as RX1 or also as RX2 in the sub menu TX ctl then you can declare one of the two receivers as Telemetry receiver by tapping on the standardly R...

Page 100: ...ot be jumped cannot be changed To change a parameter touch the SET button at the right edge of the screen The selected parameter is represented in white Then use the INC or DEC buttons to change the s...

Page 101: ...xx Firmware version of the receiver S QUA Quality expressed as a percentage of the signal packages from the trans mitter arriving at the receiver S dBm Level in dBm expressed as the percentage of the...

Page 102: ...he receiver s op erating voltage If it is too low do not op erate or start your model L R VOLT lowest receiver operating voltage L R VOLT shows the lowest operating voltage of the receiver since the l...

Page 103: ...an set a cycle time of 10 ms Attention If your system includes some or uses exclusively analogue servos always select 20 ms since the analogue servos may be overloaded and respond by jittering or grow...

Page 104: ...ted input channel As mentioned in the Notices at the begin of the Te lemetry section the 12 control channels of the 12 channel mz 24 HoTT Pro transmitter can be dis tributed as desire within a receive...

Page 105: ...to the fail safe positions set in the POSITION line This prevents landing gear from retracting when the receiver is accidentally turned on while the transmitter is off In normal model opera tion the c...

Page 106: ...5 MASTER CH Signal source or source channel 0 1 depen ding on the receiver SLAVE CH Target channel 0 1 depen ding on the receiver S TRAVEL Mixing on the side of the servo travel in percenta ge servo...

Page 107: ...tics for up to three servos Value Explanation Possible set tings Vx xx Firmware version of the receiver None CURVE 1 2 or 3 CH Channel assig nment of the respective curve setting 1 depending on the re...

Page 108: ...device to be correctly iden tified by the receiver servo connection 5 MUST be switched from SERVO to SENSOR and vice versa Use the INC button to move the icon at the left edge in front of the last li...

Page 109: ...he side of the servo travel and 1500 s corresponds to the neutral position Make sure that the servos do not strike anything during the test routine ALL MIN servo travel on the side In this line set th...

Page 110: ...e servos connected to connections 1 to 4 as well as 5 to 8 can be simultaneously supplied with their con trol signals with a GR 16 receiver No 33508 and the servos connected to connections 1 to 4 5 to...

Page 111: ...he SUMI If the reception fails of the receiver programmed as the SUMO satellite receiver the servo s connect ed to this receiver assume the fail safe positions that are programmed in the satellite rec...

Page 112: ...switches to the right for selecting one of the three possible receiver reactions in case of a loss of reception fail safe HD hold The last signals recognized as being correct are retained at the outp...

Page 113: ...You can switch between the displays of the automat ically activated sensors by touching a red selection button for example Touch The color of the field switches to blue and briefly af terward an angl...

Page 114: ...el additional numeric information is provided to the left The abbreviations have the following meaning Display of RF status Value Explanation QU Quality expressed as a percentage of the signal packag...

Page 115: ...115 Personal notes...

Page 116: ...AUTO position the sensors order will be selected as in the aforemen tioned list Tips To be able to recall also the vario tones you need to assign a switch in the following VARIO value field As soon a...

Page 117: ...ent follows the procedure de scribed in section Control and switch assignment TRANSMITTER After tapping on the desired button Touch to open the selected sub menu In this sub menu you can activate and...

Page 118: ...which is indicated by the name NORMAL or PHASE 1 As soon as you will have defined one or many other phases in the PHASE menu you will be able to switch among those phases Activate the corresponding s...

Page 119: ...ch switch position and with other lines you can proceed in the same way Touch the RES button to reset a changed value in the blue and hence active field to the default value Tip In order to be able to...

Page 120: ...which are included the same single phases with other phase names Nevertheless always start with PHASE 1 of the NORMAL link which is always active when no Phase switch is set or no Phase has been assig...

Page 121: ...to the existing Q Link name by touching the NAM Name button at the right of the display with your finger or provided stylus as described in detail in the section Model name such as to the name START...

Page 122: ...uch SLOW column delay To avoid abrupt changing of the control surfac es positions while switching between phases it is advisable to program in this column a time for smooth transition to the respectiv...

Page 123: ...alue field in the CTL column for example Touch and assign a switch or control switch as de scribed in section Control and switch assignment Notices The phase 1 the normal phase is then always active w...

Page 124: ...menu are identified as AILE aileron ELEV elevator and RUDD rudder instead of CH2 CH3 and CH4 for example Tip An individual characteristic curve for control function 1 Throttle brake can be set accordi...

Page 125: ...dividual setting options al ternatively touch the value field of the line Ch with a finger or the provided stylus Touch Phase depending Dual Rate Expo settings The here mentioned sub menu offers the p...

Page 126: ...Switch as previously described in the Dual Rate func tion in the symmetrical setting of the Expo values the value field in the SYM line to ON and once back to the setting symmetrical Expo values tap...

Page 127: ...or both the dual rate and expo nential function the effects of the two functions over lap as follows After you have finished making your settings touch the BACK button at the top left of the display t...

Page 128: ...ches if desired to switch between the phases Changing the control direction In the wing program of the mz 24 HoTT Pro trans mitter the rear throttle position is the default for the motor off position...

Page 129: ...aphic and numer ic display of the control stick position on and off In switch on stand through the control elements throttle control stick a vertical green line is moved synchronously in the graph bet...

Page 130: ...red point horizontally away from the current control position the point becomes green after a short while and a appears in the Point line This question mark does not relate to the point which has bee...

Page 131: ...for demon stration purposes and do not represent actual throttle curves After you have finished making your settings touch the BACK button at the top left of the display to return to the menu selecti...

Page 132: ...nal can act specifically on the input of another control channel and hence on another receiver output Example V tail mixer The program of the mz 24 HoTT Pro transmitter al ready contains numerous prep...

Page 133: ...any number of mixer outputs can affect one and the same Control channel Particularly in the latter case however you should make sure that the affected servo does not reach its mechanical limit when s...

Page 134: ...defined one or many other phases in the PHASE menu you will be able to switch among those phases Activate the corresponding switch or switches if de sired to switch between the phases Page change Pre...

Page 135: ...by tapping on it Touch The button color changes from black to blue Select one of the control channels 1 12 as target by tapping on it for example Touch The touched control function is transferred imme...

Page 136: ...ST or SLV button of the mixer to be deleted In this example CH 8 to the right of the two angle brackets Touch The button color changes from black to blue Touch the CLR button to reset the blue active...

Page 137: ...nctions to one of the two INC DEC buttons The influence of the trim can however be switched off if required in the value field of the TRIM line Touch Programming To set the mixing value on the left of...

Page 138: ...point 30 to the right always for example also 50 to the bottom tap on the value field on the right near the OFFSET Y Touch The color of the field switches from black to blue Use the button to move th...

Page 139: ...he following example the control at input 8 is at 45 of the control travel The output signal remains 0 since a value has not been entered The intersection of this line with the mixer curve is identifi...

Page 140: ...rol position the point becomes green after a short while and a appears in the Point line This question mark does not relate to the point which has been moved but rather indicates that another point ca...

Page 141: ...nction inputs see Defi nition of terms of a mz 24 HoTT TEACH transmitter to the PUPIL transmitter either individually or in any desired combination The standard with TEACH labeling value field or butt...

Page 142: ...to the TEACH transmitter see the next two pages More information can be found in the main Graupner FS catalogue and on the Internet at www graupner de The control functions of the PUPIL transmitter m...

Page 143: ...M with a 3 pin jack plug into a socket of the DSC system It is not designed for this purpose The DSC socket can only be used for ca bles with a 2 pin jack plug Trainer cable 4179 1 for trainer mode b...

Page 144: ...with DSC socket Trainer transmitter with TEACH module No 3290 2 3290 19 3290 22 mc 16 HoTT mc 20 HoTT mc 32 HoTT mx 12 HoTT mx 16 HoTT mx 20 HoTT mz 10 HoTT mz 12 HoTT mz 18 HoTT mz 24 HoTT Pro mc 19...

Page 145: ...nd coupling functions are made in the TEACH transmitter and are transmitted by the TEACH transmitter to the receiver Observe the standard conventions in the model types motor airplane and glider so as...

Page 146: ...arning message flashes every second at the top left in the transmitter s main display see the figure at the end of this section Open the switch that has just been assigned Binding the PUPIL transmitte...

Page 147: ...l If the T switch is in the pupil position in this situa tion acoustic warnings sound while the signal is lost and a warning message flashes every second at the top left of the display In both cases y...

Page 148: ...ormed as usually in both value fields of one line as described in the Control and switch assignment section Tap on the left value field of the logical switch to program for example Touch Weather the c...

Page 149: ...witch assignation e g L3i instead of L3 only the switch direction of this specific switch will be reversed and not the logical switch in general By the way if a specific L switch activates a function...

Page 150: ...ingle movements Selection and activation of the control channels Channel selection You can leave the three pre set channels CH9 CH10 and CH11 or you can change by tap ping with a finger or with the pr...

Page 151: ...has been set Then what has to happen or has not to happen after a determined time lapse Activate then the STEP value field in which you tap on Touch and set it by tapping on the button on the right l...

Page 152: ...monitor which can be recalled by tapping on the Sv button on the right up in the display or alter natively by pushing at the same time both arrow keys on the left of the display All the movements will...

Page 153: ...Helicopter model function menus Common function menus 153 Personal notes...

Page 154: ...hase dependent settings of the pitch curves The here mentioned sub menu offers the possibility of phase specific settings Recognizable on the top left side of the display in green color is displayed t...

Page 155: ...can set the next support point by touching the ENT button At the same time a green point appears at the in tersection between the yellow and green lines Touch Once the green line is moved with the co...

Page 156: ...ouch the Y axis blue button again to deactivate the function The button color changes again to red Notice Remember that the percentages in the IN put and OUT put line always refer to the momentary pos...

Page 157: ...he MIXER column in the desired line for example You can change the current value in the blue ac tive value field by touching the or buttons at the right edge of the display for example Touch the RES b...

Page 158: ...is lim ited by the available motor output in autorotation flight however it is limited by the stall at the main rotor blades To provide sufficient lift even while the speed is decreasing when flaring...

Page 159: ...eva tion control You can shorten the approach by carefully pulling back on the elevation control and sensitively reducing the pitch or extending the approach by pushing the elevation control forward a...

Page 160: ...vel as well as a point to be placed in the control center describe a linear characteristic for the pitch control curve Support points can be set changed and deleted in the same manner as described in...

Page 161: ...range of the throttle limiter reliably exceeds or falls below the setting range of the motor con trol unit which normally extends from 100 to 100 The Travel setting of the throttle limiter may have to...

Page 162: ...ro transmitter programs allow the throttle pitch and torque compensating curves to be independently adjusted These curves can be characterized with up to sev en points but generally fewer points are s...

Page 163: ...n be adjusted using the trim control of the throttle pitch control stick The idling position that you set is displayed in the transmitter s basic display by a horizontal bar in the position dis play o...

Page 164: ...e the vertical line to point L with the pitch control stick and corre spondingly change its value This picture only shows an example of changes of the minimum pitch setting Once this flight response i...

Page 165: ...h are generally loosely hinged would not smoothly follow such a sudden ac celeration and would swing out of their normal posi tion perhaps even striking the tail boom After starting the motor you shou...

Page 166: ...indepen dent of the control stick deflection The gyro s effect can however be additionally varied smoothly depending on the phase if desired between a minimum and maximum using a control assigned in...

Page 167: ...e response is slower there is a risk that the model s tail will start to oscillate even at low gyro gain settings Here further reductions to gyro gain will need to be made to eliminate the oscillation...

Page 168: ...rnor ACT line In the above figure this option is normally OFF which means that the control channel 8 can be normally used without restriction If you have or wish to connect a governor to output 8 to a...

Page 169: ...169 Personal notes...

Page 170: ...function ACT line To turn this option on and off touch the value field of the ACT line for example Ctrl sw line In this line as described in the Control and switch assignment section assign the same s...

Page 171: ...reen arrow for example Touch the RES button to reset a changed value in a blue active value field to the default value After making your settings leave this menu and go to Menu selection by touching t...

Page 172: ...will also be obscured by select ing 1 SERVO With all other swashplate linkages employing 2 4 collective pitch servos the mixer ratios and directions are set up by default as represented in the follow...

Page 173: ...t is the limitation of the overall swashplate deflection or the swashplate tilt angle can be limited between 100 the deflection has a circular limit to the value achievable with roll or elevation and...

Page 174: ...oth er phases in the PHASE menu you will be able to switch among those phases Activate the corresponding switch or switches if de sired to switch between the phases ACT column active In in the value f...

Page 175: ...g the BACK button at the top left of the display Touch Notice The mixed values portrayed here are for demonstration purposes only and do not rep resent real values Select another mixer here if desired...

Page 176: ...tle tracking in these three mixers Phase dependent settings The here mentioned sub menu offers the possibility of phase specific settings Recognizable on the top left side of the display in green colo...

Page 177: ...election by touching the BACK button at the top left of the display Touch Notice The mixed values portrayed here are for demonstration purposes only and do not rep resent real values Select another mi...

Page 178: ...mixer so that the helicopter does not rotate about the vertical axis even during long vertical ascents and descents as a result of differing main ro tor torque in comparison to hovering While hoverin...

Page 179: ...ce of the gearing the fuselage may still rotate slightly This relatively slight torque should then be corrected using the tail rotor blade pitch angle In any case this value is between 0 and a pitch a...

Page 180: ...LOW option by touching the associated button with a finger or the provided stylus for example In the Ctrl sw line assign a control for adding or re moving the corrective value to be set in the line SE...

Page 181: ...sets determines the respective figure program in which the control stick signals are set at a fixed value independent of the momentary control stick positions That is all aileron elevator and rudder s...

Page 182: ...liminated without having to compensate manually the rudder each time you act on the aileron control Phase dependent settings The here mentioned sub menu offers the possibility of phase specific settin...

Page 183: ...th the differentiation value for the right aileron and any inboard aileron Aileron 2L and Aileron 2R Touch the RES button to reset a changed value in the blue and hence active field to the default val...

Page 184: ...f the two following figures shows an exam ple of the display when setting the minimum 2AILE the central figure in case of selecting up to 4AILE and the bottom figure shows the display of differen tiat...

Page 185: ...tion the adverse yaw can be reduced or eliminated without having to compensate manually the rudder each time you act on the aileron control When the ailerons are raised as part of a butterfly configur...

Page 186: ...flec tion of the flap control stick To set up the reduction of the differentiation tap in the left one of the two columns on the desired val ue field with a finger or the provided stylus for ex ample...

Page 187: ...187 Personal notes...

Page 188: ...h In the value field in the Ctrl sw column assign a control or control switch to the mixer as described in section Control and switch assignment RUDD AILE line rudder aileron Frequently in aerobatic f...

Page 189: ...mpensate for the negative torque in conjunction with Aileron differenti ation which smooths flight in curves Of course the rudder remain separately controllable The setting range of 150 makes it possi...

Page 190: ...rudder is actuated This is particularly problematic in knife edge flying in which the only lift is from the fuselage when the rudder is deflected since the wings are vertical in this flight position C...

Page 191: ...but ton labeled SERVO in the top right of the display or alternatively pushing with inactivated value field at the same time the keys on the left of the display Touch the BACK button or push the ESC k...

Page 192: ...o switch among those phases Activate the corresponding switch or switches if desired to switch between the phases Programming ACT column active Within the value field for this column speci fy whether...

Page 193: ...n to reset a changed value in the blue and hence active field to the default val ue OFFSET line In this line set the phase specific positions for all of the flaps in the respective model This allows y...

Page 194: ...e in the blue and hence active field to the default value After you have finished making your settings touch the BACK button at the top left to return to the mixer selection Touch AILE FLAP line In th...

Page 195: ...s of the actual model After you have finished making your settings touch the BACK button at the top left to return to the mixer selection Touch FLAP ELEV line When setting flaps upward or downward tor...

Page 196: ...mentioned sub menu offers the possibility of phase specific settings Recognizable on the top left side of the display in green color is displayed the phase name As standard is displayed the name of th...

Page 197: ...CH6 for example the left proportional control lever SL2 so as an offset value e g then all the provided flaps move to the con trol position CTL Set Offset and travel settings so as to the RATE val ue...

Page 198: ...value in the blue and hence active field to the default value After completing the settings for the ailerons you can switch to the page for setting the flaps by touch ing NEXT at the right edge of the...

Page 199: ...199 Personal notes...

Page 200: ...switches if desired to switch between the phases Programming In the display described below enter the amount and direction of the deflection of your flaps and possibly also the elevator for braking I...

Page 201: ...he desired settings using the proce dure described above for example To prevent the sudden deflection of brake flaps ad justed in this manner when activating the selected control touch the NEXT button...

Page 202: ...all This interaction of the flaps aileron and elevator con trol the gliding angle when approaching a landing The butterfly flap position is frequently used in sports models instead of brake flaps or s...

Page 203: ...e control element assigned to the input CH1 by default the throttle brake control stick to the position at which the flaps are to be retracted or closed The current control position is numerically dis...

Page 204: ...below The greater the projected sur face of the protruding rudder the greater the braking effect Elevator curve display Switch to the display for the control position by touch ing the ST OFF button a...

Page 205: ...After you have finished making your settings touch the BACK button at the top left of the display to return to the menu selection 205 Function menu Airplane models butterfly...

Page 206: ...1 As soon as you will have defined one or many other phases in the PHASE menu you will be able to switch among those phases Activate the corresponding switch or switches if de sired to switch between...

Page 207: ...Fixed wing model function menus System menus 207 Personal notes...

Page 208: ...ault Notice The setting selected in this menu does not de pend on the model memory and is at the same time valid for all of the model memories and as comprehensible for all the model types stored in t...

Page 209: ...rol mode different from the default touch the yellow button on the right of the ST MODE button until the number appears of the control mode that you want for example Touch the BACK button at the top l...

Page 210: ...back and forth between ON and OFF touch the field for the other options for exam ple Touch Moreover in the Throttle Cut line it is also available the option REV While with ON the switch on warning wit...

Page 211: ...211 Personal notes...

Page 212: ...ibed in the section Model name for example Tapping on the button deletes the last character tapping on deletes all the characters in the blue input field Tapping on the button in the lower right part...

Page 213: ...h the BACK button at the top left of the dis play to leave the locking menu If in the status line appears in place of unlocked the message error a wrong PIN has just been input or another er ror has h...

Page 214: ...n set the warning threshold of the display depending on the selected battery type in the line above in increments of 0 1 V between 4 5 and 5 5 V NiMH battery or 3 4 and 4 2V lithium ion lithium polyme...

Page 215: ...ume line In this line you can individually adjust the volume of the acoustic signals and voice triggers of the trans mitter Repeatedly touch the field in the line Voice Volume Touch The color of the f...

Page 216: ...ouch the field of the line Brightness Touch The color of the field switches from black to blue Touch or at the right edge of the display to select the appropriate brightness from a range of 1 20 for e...

Page 217: ...uching the touch sensitive fields and vice versa Repeatedly touch the field in the line Touch sense Touch The color of the field switches from black to blue Touch or at the right edge of the display t...

Page 218: ...ON or vice ver sa Notice With the switch from OFF to ON in the Out door disp line it changes also the representation of the display Telemetry data display RFID line The RFID of the transmitter is disp...

Page 219: ...219 Personal notes...

Page 220: ...itions without exerting force at the limit position In each of these eight pos sible limit positions the side dependent indication for exactly 100 or 100 should be displayed For example if control 2 i...

Page 221: ...is in the left top corner of the red square Move the right control stick to the left front corner without exerting pressure at the limit If the transmitter is incorrectly adjusted the results can have...

Page 222: ...after this menu item is opened Touch the large red triangle or push the ENT button on the right side of the display to start playing the first MP3 file of album 1 The file starts playing immediate ly...

Page 223: ...to yellow for example Pressing the key on the left of the display or tapping the point with the sign on the lower right increases the volume by analogy Album To change to the next album tap the right...

Page 224: ...el You can jump forward to a title by touch ing the right selection button and jump back a title by touching the left button similar to cor responding buttons on MP3 players or other players Alternati...

Page 225: ...her the SEARCH but ton nor the field strength indicators are visible on the upper display edge and no data are displayed in any case no receiver is within range which can respond to the telemetry link...

Page 226: ...spective product RECEIVER This display offers a graph of the data from the display RX DATAVIEW of the Telemetry menu SETTINGS DATAVIEW It has the following meaning Value Explanation R dB Level in dBm...

Page 227: ...n see the data of sensor 2 In the right top half of the display the current cell volt ages are displayed graphically and numerically of a lithium polymer battery with up to six cells as well as the le...

Page 228: ...eceived by the receiver expressed as percentage see page 101 MAX Maximum level in meters relative to the starting location MIN Maximum altitude below the starting location in meters m s m s Climb Sink...

Page 229: ...peed Right value maximum motor speed since the device has been switched on Cur AMP Max Left value Momentary current Right value maximum current since the device has been switched on Microcopter displa...

Page 230: ...programming the flaps positions in the sub menu Trim Step of the basis menu In one of the two DIGITRIM lines tap on the normal ly labeled as NONE button and change its labeling by tapping on the and a...

Page 231: ...ther pairs of flaps as well as in the desired phases Lastly determine the proportional entrainment of the elevator via the mixing value and the mixing direction of the mixer CH6 CH3 for example 231 Pr...

Page 232: ...already the first flights as well as the resulting adjustments behind it Programming f you want to adjust the pitch trimming in the Heli pro gram using one of the two Digitrim buttons assign this butt...

Page 233: ...ave been convinced by the correct lat eral deflection of all rudders Also it is by no means a disadvantage if the model has already the first flights as well as the resulting adjustments behind it Pro...

Page 234: ...discharge when two batteries are used Appropriate for a 5 or 6 cell NiMH battery or 2 cell LiPo or LiFe battery Graupner JR G3 5 G2 and BEC plug in systems Three adjustable levels for the output volt...

Page 235: ...in volt age Voltage current and capacity measurement with warning thresh olds for min and max voltage max capacity and max current Rotational speed measurement with rotational speed regulation program...

Page 236: ...er temperature Receiver voltage Servo reversal Servo neutral position Servo travel Cycle time Channel switching Fail Safe settings Mixer settings Servo test Dimensions approx 76 mm x 72 mm x 17 mm L x...

Page 237: ...237 Personal notes...

Page 238: ...238 Personal notes...

Page 239: ...239 Personal notes...

Page 240: ...e accept ed for printing errors PN UG 01 V2016 mg Although we have carefully checked the information contained in these instructions and checked that it is correct we can ac cept no liability of any k...

Reviews: