


Chapter 5: Using the PDU
59
LED state
Outlet status
What it means
circuitry's power supply is broken.
Red
ON and LIVE
LIVE power. The outlet is on and power is
available.
Red flashing
ON and LIVE
The current flowing through the outlet is greater
than the upper warning (non-critical) threshold.
Green
OFF and LIVE
The outlet is turned off and power is available
when the outlet is turned on.
Green flashing
OFF and NOT LIVE The outlet is turned off and power is not available
because the circuit breaker has tripped.
Red and Green
flashing alternatively ON and NOT LIVE
The outlet is turned on but power is not available
because a circuit breaker has tripped.
Cycling through Red,
Green and Yellow
n/a
The PX device has just been plugged in and its
management software is loading. LED color cycling
does not interrupt power to outlets. It is an
indication of firmware loading.
Note: When a PX device powers up, it proceeds with the power-on self
test and software loading for a few moments. At this time, the outlet
LEDs cycle through different colors. When the software has completed
loading, the outlet LEDs show a steady color and the front panel display
illuminates.
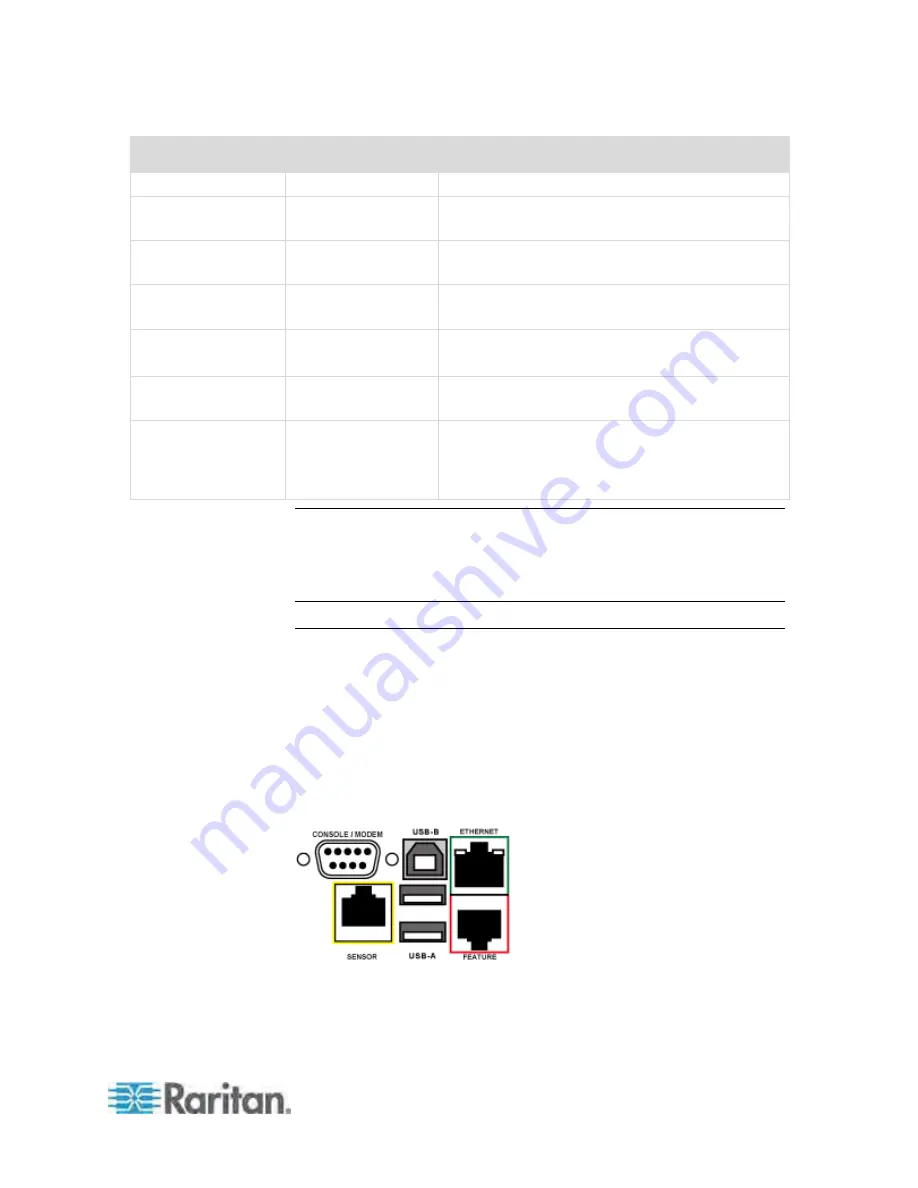
Connection Ports
Depending on the model you purchased, the total number of ports
available varies.
Zero U Connection Ports
For most of PX3 series Zero U models, there are 7 ports on the front
panel. The PX3 PDU has two USB-A ports.
PX3 Phase II models:
Содержание PX3-4000 series
Страница 5: ......
Страница 350: ...Chapter 6 Using the Web Interface 329 10 To print the currently selected topic click the Print this page icon...
Страница 615: ...Appendix H LDAP Configuration Illustration 594 5 Click OK The PX_Admin role is created 6 Click Close to quit the dialog...
Страница 627: ...Appendix I RADIUS Configuration Illustration 606 Note If your PX uses PAP then select PAP...
Страница 628: ...Appendix I RADIUS Configuration Illustration 607 10 Select Standard to the left of the dialog and then click Add...
Страница 629: ...Appendix I RADIUS Configuration Illustration 608 11 Select Filter Id from the list of attributes and click Add...
Страница 632: ...Appendix I RADIUS Configuration Illustration 611 14 The new attribute is added Click OK...
Страница 633: ...Appendix I RADIUS Configuration Illustration 612 15 Click Next to continue...
Страница 648: ...Appendix J Integration 627 3 Click OK...
Страница 661: ...Appendix J Integration 640 2 Launch dcTrack to import the spreadsheet file...


