

Chapter 6: Using the Web Interface
160
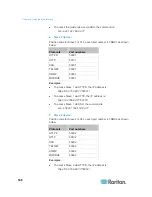
Setting Up Roles
A role defines the operations and functions a user is permitted to perform
or access. Every user must be assigned at least a role.
The PX is shipped with two built-in roles:
Admin
and
Operator
.
The Admin role provides full permissions. You can neither modify nor
delete this role.
The Operator role provides limited permissions for frequently-used
functions. You can modify or delete this role. By default, the Operator
role contains these permissions:
- Acknowledge Alarms
- View Event Settings
- View Local Event Log
- Change Pdu, Inlet, Outlet & Overcurrent Protector Configuration
- Change Own Password
- Switch Outlet (all outlets)
Note: PX3-3000 and PX3-4000 series are NOT outlet-switching
capable so the "Switch Outlet" permission is not available.
The Operator role is assigned to a newly created user profile by
default. See
Creating a User Profile
(on page 154).
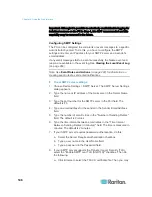
Creating a Role
Create a new role when you need a new combination of permissions.
To create a role:
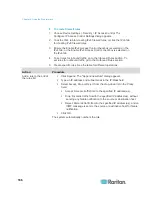
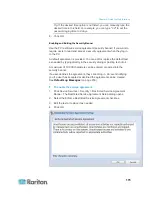
1. Choose User Management > Roles. The Manage Roles dialog
appears.
Tip: You can also access the Manage Roles dialog by clicking the
Manage Roles button in the Edit User 'XXX' dialog.
2. Click New. The Create New Role dialog appears.
3. Type the role's name in the Role Name field.
4. Type a description for the role in the Description field.
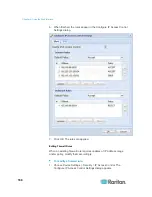
5. Click the Privileges tab to assign one or multiple permissions.
a. Click Add. The "Add Privileges to new Role" dialog appears.
b. Select the permission you want from the Privileges list.
Содержание PX3-4000 series
Страница 5: ......
Страница 350: ...Chapter 6 Using the Web Interface 329 10 To print the currently selected topic click the Print this page icon...
Страница 615: ...Appendix H LDAP Configuration Illustration 594 5 Click OK The PX_Admin role is created 6 Click Close to quit the dialog...
Страница 627: ...Appendix I RADIUS Configuration Illustration 606 Note If your PX uses PAP then select PAP...
Страница 628: ...Appendix I RADIUS Configuration Illustration 607 10 Select Standard to the left of the dialog and then click Add...
Страница 629: ...Appendix I RADIUS Configuration Illustration 608 11 Select Filter Id from the list of attributes and click Add...
Страница 632: ...Appendix I RADIUS Configuration Illustration 611 14 The new attribute is added Click OK...
Страница 633: ...Appendix I RADIUS Configuration Illustration 612 15 Click Next to continue...
Страница 648: ...Appendix J Integration 627 3 Click OK...
Страница 661: ...Appendix J Integration 640 2 Launch dcTrack to import the spreadsheet file...


