


Chapter 4: Connecting External Equipment (Optional)
46
Connecting Asset Sensors to the PX
You need both asset sensors and asset tags for tracking IT devices.
Asset tags provide an ID number for each IT device. The asset tags are
adhered to an IT device at one end and plugged in to an asset
management sensor at the other.
The asset sensor is connected to a PX, and the asset tag transmits the
ID and positioning information to the asset sensor.
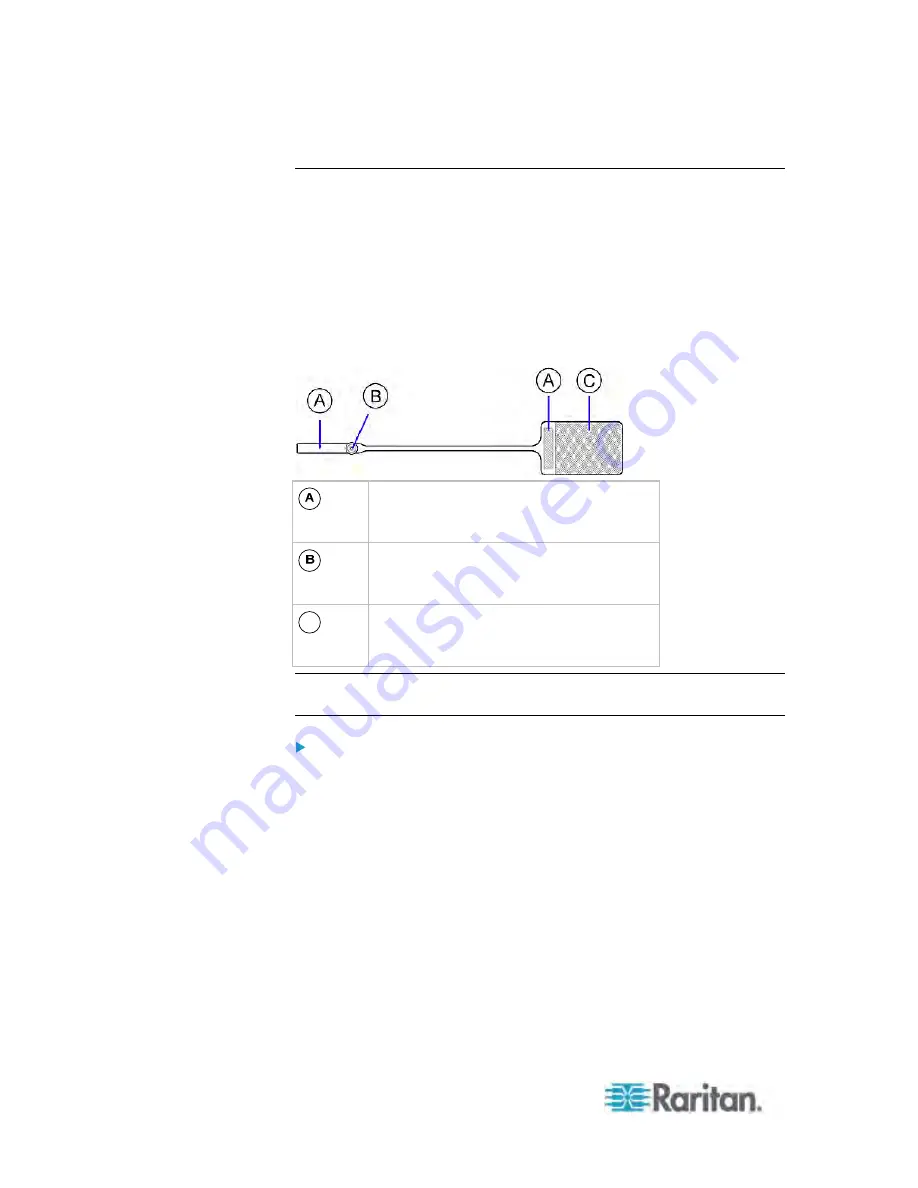
The following diagram illustrates an asset tag.
Barcode (ID number), which is available
on either end of the asset tag
Tag connector
C
Adhesive area with the tape
Note: The barcode of each asset tag is unique and is displayed in the PX
device's web interface so it can easily be identified.
To connect asset sensors to the PX device:
1. Affix the adhesive end of an asset tag to each IT device through the
tag's tape.
2. Plug the connector on the other end of each asset tag into the
corresponding tag port on the asset sensor.
3. Connect the asset sensor assembly on the rack to the PX device,
using a standard network patch cable (CAT5e/6).
a. Connect one end of the cable to the RJ-45 connector on the
MASTER asset sensor.
b. Connect the other end of the cable to the FEATURE port on the
PX device.
Содержание PX3-4000 series
Страница 5: ......
Страница 350: ...Chapter 6 Using the Web Interface 329 10 To print the currently selected topic click the Print this page icon...
Страница 615: ...Appendix H LDAP Configuration Illustration 594 5 Click OK The PX_Admin role is created 6 Click Close to quit the dialog...
Страница 627: ...Appendix I RADIUS Configuration Illustration 606 Note If your PX uses PAP then select PAP...
Страница 628: ...Appendix I RADIUS Configuration Illustration 607 10 Select Standard to the left of the dialog and then click Add...
Страница 629: ...Appendix I RADIUS Configuration Illustration 608 11 Select Filter Id from the list of attributes and click Add...
Страница 632: ...Appendix I RADIUS Configuration Illustration 611 14 The new attribute is added Click OK...
Страница 633: ...Appendix I RADIUS Configuration Illustration 612 15 Click Next to continue...
Страница 648: ...Appendix J Integration 627 3 Click OK...
Страница 661: ...Appendix J Integration 640 2 Launch dcTrack to import the spreadsheet file...


