


Chapter 6: Using the Web Interface
121
Modifying Network Settings
The PX was configured for network connectivity during the installation
and configuration process. See
Configuring the PX
(on page 16). If
necessary, you can modify any network settings using the web interface.
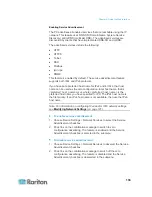
Selecting the Internet Protocol
The PX device supports two types of Internet protocols -- IPv4 and IPv6.
You can enable either or both protocols. After enabling the desired
Internet protocol(s), all but not limited to the following protocols will be
compliant with the enabled Internet protocol(s):
LDAP
NTP
SMTP
SSH
Telnet
FTP
SSL/TLS
SNMP
SysLog
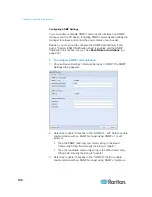
To select the appropriate Internet Protocol:
1. Choose Device Settings > Network. The Network Configuration
dialog appears.
2. Click the IP Protocol tab.
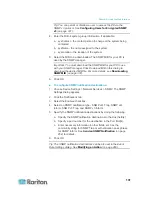
3. Select one checkbox according to the Internet protocol(s) you want
to enable:
IPv4 only: Enables IPv4 only on all interfaces. This is the default.
IPv6 only: Enables IPv6 only on all interfaces.
IPv4 and IPv6: Enables both IPv4 and IPv6 on all interfaces.
4. If you selected the "IPv4 and IPv6" checkbox in the previous step,
you must determine which IP address is used when the DNS
resolver returns both IPv4 and IPv6 addresses.
IPv4 Address: Use the IPv4 addresses returned by the DNS
server.
IPv6 Address: Use the IPv6 addresses returned by the DNS
server.
5. Click OK.
Содержание PX3-4000 series
Страница 5: ......
Страница 350: ...Chapter 6 Using the Web Interface 329 10 To print the currently selected topic click the Print this page icon...
Страница 615: ...Appendix H LDAP Configuration Illustration 594 5 Click OK The PX_Admin role is created 6 Click Close to quit the dialog...
Страница 627: ...Appendix I RADIUS Configuration Illustration 606 Note If your PX uses PAP then select PAP...
Страница 628: ...Appendix I RADIUS Configuration Illustration 607 10 Select Standard to the left of the dialog and then click Add...
Страница 629: ...Appendix I RADIUS Configuration Illustration 608 11 Select Filter Id from the list of attributes and click Add...
Страница 632: ...Appendix I RADIUS Configuration Illustration 611 14 The new attribute is added Click OK...
Страница 633: ...Appendix I RADIUS Configuration Illustration 612 15 Click Next to continue...
Страница 648: ...Appendix J Integration 627 3 Click OK...
Страница 661: ...Appendix J Integration 640 2 Launch dcTrack to import the spreadsheet file...


