


Chapter 6: Using the Web Interface
279
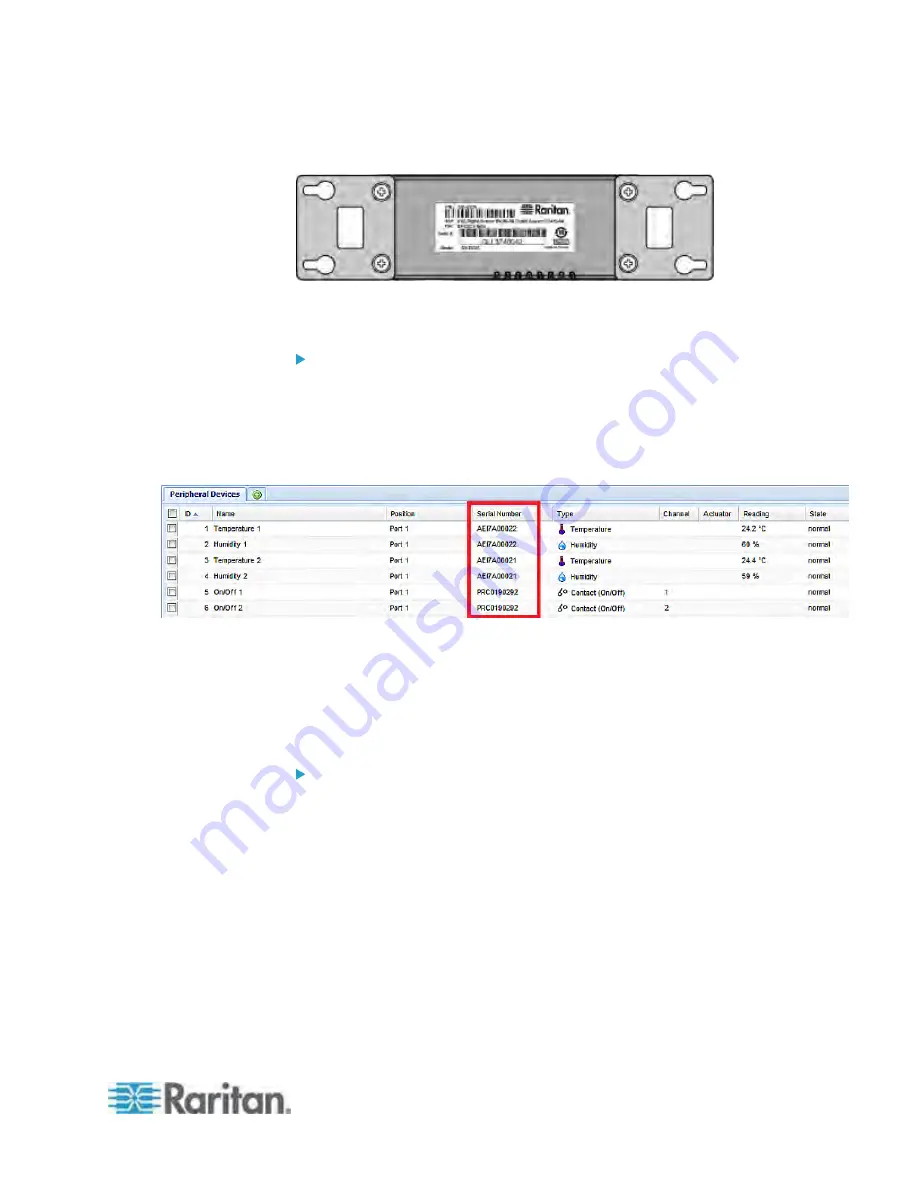
A DPX2 or DX sensor has a serial number tag attached to its rear side.
The serial number for each sensor or actuator appears listed in the web
interface after each sensor or actuator is detected by the PX.
To identify each detected environmental sensor or actuator via
serial numbers:
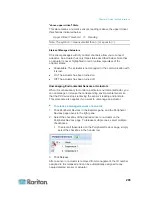
1. Click Peripheral Devices in the Explorer pane, and the Peripheral
Devices page opens in the right pane.
2. Match the serial number from the tag to those listed in the sensor
table.
Matching the Position
Both DPX2 and DX sensor packages can be daisy chained. The PX can
indicate each sensor or actuator's position by showing the sensor port
where the environmental sensor package is connected as well as its
sequence in a sensor daisy chain.
To identify an environmental sensor or actuator through its
position:
1. Click Peripheral Devices in the Explorer pane, and the Peripheral
Devices page opens in the right pane.
Содержание PX3-4000 series
Страница 5: ......
Страница 350: ...Chapter 6 Using the Web Interface 329 10 To print the currently selected topic click the Print this page icon...
Страница 615: ...Appendix H LDAP Configuration Illustration 594 5 Click OK The PX_Admin role is created 6 Click Close to quit the dialog...
Страница 627: ...Appendix I RADIUS Configuration Illustration 606 Note If your PX uses PAP then select PAP...
Страница 628: ...Appendix I RADIUS Configuration Illustration 607 10 Select Standard to the left of the dialog and then click Add...
Страница 629: ...Appendix I RADIUS Configuration Illustration 608 11 Select Filter Id from the list of attributes and click Add...
Страница 632: ...Appendix I RADIUS Configuration Illustration 611 14 The new attribute is added Click OK...
Страница 633: ...Appendix I RADIUS Configuration Illustration 612 15 Click Next to continue...
Страница 648: ...Appendix J Integration 627 3 Click OK...
Страница 661: ...Appendix J Integration 640 2 Launch dcTrack to import the spreadsheet file...


