


Appendix K: Additional PX Information
652
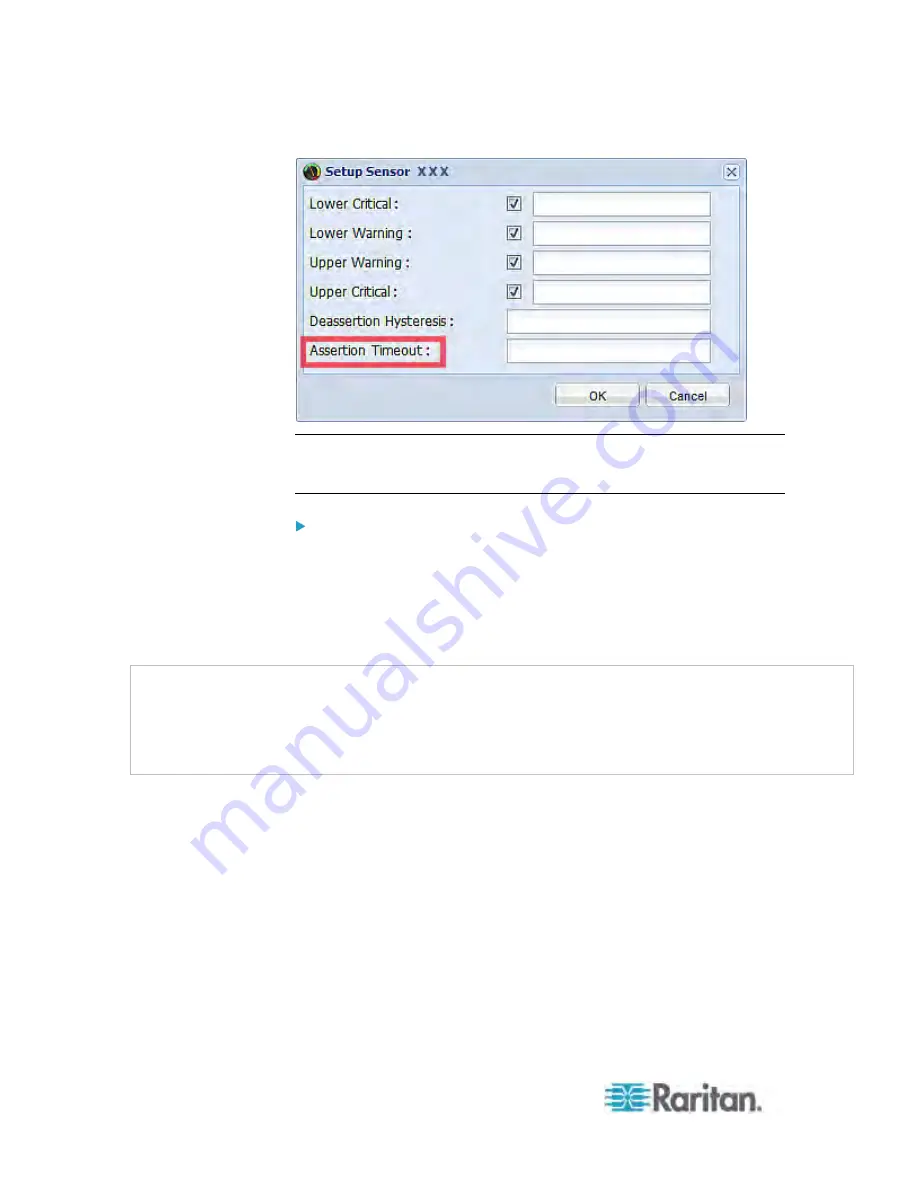
Note: For most sensors, the measurement unit in the "Assertion Timeout"
field is sample. Because the PX measures each sensor every second,
timing of a sample is equal to a second.
How "Assertion Timeout" is helpful:
If you have created an event rule that instructs the PX to send
notifications for assertion events, setting the "Assertion Timeout" is
helpful for eliminating a number of notifications that you may receive in
case the sensor's reading fluctuates around a certain threshold.
Assertion Timeout Example for Temperature Sensors
Assumption:
Upper Warning threshold is enabled.
Upper Warning = 25 (degrees Celsius)
Assertion Timeout = 5 samples (that is, 5 seconds)
When a temperature sensor's reading exceeds 25 degrees Celsius,
moving from the "normal" range to the "above upper warning" range, the
PX does NOT immediately announce this warning state. Instead it waits
for 5 seconds, and then does either of the following:
If the temperature remains above 25 degrees Celsius in the "above
upper warning" range for 5 seconds, the PX turns on the "assertion"
action to announce the "above upper warning" state.
If the temperature drops below 25 degrees Celsius within 5 seconds,
the PX does NOT turn on the "assertion" action.
Содержание PX3-4000 series
Страница 5: ......
Страница 350: ...Chapter 6 Using the Web Interface 329 10 To print the currently selected topic click the Print this page icon...
Страница 615: ...Appendix H LDAP Configuration Illustration 594 5 Click OK The PX_Admin role is created 6 Click Close to quit the dialog...
Страница 627: ...Appendix I RADIUS Configuration Illustration 606 Note If your PX uses PAP then select PAP...
Страница 628: ...Appendix I RADIUS Configuration Illustration 607 10 Select Standard to the left of the dialog and then click Add...
Страница 629: ...Appendix I RADIUS Configuration Illustration 608 11 Select Filter Id from the list of attributes and click Add...
Страница 632: ...Appendix I RADIUS Configuration Illustration 611 14 The new attribute is added Click OK...
Страница 633: ...Appendix I RADIUS Configuration Illustration 612 15 Click Next to continue...
Страница 648: ...Appendix J Integration 627 3 Click OK...
Страница 661: ...Appendix J Integration 640 2 Launch dcTrack to import the spreadsheet file...


