NetCol8000-C(070-260) In-room Chilled Water Smart
Cooling Product
User Manual
6 System Operation and Maintenance
Issue 06 (2020-01-13)
Copyright © Huawei Technologies Co., Ltd.
251
Before removing the valve, close the upstream valve for water inlet/outlet pipes and drain all
water from the smart cooling product.
Step 4
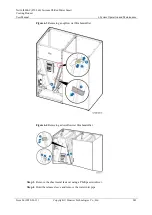
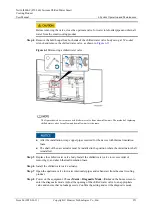
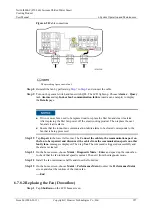
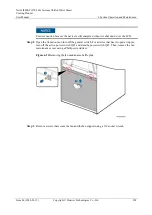
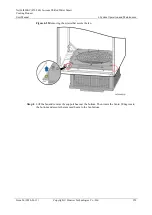
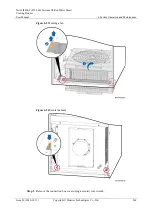
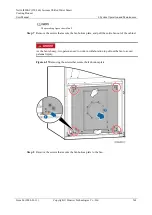
Remove the hold hoops from both ends of the chilled water valve body using a 15# socket
wrench and remove the chilled water valve, as shown in
Figure 6-13
Removing a chilled water valve
The figure shows how to remove a chilled water valve from a downflow unit. The method of replacing
chilled water valves for upflow and downflow units is the same.
After the installation, wrap copper pipes reserved for the device with thermal insulation
foam.
The shaft of the new actuator must be installed in the position where the old actuator shaft
is installed.
Step 5
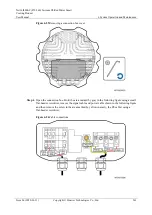
Replace the chilled water valve body. Install the chilled water valve in reverse order of
removing it, and attach thermal insulation foam.
Step 6
Install the chilled water valve actuator.
Step 7
Open the upstream valve for water inlet/outlet pipes and exhaust air from the smart cooling
product.
Step 8
Power on the equipment. Choose
Maint
>
Diagnostic Mode
>
Enter
on the home screen to
enter the diagnostic mode. Adjust the opening of the chilled water valve to an appropriate
value and ensure that no leakage exists. Confirm the setting and exit the diagnostic mode.

