


27
REPLACING SUPPLIES AND MAINTENANCE
3
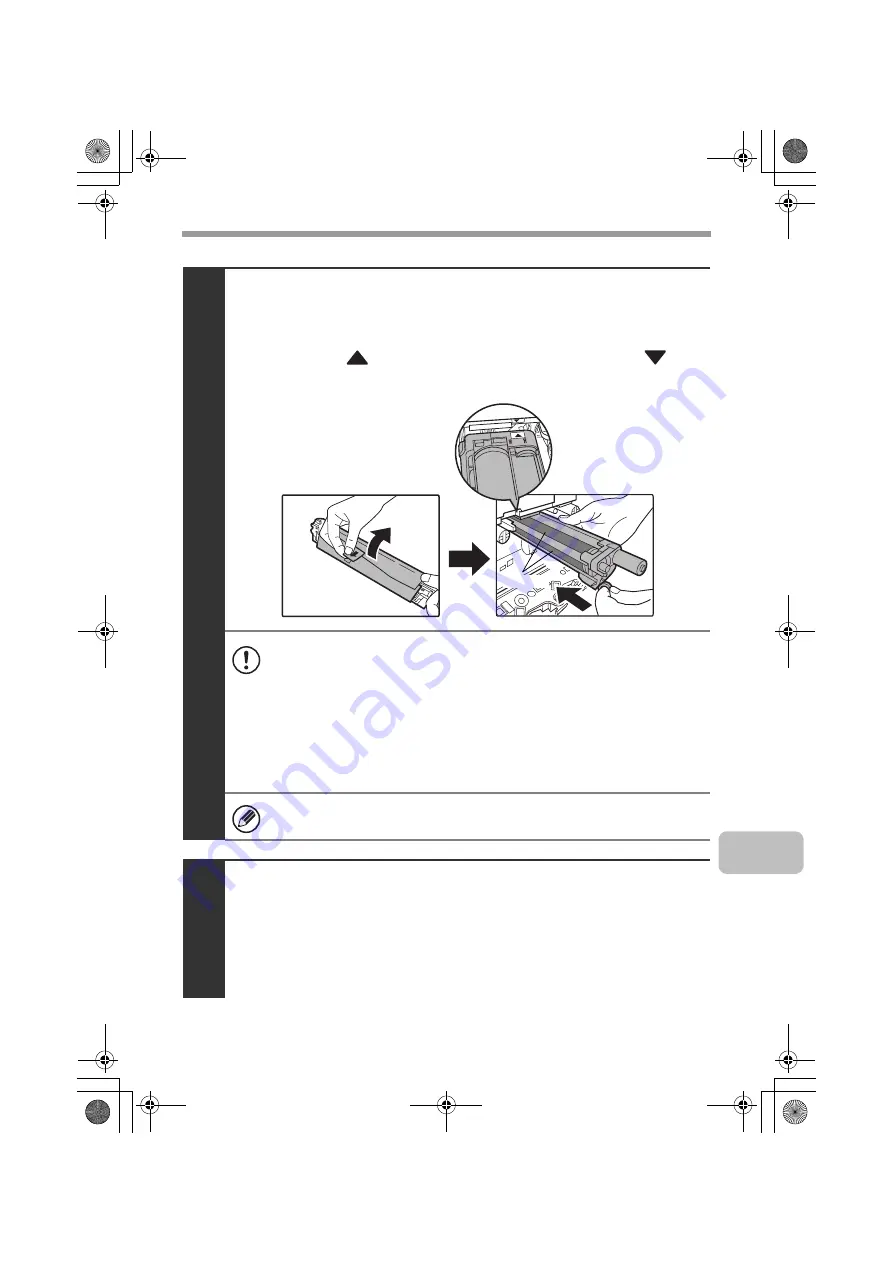
Remove the protective material from the drum
cartridge and slowly insert the drum cartridge
along the guides.
Make sure that the
mark on the drum cartridge is aligned with the
mark
on the machine as you insert the drum cartridge.
• To remove the protective material, slowly pull it straight out so that it
does not tear.
• When installing the drum cartridge, do not touch or damage the drum.
This may cause a failure.
• After removing the protective material, immediately insert the drum
cartridge in the machine. Do not allow the drum cartridge to be directly
exposed to sunlight or electric light.
• Do not tilt the drum cartridge or insert it in the wrong direction or
orientation. This may damage the drum cartridge or cause a failure.
Make sure that the colors on the new drum cartridge and the insertion
label match.
4
Replace the developer cartridge and toner
collection container, close the front cover of the
machine, and turn on the power.
For the procedure for replacing the developer cartridge and toner collection
container, see steps 7 to 8 and steps 10 to 11 of "Replacing the developer
cartridge" (page 18).
Drum
mxc401_us_saf.book 27 ページ 2008年10月15日 水曜日 午前11時52分
Summary of Contents for MX-C311
Page 79: ...mxc401_us_saf book 76 ページ 2008年10月15日 水曜日 午前11時52分 ...
Page 80: ...mxc401_us_saf book 77 ページ 2008年10月15日 水曜日 午前11時52分 ...
Page 156: ...Reduce copy mistakes Print one set of copies for proofing ...
Page 158: ...Make a copy on this type of paper Envelopes and other special media Transparency film ...
Page 163: ...Conserve Print on both sides of the paper Print multiple pages on one side of the paper ...
Page 187: ...Organize my files Delete a file Delete all files Periodically delete files Change the folder ...
Page 364: ...3 18 PRINTER Contents 4 Click the Print button Printing begins ...