1-18
AUTHENTICATION BY LOGIN NAME / PASSWORD
The following procedure is used to log in using a login name and password received from the administrator of the
machine or the administrator of the LDAP server.
The LDAP certification requires the hard disk drive.
When controlled by lo
g
in name and password
(Different items will appear in the screen when LDAP authentication is used.)
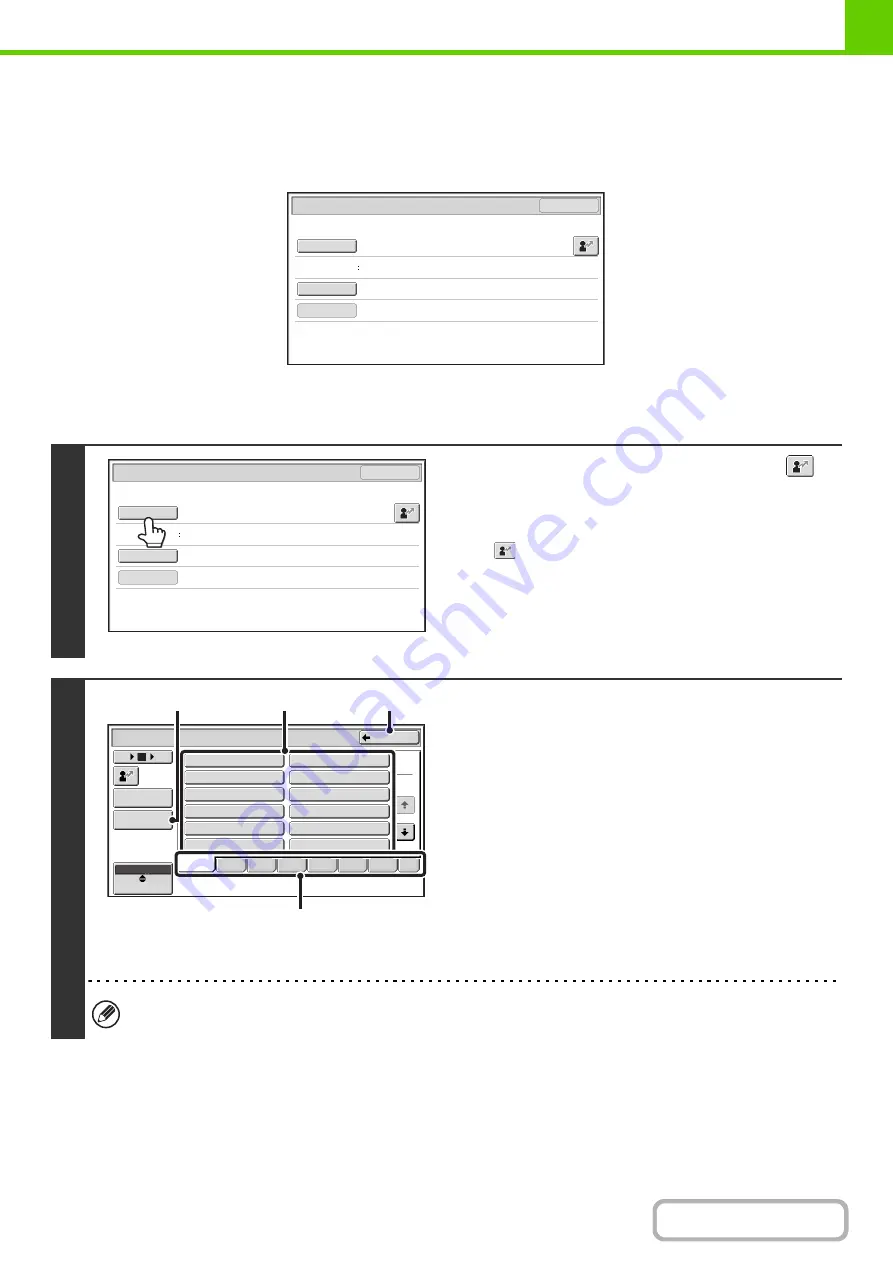
1
Touch the [Lo
g
in Name] key or the
key.
If the [Login Name] key is touched, a screen for selecting the
user name appears. Go to the next step.
If the
key is touched, an area for entering a "Registration
No." appears [---].
Use the numeric keys to enter your registration number that
has been stored in "User List" in the system settings
(administrator). After entering the registration number, go to
step 3.
2
Select the user name.
(A) [Direct Entry] key
Use this key if you have not been stored in "User List" in
the system settings (administrator) and are only using
LDAP authentication.
A text entry screen will appear. Enter your login name.
(B) User selection keys
Touch your user name that has been stored in "User List"
in the system settings (administrator).
(C) [Back] key
Touch this key to return to the login screen.
(D) Index tabs
All users appear on the [All] tab. Users are grouped on the
other tabs according to the search characters entered
when each user was stored.
LDAP authentication can be used when the administrator of the server provides LDAP service on the LAN (local area
network).
User
Authentication
OK
Login
Name
User
Name
Password
Auth
to
:
Login
Locally
User
Authentication
OK
Login
Name
User
Name
Password
Auth
to
:
Login
Locally
Device Account Mode User Selection
1
2
Back
User 0010
User 0008
User 0006
User 0004
User 0002
User 0009
User 0012
User 0011
User 0007
User 0005
User 0003
User 0001
All
ABCD
EFGH
IJKL
MNOP
QRSTU
VWXYZ
etc.
Admin Login
Direct Entry
User
ABC
12
18
6
(B)
(C)
(D)
(A)
Summary of Contents for MX-M266N
Page 8: ...Assemble output into a pamphlet Create a stapled pamphlet Staple output Create a blank margin ...
Page 11: ...Conserve Print on both sides of the paper Print multiple pages on one side of the paper ...
Page 35: ...Organize my files Delete a file Delete all files Periodically delete files Change the folder ...
Page 259: ...3 19 PRINTER Contents 4 Click the Print button Printing begins ...


