5-35
SENDING AN IMAGE IN USB MEMORY MODE
Follow the steps below to send a scanned image to a commercially available USB memory device that has been
connected to the machine. This stores the file in the USB device.
• Use a FAT32 USB memory with a capacity of no more than 32 GB.
• When a default address is configured in "Default Address Setting" in the system settings (administrator), the mode cannot
be changed. To switch to USB memory mode, touch the [Cancel] key in the touch panel and then follow the steps below.
1
Connect the USB memory to the USB
connector (Type A) on the machine.
2
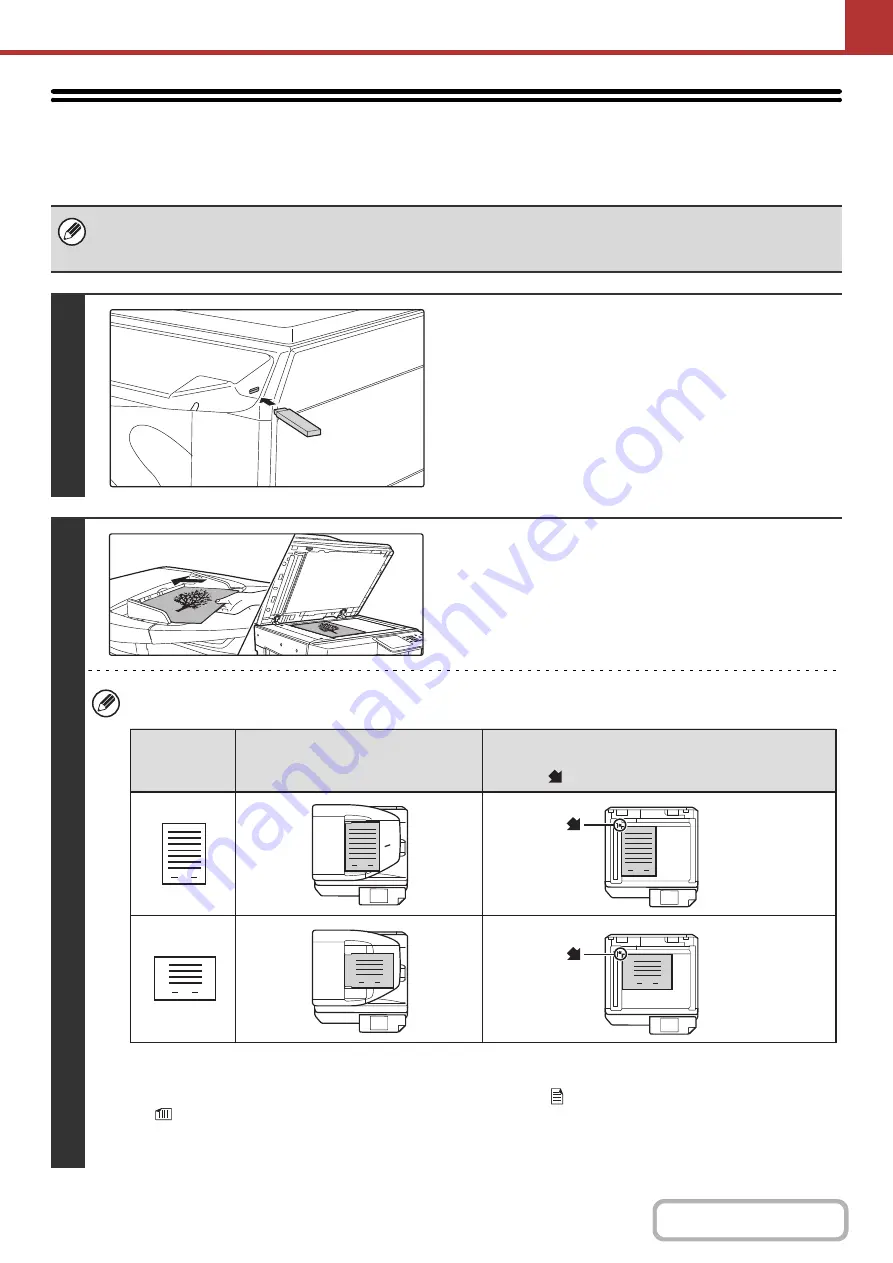
Place the ori
g
inal.
• When placing the originals, orient them as shown below.
* To place a large portrait-oriented original, place it as shown above in "Landscape orientation" and specify the
placement orientation in step 4.
• Place 5-1/2" x 8-1/2" (A5) size originals in portrait (vertical) orientation (
). If placed in landscape (horizontal) orientation
(
), an incorrect size will be detected. For a 5-1/2" x 8-1/2"R (A5R) size original, enter the original size manually.
• Originals cannot be scanned in succession from both the automatic document feeder and the document glass and
sent in a single transmission.
1
1
1
1
1
1
1
Document feeder tray
Place the original face up.
Portrait
orientation*
Landscape
orientation
Document
g
lass
Place the original face down and align the corner with the tip of the
arrow mark
in the top left corner of the document glass scale.
Ori
g
inals
Summary of Contents for MX-M266N
Page 8: ...Assemble output into a pamphlet Create a stapled pamphlet Staple output Create a blank margin ...
Page 11: ...Conserve Print on both sides of the paper Print multiple pages on one side of the paper ...
Page 35: ...Organize my files Delete a file Delete all files Periodically delete files Change the folder ...
Page 259: ...3 19 PRINTER Contents 4 Click the Print button Printing begins ...


