2-94
Storin
g
, editin
g
, and deletin
g
text strin
g
s
1
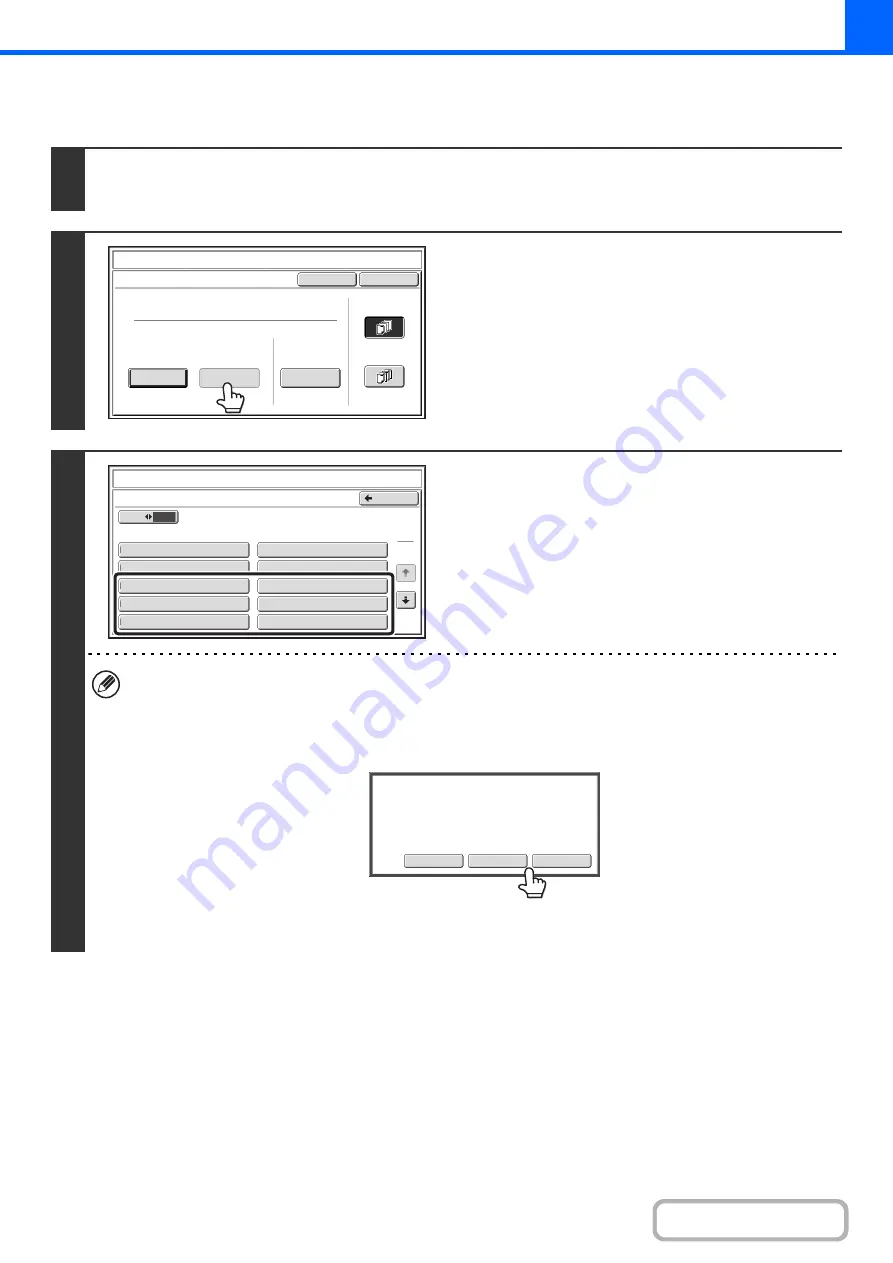
Touch the [Text] key in the stamp selection screen.
See steps 1 to 4 of "
GENERAL PROCEDURE FOR USING STAMP
2
Touch the [Store/Delete] key.
3
Store a text strin
g
, or edit/delete a stored
text strin
g
.
• To store a text string, touch a key with no text stored.
A text entry screen will appear. A maximum of 50 characters
can be entered. When you have finished entering the text,
touch the [OK] key. The text entry screen will close.
• To edit or delete a text string, follow the instructions below.
To edit or delete a text strin
g
...
• When the key with the text string is touched, the following screen appears.
When the [Modify] key is touched, a text entry screen appears. The stored text string appears in the text entry
screen. Edit the text. When you have finished entering the text, touch the [OK] key. The text entry screen will close.
• When the [Delete] key is touched, the stored text is deleted.
• Text settings can also be configured in the Web pages. Click [Application Settings], [Copy settings] and then [Text
Settings (Stamp)] in the Web page menu.
Cancel
OK
Pre-Set
First Page
All Pages
Store/Delete
Recall
Direct Entry
Stamp
Text
10
5
Store/Delete
No.01 AAA AAA
No.03 CCC CCC
No.04 DDD DDD
No.02 BBB BBB
No.05
No.07
No.08
No.09
No.10
No.06
Back
1
3
Stamp
Text
Modify
Delete
Cancel
A
text
has
been
already
stored
to
this
location.
Change
the
text
?
Summary of Contents for MX-M266N
Page 8: ...Assemble output into a pamphlet Create a stapled pamphlet Staple output Create a blank margin ...
Page 11: ...Conserve Print on both sides of the paper Print multiple pages on one side of the paper ...
Page 35: ...Organize my files Delete a file Delete all files Periodically delete files Change the folder ...
Page 259: ...3 19 PRINTER Contents 4 Click the Print button Printing begins ...


