5-80
4
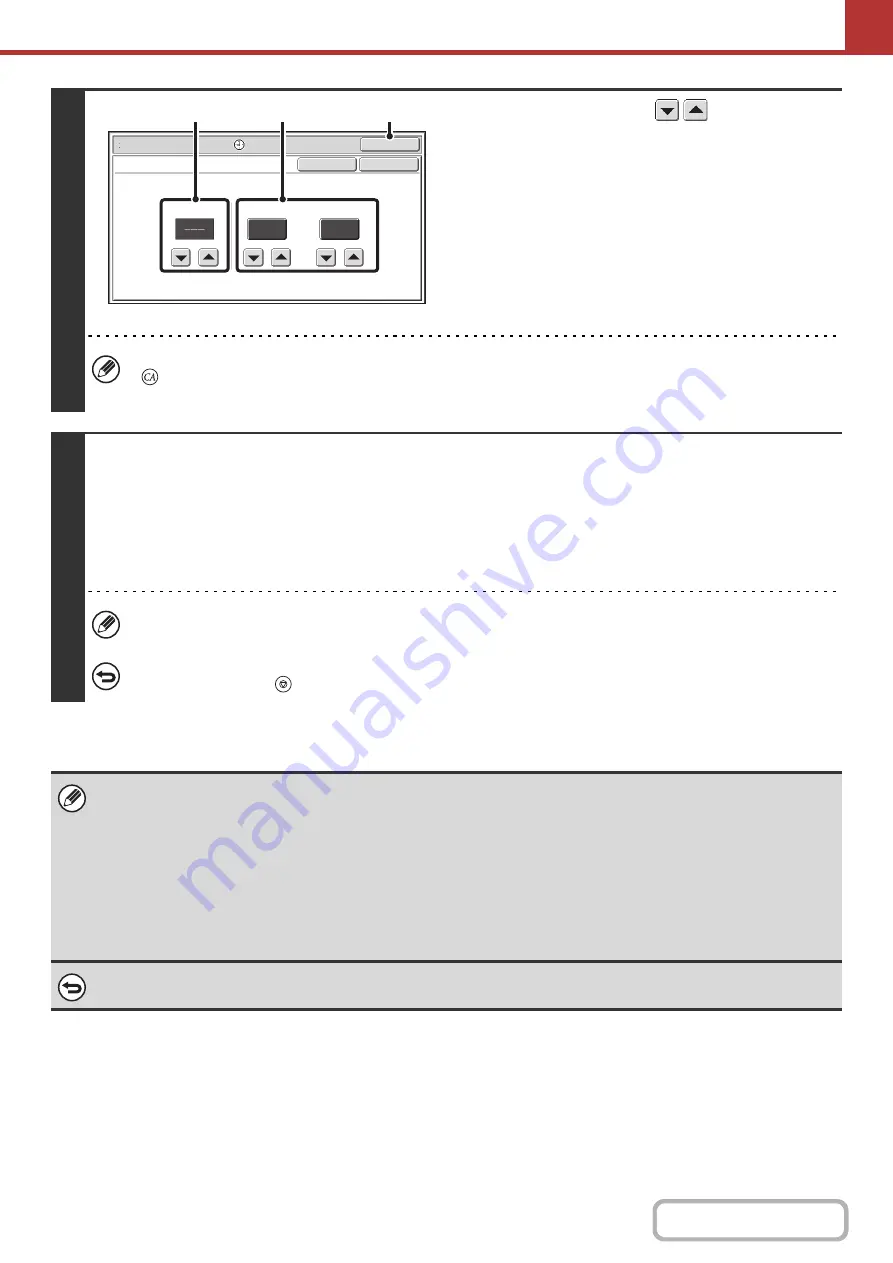
Set the time with the
keys.
(1) Specify the day.
If you do not wish to specify a day, select [---]. In this
case, transmission will begin when the time specified in
(2) arrives.
(2) Specify the time (hour, minute)
Select the time in 24-hour format.
You can also directly touch a numeric display key to
change the setting with the numeric keys.
(3) Touch the [OK] key.
When this screen is opened, the setting will show the current time. If the time is not correct, press the [CLEAR ALL] key
(
) to cancel the operation. Correct the time in the system settings and then perform the timer transmission procedure.
+
(page 5-5)
5
Press the [START] key.
Scanning begins.
• If you inserted the original pages in the document feeder tray, all pages are scanned.
A beep will sound to indicate that scanning is finished.
• If you are scanning the original on the document glass, scan each page one page at a time.
When scanning finishes, place the next original and press the [START] key. Repeat until all pages have been scanned and
then touch the [Read-End] key. A beep will sound to indicate that scanning is finished.
• The original is scanned into memory. The original cannot be scanned at a specified time.
To cancel scannin
g
...
Press the [STOP] key (
) to cancel the operation.
• The time can be specified up to a week in advance.
• Up to 94 timer transmissions can be stored at once.
• If another transmission is in progress when the specified time arrives, the timer transmission will begin after that
transmission is finished.
• Other transmissions can be performed as usual after a timer transmission is stored.
• A timer transmission can be deleted in the job status screen.
• If a timer transmission is given priority in the job status screen, the time specification is canceled. The transmission will
begin as soon as the job in progress is completed.
GIVING PRIORITY TO A SCAN TRANSMISSION JOB
To cancel timer transmission...
Touch the [Cancel] key in the screen of step 4.
Scan/Special Modes
OK
10
00
Timer
Time
Day of the Week
hh.
mm.
OK
Cancel
(1)
(2)
(3)
Summary of Contents for MX-M266N
Page 8: ...Assemble output into a pamphlet Create a stapled pamphlet Staple output Create a blank margin ...
Page 11: ...Conserve Print on both sides of the paper Print multiple pages on one side of the paper ...
Page 35: ...Organize my files Delete a file Delete all files Periodically delete files Change the folder ...
Page 259: ...3 19 PRINTER Contents 4 Click the Print button Printing begins ...


