2-29
2
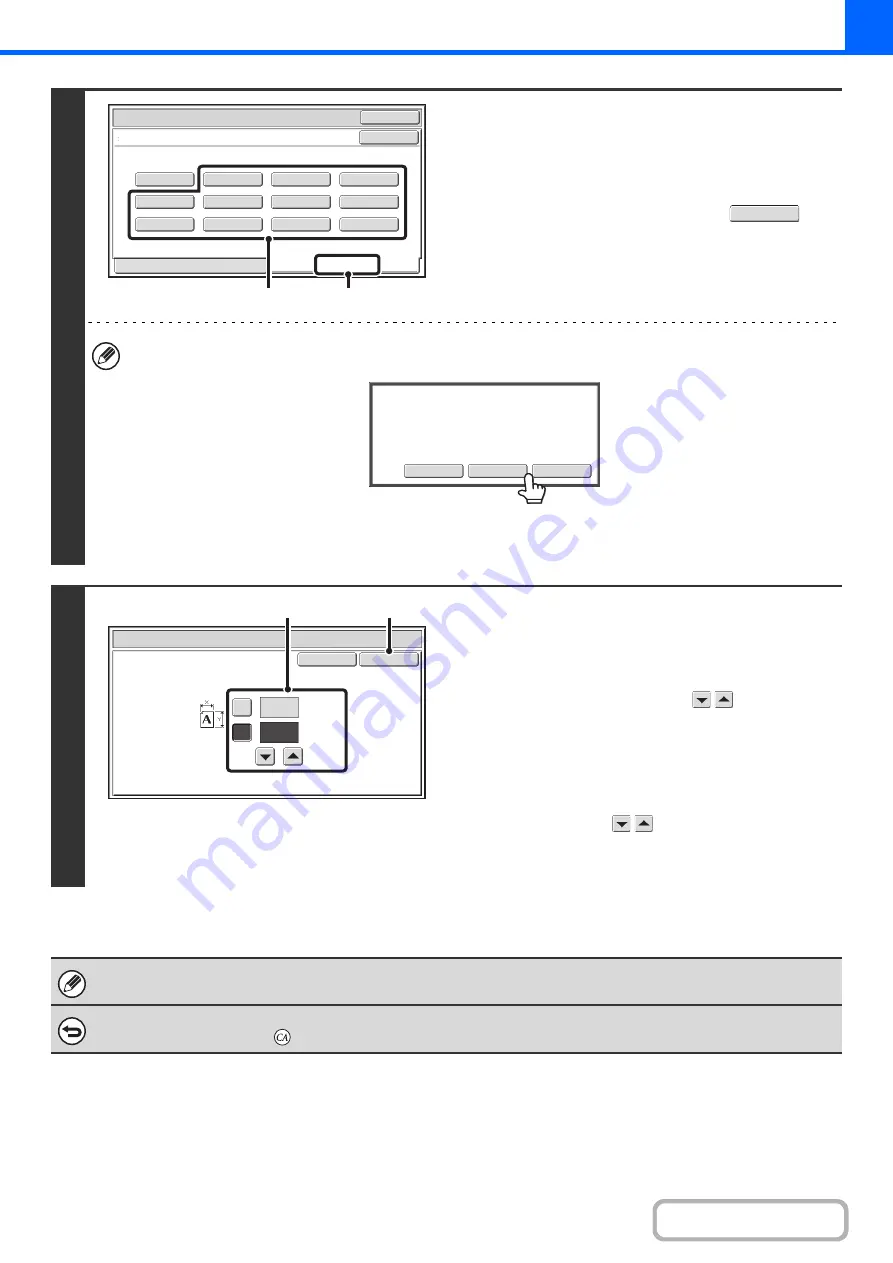
Store the ori
g
inal size.
(1) Touch the [Store/Delete] tab.
(2) Touch a key for storin
g
a custom ori
g
inal
size.
Touch a key that does not show a size (
).
If you wish to edit or clear a previously stored key...
Touch the key that you want to edit or clear. The following screen will appear.
• To edit the key, touch the [Modify] key and go to the next step.
• To clear the key, touch the [Delete] key. Make sure that the original size has been cleared and touch the [OK] key.
3
Enter the ori
g
inal size.
(1) Enter the X (horizontal) dimension of the
ori
g
inal.
With the [X] key highlighted, enter the X (horizontal)
dimension of the original with the
keys. A
dimension from 1" to 17" (25 mm to 432 mm) can be
entered.
(2) Enter the Y (vertical) dimension of the
ori
g
inal.
Touch the [Y] key and enter the Y (vertical) dimension of
the original with the
keys. A dimension from 1" to
11-5/8" (25 mm to 297 mm) can be entered.
(3) Touch the [OK] key.
The stored original size will be retained even if the main power is turned off.
To cancel the operation...
Press the [CLEAR ALL] key (
).
Original
OK
OK
X15½ Y 8½
Recall
Store/Delete
Custom Size
(1)
(2)
Modify
Delete
Cancel
A
custom
si
z
e
has
already
been
stored
in
this
location.
OK
Cancel
Original
(1~17)
inch
(1~11 5/8)
inch
17
X
Y
11
(3)
(1), (2)
Summary of Contents for MX-M266N
Page 8: ...Assemble output into a pamphlet Create a stapled pamphlet Staple output Create a blank margin ...
Page 11: ...Conserve Print on both sides of the paper Print multiple pages on one side of the paper ...
Page 35: ...Organize my files Delete a file Delete all files Periodically delete files Change the folder ...
Page 259: ...3 19 PRINTER Contents 4 Click the Print button Printing begins ...


