2-21
CHANGING THE EXPOSURE AND ORIGINAL
IMAGE TYPE
The exposure and original image type can be selected to obtain a clear copy.
AUTOMATIC ADJUSTMENT OF THE EXPOSURE AND
ORIGINAL TYPE
Automatic exposure adjustment operates by default to automatically adjust the exposure level and original type as
appropriate for the original being copied. ("Auto" is displayed.)
Automatic adjustment takes place to enable optimum copying.
SELECTING THE ORIGINAL TYPE AND MANUALLY
ADJUSTING THE EXPOSURE
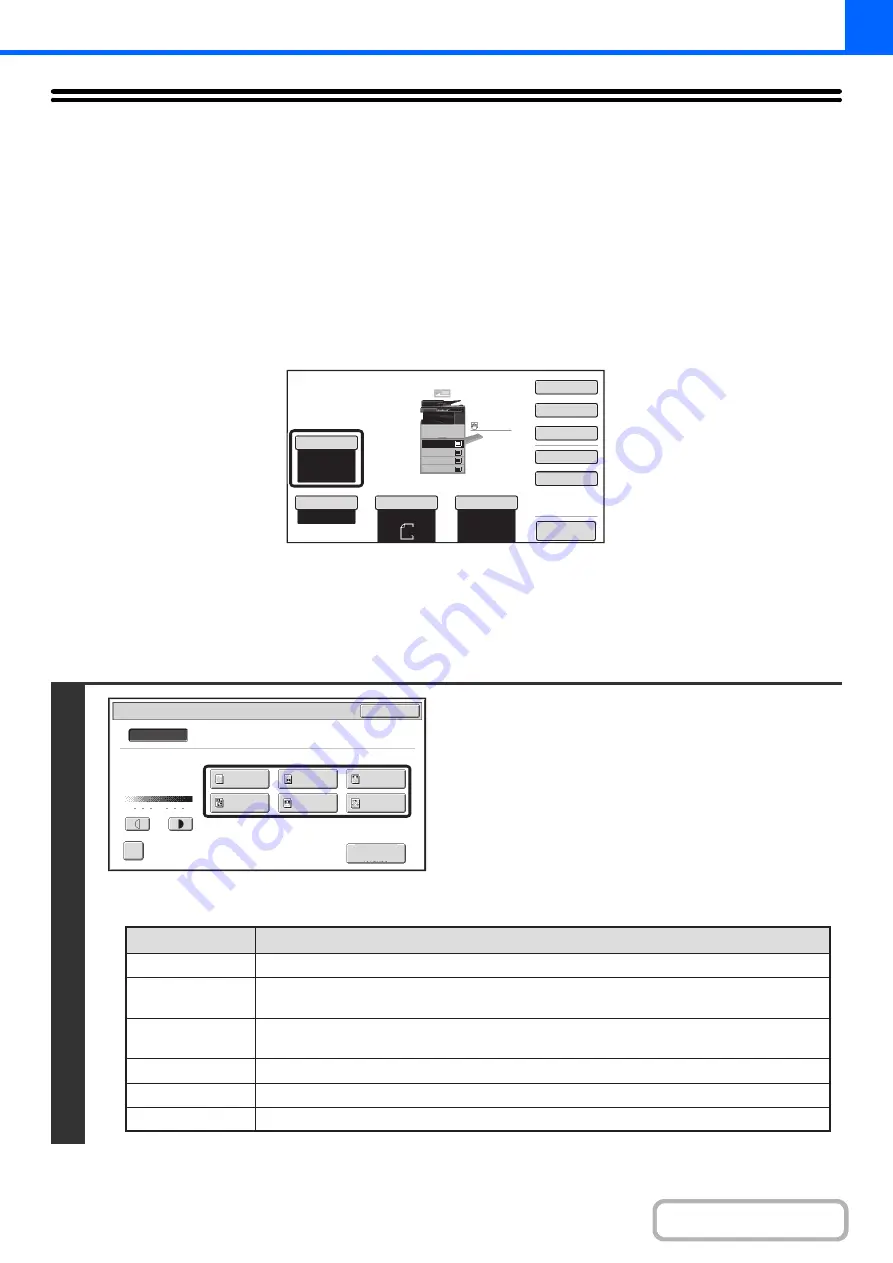
If you wish to select the original type or manually adjust the exposure, touch the [Exposure] key in the base screen of
copy mode and follow the steps below.
1
Select the ori
g
inal ima
g
e type.
Touch the appropriate original image type key for the original.
l
Ori
g
inal ima
g
e type select keys
Auto
8½x11
Plain
8½x11
Color Mode
Special Modes
2-Sided Copy
Output
File
Quick File
Copy Ratio
100%
Original
Paper Select
Auto
Full Color
Exposure
Auto
Preview
Plain
3.
1.
2.
4.
8½x11
11x17
8½x11R
8½x14
8½x11
3.
2.
4.
11x17
8½x11R
8½x14
1.
8½x11
Plain
8½x11
Copy of Copy
Exposure
OK
Manual
Original Image Type
1
3
5
Text/
Prtd.Photo
Photo
Text/Photo
Map
Text
Printed
Photo
Scan
Resolution
Auto
Mode
Description
Text
Text/Prtd. Photo
Printed photo
Text/Photo
Photo
Map
Use this mode for reg
u
lar text doc
u
ments.
This mode pro
v
ides the
b
est
b
alance for copying an original
w
hich contains
b
oth text and
printed photographs, s
u
ch as a magazine or catalog
u
e.
This mode is
b
est for copying printed photographs, s
u
ch as photos in a magazine or catalog
u
e.
This mode pro
v
ides the
b
est
b
alance for copying an original
w
hich contains
b
oth text and
photographs, s
u
ch as a text doc
u
ment
w
ith a photo pasted on.
Use this mode to copy photos.
This mode is
b
est for copying the light color shading and fine text fo
u
nd on most maps.
Summary of Contents for MX-M266N
Page 8: ...Assemble output into a pamphlet Create a stapled pamphlet Staple output Create a blank margin ...
Page 11: ...Conserve Print on both sides of the paper Print multiple pages on one side of the paper ...
Page 35: ...Organize my files Delete a file Delete all files Periodically delete files Change the folder ...
Page 259: ...3 19 PRINTER Contents 4 Click the Print button Printing begins ...


