GE M
EDICAL
S
YSTEMS
D
IRECTION
FK091075, R
EVISION
04
V
IVID
3N P
RO
/E
XPERT
S
ERVICE
M
ANUAL
8-38
Section 8-3 - Control Console Components Replacement
8-3-4
Keyboard Replacement Procedure
8-3-4-1
Tools
Use the appropriate flat and Phillips-type screw drivers, a wire cutter and the appropriate Hex wrench
keys as indicated in the keyboard replacement procedure.
8-3-4-2
Preparation
Shut down the Vivid 3N Pro/Expert ultrasound unit, as described in
Chapter 3 -
Installation
.
8-3-4-3
Keyboard Removal Procedure
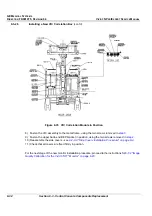
1) Remove the bottom keyboard cover and cable hooks, as described in
8-2-8-3 "Bottom Keyboard
Cover Removal Procedure" on page 8-14
.
2) Unplug the three keyboard cables located at the bottom of the keyboard.
3)
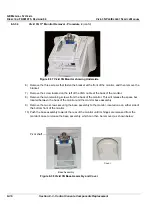
Remove the speaker covers, as described in
8-2-9-3 "Speaker Cover Removal Procedure" on page
8-16
.
4) Remove the two nuts securing the probe holders to the keyboard, located beneath the keyboard on
either side, and then remove the probe holders.
5) Remove the two M4 nuts securing the keyboard to the metal frame, located one on either corner of
the far end of the keyboard.
6) Loosen the three M5 nuts and two M5 side screws securing the front handle and pull the front
handle backwards to free the front edge of the keyboard.
7) Lift out the keyboard.
8-3-4-4
Keyboard Installation Procedure
1) Return the keyboard to its original position.
2) Push the keyboard as far in as it can go, and then fasten it to the metal frame from underneath at
its far end corners with the two M4 nuts, one on either corner.
3) Push the front handle forwards to its original position so that it overlaps the front edge of the
keyboard, and then fasten it to the metal frame with the three M5 nuts and the two M5 side screws.
4) Return the two probe holders to their positions on either side of the keyboard and fasten each with
two nuts to the metal frame. Before tightening the nuts adjust each probe holder to fit properly and
symmetrically on the sides of the keyboard.
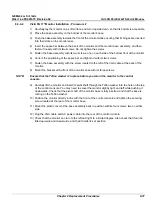
5) Return the speakers cover to its original position, as described in
8-2-9-4 "Speaker Cover
Installation Procedure" on page 8-16
. Before tightening the screws, adjust the cover to fit properly
and symmetrically.
6) Plug in the three keyboard cables, located at the bottom of the keyboard.
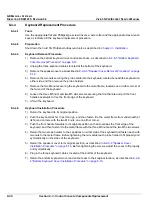
7) Return the bottom keyboard cover and cable hooks to their original location, as described in
8-2-8-
4 "Bottom Keyboard Cover Installation Procedure" on page 8-15
.
Содержание Vivid 3N Pro Series
Страница 2: ......
Страница 5: ...GE MEDICAL SYSTEMS DIRECTION FK091075 REVISION 04 VIVID 3N PRO EXPERT SERVICE MANUAL ii iii...
Страница 24: ...GE MEDICAL SYSTEMS DIRECTION FK091075 REVISION 04 VIVID 3N PRO EXPERT SERVICE MANUAL xxii...
Страница 597: ......

