GE M
EDICAL
S
YSTEMS
D
IRECTION
FK091075, R
EVISION
04
V
IVID
3N P
RO
/E
XPERT
S
ERVICE
M
ANUAL
8-6
Section 8-2 - Cover Replacement Procedures
8-2-3-3 Front Cover Removal Procedure
(cont’d)
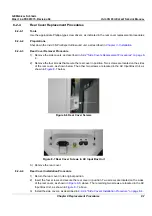
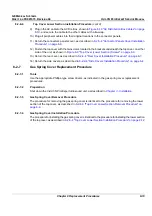
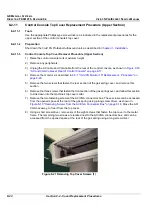
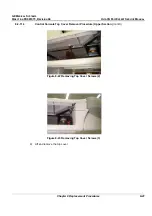
4) Remove the three screws located across the front of the top cover, shown below:
Figure 8-5 Top Cover Screws (Lower Section)
5) In order to free the front cover, grip the cover by its lower sides, and push upwards while pulling it
towards you.
8-2-3-4
Front Cover Installation Procedure
1) Return the front cover to its original position at the front of the unit, taking care to first insert its upper
edge under the top cover.
2) Fasten the front cover with the three screws at the edge of the top cover, as shown in
Figure 8-5
,
above.
3) Fasten the left and right brackets at the lower end of the front cover, one each side, by tightening
each bracket with its two screws to the main metal frame, as shown in
Figure 8-4 "Front Cover
Bracket Screws" on page 8-5
.
4) Install the side covers, as described
8-2-2-4 "Side Covers Installation Procedure" on page 8-4
.
5) Insert the air filter to its original location, as shown in
Figure 8-3 "Air Filter" on page 8-5
.
NOTE:
It is recommended to clean the filter before returning it to its original location, as
described in
Chapter 10 - Periodic Maintenance
.
Содержание Vivid 3N Pro Series
Страница 2: ......
Страница 5: ...GE MEDICAL SYSTEMS DIRECTION FK091075 REVISION 04 VIVID 3N PRO EXPERT SERVICE MANUAL ii iii...
Страница 24: ...GE MEDICAL SYSTEMS DIRECTION FK091075 REVISION 04 VIVID 3N PRO EXPERT SERVICE MANUAL xxii...
Страница 597: ......

