February 2013
8-48
ColorQube® 9303 Family
Principles of Operation
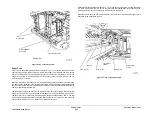
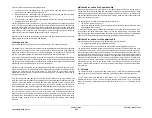
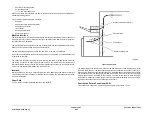
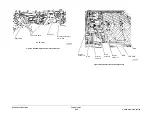
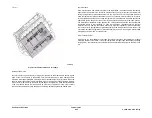
The inner two fingers are approximately 56 mm apart for registering thinner media fed by the
bypass and the outer two fingers are approximately 250 mm apart for registering the wider
media fed by the bypass.
The registration gate is positioned such that when the stack is registered:
•
the stacks lead edge will be at the base of the ramp between the nudger and the feed nip,
•
the nudger will be above the stack ready to lower and feed, and
•
the media present sensor flag will be resting on the top of the stack indicating that media
is present.
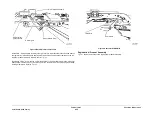
Media Size Detection
The media size detection in the bypass tray is achieved using the width of the stack indicated
by the position of the media guides.
The customer is required to set the media guides to the front and rear edges of the stack to
enable accurate media width sensing.The user must correctly adjust the guide position, as
there is no alternative mechanism for sensing the media width in the bypass tray.
The media guides move synchronously when the customer moves either guide due to a double
rack and pinion mechanism. This ensures that the rack connected to the rear guide is always in
the same place for any specific media width.
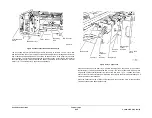
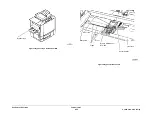
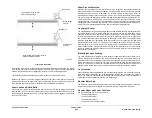
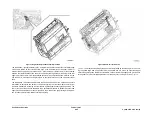
The bypass tray features a potentiometer that has its follower sprung loaded against a ramp
profile in the rear rack. As the guides are moved further apart the voltage output from the
potentiometer decreases and when the guides are moved closer together the voltage output
from the potentiometer increases.
Also housed in the bypass tray is an opto-interrupt sensor called the media width sensor. The
activation flag of this sensor is part of the rear rack. The flag in the rack has three sections to it
giving a total of 7 regions.
There are 3 regions with a voltage high response and 4 regions with a voltage low response.
The combination of the potentiometer output voltage and the state of the media width sensor
indicates to the bypass tray software which width region the rear guide is in.
Each region has a defined maximum and minimum stack width that could be in the tray. This
information is then passed onto the IME code where the user is required to confirm the media
size in the tray.
As the width sensing is market differentiated, the default media size that will be presented to
the user for any given width region will depend on the worldwide location of the machine.
Table 1
covers each region’s width boundaries, default media by market and other media.
The media size in the cross process direction is detected using the potentiometer and flag sen-
sor, attached to the paper width guides. The user is asked to confirm the detected width size
via the UI or to enter a custom size. The size in the process direction is measured when the
edge of the paper activates the paper path timing sensor #16.
Nudger and Registration gate Operation
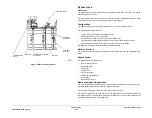
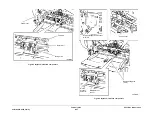
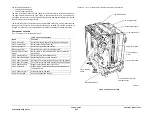
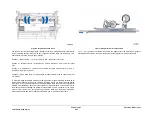
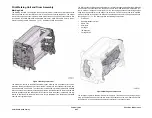
The nudger is lifted and lowered via a cam mechanism that is driven when the stepper motor is
reversed. Rotating the motor in reverse does not drive either the feed or the nudger roll due to
the one-way clutches on the feed shaft. The cam can only be driven in one direction by virtue
of a one way bearing housed in one of the gears in the gear train driving the cam. There are 2
‘V’ profiles on the cam surface that interact with the nudger follower and an additional spring
loaded locking lever. These enable the following functionality;
1.
When the nudger follower is in either ‘V’ it prevents the nudger from lowering onto the
stack
2.
When the additional locking lever is in a ‘V’ it prevents the cam rotating and lifting the
nudger during feeding, or affecting the nudger load.
3.
Enables a large stop position window for all functional positions as the ‘Vs’ enable the
mechanism to self centre when stopped (the self centring also provides positional robust-
ness to any system vibrations should they occur)
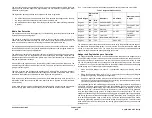
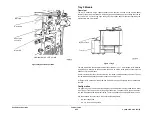
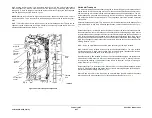
The registration gate in its media loading position has its’ four fingers vertical in the paper path
at the base of the ramp between the nudger and the separation nip. The reg gate hard stop is
provided by a sprung loaded locking lever that prevents the rotation of the reg gate at its cam
follower. As the cam is rotated it first lifts the locking lever, thus removing the reg gate hard
stop, and then rotates the reg gate so its’ fingers retreat out of the paper path. The cam is
designed so that the nudger is not lowered until the reg gate is completely out of the paper path
and the reg gate is not raised until the nudger has been lifted off the stack. The reg gate returns
to its hard stopped position using a return spring. The forces have been balanced to ensure
that the reg gate spring will always overcome the locking lever spring forces. This ensures that
when media is removed from the bypass tray the reg gate will always return to its media load
locked position.
Table 1 Region width boundaries
Width Region
Region width
(mm)
US default
EU default
Other media sizes
in region
Min
Max
Region 1
100
126
ENV US#10 SEF
Env dl SEF
-
Region 2
122
170
Statement SEF
A5 SEF
Env C5 SEF, Env 6
x 9 SEF
Region 3
166
206
Executive
-
-
Region 4
202
256
Letter SEF
A4 SEF
Env C4 SEF, Env 9
x 12 SEF
Region 5
252
290
Letter LEF
-
Tabloid SEF
Region 6
286
314
Tabloid extra SEF
A4 LEF
A3 SEF
Region 7
310
322
-
SRA3 SEF
-
Summary of Contents for ColorQube 9303 Series
Page 1: ...Xerox ColorQube 9303 Family Service Manual 708P90290 February 2013...
Page 4: ...February 2013 ii ColorQube 9303 Family Introduction...
Page 18: ...February 2013 1 2 ColorQube 9303 Family Service Call Procedures...
Page 92: ...February 2013 2 68 ColorQube 9303 Family 05F Status Indicator RAPs...
Page 104: ...February 2013 2 80 ColorQube 9303 Family 12 701 00 65 Status Indicator RAPs...
Page 200: ...February 2013 2 176 ColorQube 9303 Family 12N 171 Status Indicator RAPs...
Page 292: ...February 2013 2 268 ColorQube 9303 Family 16D Status Indicator RAPs...
Page 320: ...February 2013 2 296 ColorQube 9303 Family 42 504 00 42 505 00 Status Indicator RAPs...
Page 500: ...February 2013 2 476 ColorQube 9303 Family 94B Status Indicator RAPs...
Page 648: ...February 2013 3 2 ColorQube 9303 Family Image Quality...
Page 653: ...February 2013 3 7 ColorQube 9303 Family IQ 1 Image Quality Figure 1 IQ defects 1...
Page 654: ...February 2013 3 8 ColorQube 9303 Family IQ 1 Image Quality Figure 2 IQ defects 2...
Page 655: ...February 2013 3 9 ColorQube 9303 Family IQ 1 Image Quality Figure 3 IQ defects 3...
Page 656: ...February 2013 3 10 ColorQube 9303 Family IQ 1 Image Quality Figure 4 IQ defects 4...
Page 657: ...February 2013 3 11 ColorQube 9303 Family IQ 1 Image Quality Figure 5 IQ defects 5...
Page 658: ...February 2013 3 12 ColorQube 9303 Family IQ 1 Image Quality Figure 6 IQ defects 6...
Page 660: ...February 2013 3 14 ColorQube 9303 Family IQ 1 Image Quality Figure 9 IQ defects 9...
Page 661: ...February 2013 3 15 ColorQube 9303 Family IQ 1 Image Quality Figure 10 IQ defects 10...
Page 662: ...February 2013 3 16 ColorQube 9303 Family IQ 1 Image Quality Figure 11 IQ defects 11...
Page 663: ...February 2013 3 17 ColorQube 9303 Family IQ 1 Image Quality Figure 12 IQ defects 12...
Page 664: ...February 2013 3 18 ColorQube 9303 Family IQ 1 Image Quality Figure 13 IQ defects 13...
Page 728: ...February 2013 3 82 ColorQube 9303 Family IQ 29 IQ 30 Image Quality...
Page 736: ...February 2013 3 90 ColorQube 9303 Family TP 15 Image Quality Figure 2 Media path test pages...
Page 758: ...February 2013 3 112 ColorQube 9303 Family IQS 7 IQS 8 Image Quality...
Page 778: ...February 2013 4 20 ColorQube 9303 Family REP 1 9 Repairs Adjustments...
Page 794: ...February 2013 4 36 ColorQube 9303 Family REP 3 10 Repairs Adjustments...
Page 1144: ...February 2013 4 386 ColorQube 9303 Family REP 94 1 Repairs Adjustments...
Page 1176: ...February 2013 4 418 ColorQube 9303 Family ADJ 62 3 ADJ 62 4 Repairs Adjustments...
Page 1182: ...February 2013 4 424 ColorQube 9303 Family ADJ 75 3 Repairs Adjustments...
Page 1184: ...February 2013 4 426 ColorQube 9303 Family ADJ 82 1 Repairs Adjustments...
Page 1186: ...February 2013 4 428 ColorQube 9303 Family ADJ 91 1 Repairs Adjustments...
Page 1552: ...February 2013 6 260 ColorQube 9303 Family dC140 General Procedures Information...
Page 1576: ...February 2013 6 284 ColorQube 9303 Family dC640 General Procedures Information...
Page 1578: ...February 2013 6 286 ColorQube 9303 Family dC708 dC715 General Procedures Information...
Page 1600: ...February 2013 7 2 ColorQube 9303 Family Wiring Data...
Page 1696: ...February 2013 8 2 ColorQube 9303 Family Principles of Operation...
Page 1808: ...February 2013 8 114 ColorQube 9303 Family Principles of Operation...
Page 1809: ...XEROX EUROPE...
Page 1810: ...XEROX EUROPE...
Page 1811: ...XEROX EUROPE...
Page 1812: ...XEROX EUROPE...


