February 2013
8-40
ColorQube® 9303 Family
Principles of Operation
Full Width Array Raster Input Scanner
Overview
The 600dpi scanner uses a full width array and minimal optical path between the document
and the light sensing devices. The full width array is mounted on the scan carriage together
with the LED exposure lamps.
The scanner has two modes of operation. In CVT mode, the scan assembly stays fixed in
place while documents are moved over it. In document glass mode, the document remains sta-
tionary while the scan carriage moves beneath the document.
The scanner uses mechanical drives to scan documents on the document glass, or to position
the scan carriage under the CVT glass, when the document handler is used in CVT mode.
Document registration on the document glass is from the right rear corner of the glass. Docu-
ments up to A3 or 11 by 17 inches can be accommodated.
Scan Carriage Assembly
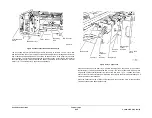
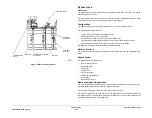
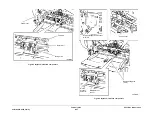
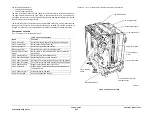
The scan carriage assembly,
Figure 2
, is arranged to slide on front and rear rails, being con-
trolled by scan cables driven by the scan motor. The scan carriage has three upper skids that
are held in contact with the lower surface of the document glass, by two spring loaded lower
skids. This arrangement gives a constant length of light path between the document and the
full width array.
A ribbon cable supplies power from the scanner PWB to the exposure lamp inverter. A
shielded ribbon cable supplies the analogue image data from the full width array to the scanner
PWB.
Scan Carriage Drive
Scan cables connected to a capstan are routed around the periphery of the scanner cavity, by
scan idler pulleys. The scan carriage is clamped to these cable, so that rotation of the capstan
causes the scan carriage to translate to the left or right. The capstan is driven by the scan drive
belt from the scan motor. The scan motor power and control comes from the scanner PWB
located in the scanner assembly.
Full Width Array Calibration
At power on initialization and every pattern scan and start of DADH job a calibration is per-
formed. The scan carriage is positioned so that the full width array is below the calibration strip
on the underside of the document glass.
The reflected light from the calibration strip is received by the elements of the full width array.
The resulting analogue signal is sent from the full width array PWB to the scanner PWB where
the analogue signals are converted to a digital video signal and then a gain adjustment is
applied for each individual element, each individual element of the full width array to achieve a
uniform gain for the whole array.
When the exposure lamp switches off, further readings are taken that represent a black image.
These values are used to set the automatic offset control (AOC). These values are automati-
cally calculated, but can be adjusted using the Image Quality Adjustment routine in the tools
menu.
Document Glass
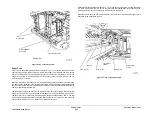
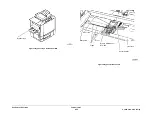
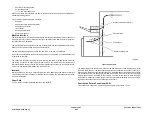
The document glass can accept documents up to A3 or 11 x 17 inches,
Figure 1
. A registration
scale is provided on the right and rear of the document glass and the registration position is at
the right rear corner.
CVT Glass
The CVT (Constant Velocity Transport) glass is a separate piece of glass positioned to the left
of the document glass,
Figure 1
. In CVT mode, the scan carriage is positioned under the CVT
glass. Documents from the DADH pass over the glass and are returned to the DADH.
Document size Sensing
Two document size sensors are located in the base of the scanner. The output of the sensors
together with edge position data from full width array sensors is used by the scanner PWB to
send document size information to the image processing PWB when in scanning mode. The
signal from the input module angle sensor is used to provide timing information to the scanner
PWB, so that the document size measurement is taken before the DADH is closed.
LED illuminator
Two LED exposure lamps are mounted on the scan carriage, one on each side of the light sen-
sor. The surface of each lamp is shaped to diffuse the light from the LEDs, and together they
produce a light of even intensity and generate negligible heat when energized. The LED supply
is +24V, via a ribbon cable from the scanner PWB to lamp 1. A second ribbon cable takes the
supply from lamp 1 to lamp 2.
Optical Path
Light from the exposure lamps on the scan carriage, is directed through the document glass to
illuminate the document. Light from the document passes vertically downwards through the
document glass, through the selfoc lens to the full width array.
Full Width Array
The full width array contains an array of twenty silicon detector chips which are bonded to the
full width array PWB. Each detector chip contains 384 detectors of 43 microns diameter. The
total width of the array being 330 mm or 7680 pixels. The silicon detectors convert the light lev-
els reflected from the document into analogue voltage levels.
Each silicon detector produces one pixel (picture element) of image information. Each pixel
represents one spot of white, grey or black corresponding to the image on the document.
Selfoc Lens
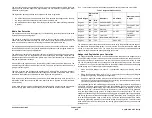
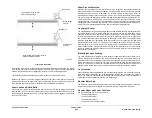
The Selfoc (self focusing) lens consists of 650 Selfoc rods of 0.5 mm diameter,
Figure 2
. Each
rod is set in to a resin-type material to form a 325 mm wide lens.The lens sits above the full
width array in the scan carriage.
Scanner Initialization
At power on initialization and at timed intervals between jobs, scanner initialization is per-
formed. The scan carriage moves to the scan carriage home sensor to set the home position of
the carriage. This is used as a reference from which all scan carriage movements are calcu-
lated.
Summary of Contents for ColorQube 9303 Series
Page 1: ...Xerox ColorQube 9303 Family Service Manual 708P90290 February 2013...
Page 4: ...February 2013 ii ColorQube 9303 Family Introduction...
Page 18: ...February 2013 1 2 ColorQube 9303 Family Service Call Procedures...
Page 92: ...February 2013 2 68 ColorQube 9303 Family 05F Status Indicator RAPs...
Page 104: ...February 2013 2 80 ColorQube 9303 Family 12 701 00 65 Status Indicator RAPs...
Page 200: ...February 2013 2 176 ColorQube 9303 Family 12N 171 Status Indicator RAPs...
Page 292: ...February 2013 2 268 ColorQube 9303 Family 16D Status Indicator RAPs...
Page 320: ...February 2013 2 296 ColorQube 9303 Family 42 504 00 42 505 00 Status Indicator RAPs...
Page 500: ...February 2013 2 476 ColorQube 9303 Family 94B Status Indicator RAPs...
Page 648: ...February 2013 3 2 ColorQube 9303 Family Image Quality...
Page 653: ...February 2013 3 7 ColorQube 9303 Family IQ 1 Image Quality Figure 1 IQ defects 1...
Page 654: ...February 2013 3 8 ColorQube 9303 Family IQ 1 Image Quality Figure 2 IQ defects 2...
Page 655: ...February 2013 3 9 ColorQube 9303 Family IQ 1 Image Quality Figure 3 IQ defects 3...
Page 656: ...February 2013 3 10 ColorQube 9303 Family IQ 1 Image Quality Figure 4 IQ defects 4...
Page 657: ...February 2013 3 11 ColorQube 9303 Family IQ 1 Image Quality Figure 5 IQ defects 5...
Page 658: ...February 2013 3 12 ColorQube 9303 Family IQ 1 Image Quality Figure 6 IQ defects 6...
Page 660: ...February 2013 3 14 ColorQube 9303 Family IQ 1 Image Quality Figure 9 IQ defects 9...
Page 661: ...February 2013 3 15 ColorQube 9303 Family IQ 1 Image Quality Figure 10 IQ defects 10...
Page 662: ...February 2013 3 16 ColorQube 9303 Family IQ 1 Image Quality Figure 11 IQ defects 11...
Page 663: ...February 2013 3 17 ColorQube 9303 Family IQ 1 Image Quality Figure 12 IQ defects 12...
Page 664: ...February 2013 3 18 ColorQube 9303 Family IQ 1 Image Quality Figure 13 IQ defects 13...
Page 728: ...February 2013 3 82 ColorQube 9303 Family IQ 29 IQ 30 Image Quality...
Page 736: ...February 2013 3 90 ColorQube 9303 Family TP 15 Image Quality Figure 2 Media path test pages...
Page 758: ...February 2013 3 112 ColorQube 9303 Family IQS 7 IQS 8 Image Quality...
Page 778: ...February 2013 4 20 ColorQube 9303 Family REP 1 9 Repairs Adjustments...
Page 794: ...February 2013 4 36 ColorQube 9303 Family REP 3 10 Repairs Adjustments...
Page 1144: ...February 2013 4 386 ColorQube 9303 Family REP 94 1 Repairs Adjustments...
Page 1176: ...February 2013 4 418 ColorQube 9303 Family ADJ 62 3 ADJ 62 4 Repairs Adjustments...
Page 1182: ...February 2013 4 424 ColorQube 9303 Family ADJ 75 3 Repairs Adjustments...
Page 1184: ...February 2013 4 426 ColorQube 9303 Family ADJ 82 1 Repairs Adjustments...
Page 1186: ...February 2013 4 428 ColorQube 9303 Family ADJ 91 1 Repairs Adjustments...
Page 1552: ...February 2013 6 260 ColorQube 9303 Family dC140 General Procedures Information...
Page 1576: ...February 2013 6 284 ColorQube 9303 Family dC640 General Procedures Information...
Page 1578: ...February 2013 6 286 ColorQube 9303 Family dC708 dC715 General Procedures Information...
Page 1600: ...February 2013 7 2 ColorQube 9303 Family Wiring Data...
Page 1696: ...February 2013 8 2 ColorQube 9303 Family Principles of Operation...
Page 1808: ...February 2013 8 114 ColorQube 9303 Family Principles of Operation...
Page 1809: ...XEROX EUROPE...
Page 1810: ...XEROX EUROPE...
Page 1811: ...XEROX EUROPE...
Page 1812: ...XEROX EUROPE...


