February 2013
6-298
ColorQube® 9303 Family
dC977, dC978
General Procedures/Information
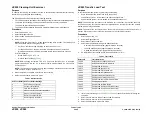
dC977 Drum Runout Calibration
Purpose
To measure minute inaccuracies in the concentricity of the drum, then adjust the printheads as
necessary.
If the following parts are removed or replaced the Drum Runout Calibration routine is required:
•
Drum
•
Drum encoder
•
Drum pulley
•
Transfix linkages
Procedure
NOTE: Before printing test pages, ensure that A4 or 8.5 x11 inch plain paper is loaded LEF into
tray 4. Use the best quality media available. Do not use hole punched paper.
Perform the following:
1.
Enter service mode,
GP 1
.
2.
Select the Adjustments tab.
3.
Select dC977 Drum Runout Calibration.
4.
Select the Runout Test Page button.
The machine will print a drum runout test page. Check the test page to confirm that cali-
bration is required, (
TP 23
) and (
IQ 5
).
If calibration is not required select Close to exit the routine.
5.
Select Jet Test Page. The machine will run the jet test routine which will print 2 pages for
each colour.
6.
Use the jet test pages to identify any defective heads. Check the test page to interpret the
jet test output (
TP 21
) and (
IQ 9
).
•
If more than 10 jets are missing run
dC968
Head Purge before continuing with this
procedure.
•
If less than 10 jets are missing select Calibrate Runout.
NOTE: Calibration requires the following:
•
Sufficient ink in all reservoirs.
•
The waste tray must not be full.
•
The marking unit must be ready to print.
7.
Select Calibrate Runout. The calibration routine takes approximately 5 minutes.
8.
On completion of the Calibration Runout routine. Select Close to return to the Adjust-
ments window.
9.
Select Call Closeout to exit service mode.
dC978 Transfix Calibration Values
Purpose
To display and update the transfix calibration load values to ensure proper operation of the
transfix load system.
This procedure is required when replacing transfix load arm assemblies or if incorrect transfix
calibration values are suspected.
Procedure
1.
Enter service mode,
GP 1
.
2.
Select the Adjustments tab.
3.
Select dC978 Transfix Calibration Values.
4.
The transfix calibration values are displayed with an option to write new values if required.
NOTE: New transfix calibration values must also be written on the calibration label on the
front drum frame, refer to
REP 10.3
or
REP 10.2
.
5.
Follow the on screen instructions to read and amend the values as necessary.
6.
Select Close to return to the Adjustments window.
7.
Select Call Closeout to exit service mode.
Summary of Contents for ColorQube 9303 Series
Page 1: ...Xerox ColorQube 9303 Family Service Manual 708P90290 February 2013...
Page 4: ...February 2013 ii ColorQube 9303 Family Introduction...
Page 18: ...February 2013 1 2 ColorQube 9303 Family Service Call Procedures...
Page 92: ...February 2013 2 68 ColorQube 9303 Family 05F Status Indicator RAPs...
Page 104: ...February 2013 2 80 ColorQube 9303 Family 12 701 00 65 Status Indicator RAPs...
Page 200: ...February 2013 2 176 ColorQube 9303 Family 12N 171 Status Indicator RAPs...
Page 292: ...February 2013 2 268 ColorQube 9303 Family 16D Status Indicator RAPs...
Page 320: ...February 2013 2 296 ColorQube 9303 Family 42 504 00 42 505 00 Status Indicator RAPs...
Page 500: ...February 2013 2 476 ColorQube 9303 Family 94B Status Indicator RAPs...
Page 648: ...February 2013 3 2 ColorQube 9303 Family Image Quality...
Page 653: ...February 2013 3 7 ColorQube 9303 Family IQ 1 Image Quality Figure 1 IQ defects 1...
Page 654: ...February 2013 3 8 ColorQube 9303 Family IQ 1 Image Quality Figure 2 IQ defects 2...
Page 655: ...February 2013 3 9 ColorQube 9303 Family IQ 1 Image Quality Figure 3 IQ defects 3...
Page 656: ...February 2013 3 10 ColorQube 9303 Family IQ 1 Image Quality Figure 4 IQ defects 4...
Page 657: ...February 2013 3 11 ColorQube 9303 Family IQ 1 Image Quality Figure 5 IQ defects 5...
Page 658: ...February 2013 3 12 ColorQube 9303 Family IQ 1 Image Quality Figure 6 IQ defects 6...
Page 660: ...February 2013 3 14 ColorQube 9303 Family IQ 1 Image Quality Figure 9 IQ defects 9...
Page 661: ...February 2013 3 15 ColorQube 9303 Family IQ 1 Image Quality Figure 10 IQ defects 10...
Page 662: ...February 2013 3 16 ColorQube 9303 Family IQ 1 Image Quality Figure 11 IQ defects 11...
Page 663: ...February 2013 3 17 ColorQube 9303 Family IQ 1 Image Quality Figure 12 IQ defects 12...
Page 664: ...February 2013 3 18 ColorQube 9303 Family IQ 1 Image Quality Figure 13 IQ defects 13...
Page 728: ...February 2013 3 82 ColorQube 9303 Family IQ 29 IQ 30 Image Quality...
Page 736: ...February 2013 3 90 ColorQube 9303 Family TP 15 Image Quality Figure 2 Media path test pages...
Page 758: ...February 2013 3 112 ColorQube 9303 Family IQS 7 IQS 8 Image Quality...
Page 778: ...February 2013 4 20 ColorQube 9303 Family REP 1 9 Repairs Adjustments...
Page 794: ...February 2013 4 36 ColorQube 9303 Family REP 3 10 Repairs Adjustments...
Page 1144: ...February 2013 4 386 ColorQube 9303 Family REP 94 1 Repairs Adjustments...
Page 1176: ...February 2013 4 418 ColorQube 9303 Family ADJ 62 3 ADJ 62 4 Repairs Adjustments...
Page 1182: ...February 2013 4 424 ColorQube 9303 Family ADJ 75 3 Repairs Adjustments...
Page 1184: ...February 2013 4 426 ColorQube 9303 Family ADJ 82 1 Repairs Adjustments...
Page 1186: ...February 2013 4 428 ColorQube 9303 Family ADJ 91 1 Repairs Adjustments...
Page 1552: ...February 2013 6 260 ColorQube 9303 Family dC140 General Procedures Information...
Page 1576: ...February 2013 6 284 ColorQube 9303 Family dC640 General Procedures Information...
Page 1578: ...February 2013 6 286 ColorQube 9303 Family dC708 dC715 General Procedures Information...
Page 1600: ...February 2013 7 2 ColorQube 9303 Family Wiring Data...
Page 1696: ...February 2013 8 2 ColorQube 9303 Family Principles of Operation...
Page 1808: ...February 2013 8 114 ColorQube 9303 Family Principles of Operation...
Page 1809: ...XEROX EUROPE...
Page 1810: ...XEROX EUROPE...
Page 1811: ...XEROX EUROPE...
Page 1812: ...XEROX EUROPE...


