February 2013
2-607
ColorQube® 9303 Family
OF 7, OF 8
Status Indicator RAPs
•
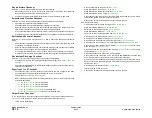
Analogue Power Gauge 24V. Refer to
WD 1.4
and
WD 9.4
.
–
Source -
Power Supply Unit
, PJDC2, pin 31.
–
Destination -
Drum Driver PWB
, PJ902, pin 31.
–
Action - This signal informs the drum driver PWB that the +24V power used is within
the expected range.
–
Analogue power gauge 24V signal level - This is an analogue signal between 0V and
+3.3V. When this signal is below +2.11 volts, the power used is within the expected
range.
•
Analogue Power Gauge 50V. Refer to
WD 1.4
and
WD 9.4
.
–
Source -
Power Supply Unit
, PJDC2, pin 29.
–
Destination -
Drum Driver PWB
, PJ902, pin 29.
–
Action - This signal informs the drum driver PWB that the +50V supply power used is
within the expected range.
–
Analogue power gauge 50V signal level - This is an analogue signal between 0V and
+3.3V. When this signal is below +2.11 volts, the power used is within the expected
range.
The above signals are carried on a ribbon cable and are therefore difficult to measure. Check
that the cable is in good condition and is securely and correctly connected. Install new compo-
nents as required:
•
Drum driver power supply interface cable,
PL 1.15 Item 10
.
•
Drum driver PWB,
PL 1.15 Item 4
.
•
Power supply unit,
PL 1.15 Item 2
.
Check the power supplies during normal or sleep mode as follows:
•
+3.3V ESTAR. Refer to
WD 1.3
. This supply is switched on both in normal and sleep
modes. If necessary, go to
01B
+3.3V ESTAR Distribution RAP.
•
+3.3V. Refer to
WD 1.6
. This supply is switched on both in normal and sleep modes. If
necessary, go to
01C
+3.3V Distribution RAP.
•
+5V. Refer to
WD 1.3
. This supply is switched on during normal mode and is switched off
during sleep mode. If necessary, go to
01D
+5V Distribution RAP.
•
+12V. Refer to
WD 1.3
. This supply is switched on during normal mode and is switched off
during sleep mode. If necessary, go to
01E
+12V Distribution RAP.
•
-12V. Refer to
WD 1.3
. This supply is switched on during normal mode and is switched off
during sleep mode. If necessary, go to
01F
-12V Distribution RAP.
•
+17V. Refer to
WD 1.5
. This supply changes voltage according to the machine mode.
When the machine is switched on, the machine enters Print Engine Self Test (PEST) and
this supply is measured at about +17V. When the machine enters normal running mode,
this supply rises to +24V. When the machine enters sleep mode, this supply returns to
about +17V. It is used to generate the +3.3V for the IIT. If necessary, go to
01G
+17V Dis-
tribution RAP.
•
+24V. Refer to
WD 1.3
. This supply is switched on during normal mode and is switched off
during sleep mode. If necessary, go to
01H
+24V Distribution RAP.
•
+50V. Refer to
WD 1.3
. This supply is switched on during normal mode and is switched off
during sleep mode. If necessary, go to
01J
+50V Distribution RAP.
•
-50V. Refer to
WD 1.3
. This supply is switched on during normal mode and is switched off
during sleep mode. If necessary, go to
01K
-50V Distribution RAP.
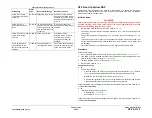
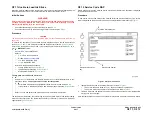
OF 8 Multi-feed RAP
To solve several sheet multi-feeds or extra blank sheet output problems.
Initial Actions
WARNING
Ensure that the electricity to the machine is switched off while performing tasks that do
not need electricity. Refer to
GP 14
. Disconnect the power cord. Electricity can cause
death or injury. Moving parts can cause injury.
•
Check the condition of the paper. Do not use incorrectly cut paper, damp paper, paper
with rough edges, badly drilled paper, paper with wrapper wax or glue contamination.
Refer to
IQ 1
Image Quality Entry RAP.
•
Check the paper specification,
GP 20
.
•
Multi-feed from the bypass tray, go to
74A
By-pass Tray RAP
Procedure
When checking for multi-feeds always use a new ream of paper. If a new ream can not be
used, then perform the following:
1.
Fan the paper.
2.
Turn the paper round or turn the paper over.
3.
Remove four or five sheets from the top of the stack.
4.
When loading multi-reams of paper into tray 3. Remove the top and bottom sheet from
each ream. This will prevent ream interface multi-feeds.
Tray 1 and Tray 2
Check the following:
1.
Check that the paper tray side guides are set to the correct paper size.
2.
The paper tray drops down when the tray is pulled out and the tray elevates up when
pushed in.
a.
Check the paper feed assembly,
REP 81.1
.
b.
Check the paper feed rolls,
REP 81.4
.
c.
Check that the clutch assembly, tray 1,
PL 81.25 Item 4
or tray 2,
PL 81.26 Item 4
,
has a torque resistance and does not rotate freely.
d.
Install new components as necessary, Tray 1,
PL 81.25
, Tray 2,
PL 81.26
.
3.
The paper trays for worn, broken or missing components.
a.
Install new components as necessary,
PL 70.10 Item 1
.
Tray 3
Check the following:
1.
The tray moves down when the tray is pulled out, and moves up when the tray is closed.
a.
Check tray 3 paper feed assembly,
REP 81.2
.
b.
Check that the clutch assembly,
PL 81.30 Item 4
has a torque resistance and does
not rotate freely.
c.
Install new components as necessary,
PL 81.30 Item 1
.
2.
The paper tray for worn, broken or missing components. Install new components as nec-
essary,
PL 73.15
.
Summary of Contents for ColorQube 9303 Series
Page 1: ...Xerox ColorQube 9303 Family Service Manual 708P90290 February 2013...
Page 4: ...February 2013 ii ColorQube 9303 Family Introduction...
Page 18: ...February 2013 1 2 ColorQube 9303 Family Service Call Procedures...
Page 92: ...February 2013 2 68 ColorQube 9303 Family 05F Status Indicator RAPs...
Page 104: ...February 2013 2 80 ColorQube 9303 Family 12 701 00 65 Status Indicator RAPs...
Page 200: ...February 2013 2 176 ColorQube 9303 Family 12N 171 Status Indicator RAPs...
Page 292: ...February 2013 2 268 ColorQube 9303 Family 16D Status Indicator RAPs...
Page 320: ...February 2013 2 296 ColorQube 9303 Family 42 504 00 42 505 00 Status Indicator RAPs...
Page 500: ...February 2013 2 476 ColorQube 9303 Family 94B Status Indicator RAPs...
Page 648: ...February 2013 3 2 ColorQube 9303 Family Image Quality...
Page 653: ...February 2013 3 7 ColorQube 9303 Family IQ 1 Image Quality Figure 1 IQ defects 1...
Page 654: ...February 2013 3 8 ColorQube 9303 Family IQ 1 Image Quality Figure 2 IQ defects 2...
Page 655: ...February 2013 3 9 ColorQube 9303 Family IQ 1 Image Quality Figure 3 IQ defects 3...
Page 656: ...February 2013 3 10 ColorQube 9303 Family IQ 1 Image Quality Figure 4 IQ defects 4...
Page 657: ...February 2013 3 11 ColorQube 9303 Family IQ 1 Image Quality Figure 5 IQ defects 5...
Page 658: ...February 2013 3 12 ColorQube 9303 Family IQ 1 Image Quality Figure 6 IQ defects 6...
Page 660: ...February 2013 3 14 ColorQube 9303 Family IQ 1 Image Quality Figure 9 IQ defects 9...
Page 661: ...February 2013 3 15 ColorQube 9303 Family IQ 1 Image Quality Figure 10 IQ defects 10...
Page 662: ...February 2013 3 16 ColorQube 9303 Family IQ 1 Image Quality Figure 11 IQ defects 11...
Page 663: ...February 2013 3 17 ColorQube 9303 Family IQ 1 Image Quality Figure 12 IQ defects 12...
Page 664: ...February 2013 3 18 ColorQube 9303 Family IQ 1 Image Quality Figure 13 IQ defects 13...
Page 728: ...February 2013 3 82 ColorQube 9303 Family IQ 29 IQ 30 Image Quality...
Page 736: ...February 2013 3 90 ColorQube 9303 Family TP 15 Image Quality Figure 2 Media path test pages...
Page 758: ...February 2013 3 112 ColorQube 9303 Family IQS 7 IQS 8 Image Quality...
Page 778: ...February 2013 4 20 ColorQube 9303 Family REP 1 9 Repairs Adjustments...
Page 794: ...February 2013 4 36 ColorQube 9303 Family REP 3 10 Repairs Adjustments...
Page 1144: ...February 2013 4 386 ColorQube 9303 Family REP 94 1 Repairs Adjustments...
Page 1176: ...February 2013 4 418 ColorQube 9303 Family ADJ 62 3 ADJ 62 4 Repairs Adjustments...
Page 1182: ...February 2013 4 424 ColorQube 9303 Family ADJ 75 3 Repairs Adjustments...
Page 1184: ...February 2013 4 426 ColorQube 9303 Family ADJ 82 1 Repairs Adjustments...
Page 1186: ...February 2013 4 428 ColorQube 9303 Family ADJ 91 1 Repairs Adjustments...
Page 1552: ...February 2013 6 260 ColorQube 9303 Family dC140 General Procedures Information...
Page 1576: ...February 2013 6 284 ColorQube 9303 Family dC640 General Procedures Information...
Page 1578: ...February 2013 6 286 ColorQube 9303 Family dC708 dC715 General Procedures Information...
Page 1600: ...February 2013 7 2 ColorQube 9303 Family Wiring Data...
Page 1696: ...February 2013 8 2 ColorQube 9303 Family Principles of Operation...
Page 1808: ...February 2013 8 114 ColorQube 9303 Family Principles of Operation...
Page 1809: ...XEROX EUROPE...
Page 1810: ...XEROX EUROPE...
Page 1811: ...XEROX EUROPE...
Page 1812: ...XEROX EUROPE...

