February 2013
8-49
ColorQube® 9303 Family
Principles of Operation
There are three functional cam rotational positions;
1.
Jam clear position – the nudger is up, the reg gate is held down and the cam rotation is
prevented by the nudger follower in the first ‘V’.
2.
Media load position – the nudger is up, the reg gate is up and locked and the cam rotation
is prevented by the nudger follower in the second ‘V’.
3.
Feed position – the nudger is down, the reg gate is down and the cam is locked by the
additional lever in the second ‘V’.
The cam includes a sensor vane that runs in an opto-interrupt sensor called the nudger home
sensor. The lead edge of this vane indicates the number of steps left to both the jam clear and
the media load position. The trail edge of this vane indicates the number of steps left to lower
the nudger. The nudger roll can be lowered over the whole stack height negating the need for
stack elevation. The mechanism does not continually adjust the nudger position; it allows the
nudger to travel over the full stack height under the force of its spring.
Whenever a jam is detected the nudger will be raised to the jam clear position. Once clear, the
nudger should be moved to the media load position
Feeding operation
When media has been loaded and its size confirmed by the user, feeding can begin.
The stepper motor is rotated in reverse, lowering the registration gate out of the paper path and
then lowering the nudger onto the stack. A wait period is then observed to ensure that the
nudger has settled on the stack prior to commencing feeding. The stepper motor is then driven
forward, feeding the top sheet into the shingle ramp and then into the separation nip.
If more than one sheet has been fed off the top of the stack then the shingle ramp will shingle
them, minimizing the number of cases where more than two sheets enter the separation nip.
The separation nip then feeds the top sheet forward, (retarding the second lower sheet if it has
entered the nip), until its lead edge is seen at the feed sensor.
The sheet is then be delivered to a specified stage location after the feed nip but before nip E
where the sheet waits. This wait period will be adjusted for each sheet to enable the correct
delivery time of the sheet to the confirm sensor 16, but will also be of a minimum value to
enable the system dynamics to settle prior to an additional move. The sheet is then be fed on
to nip E and sensor 16.
Once the sheets lead edge has been seen at the confirm sensor #16 the bypass feed motor
stops and nip E drags the sheet out of the bypass tray. This guarantees an inter document gap
between consecutive sheets. To minimize the drive force required at nip E to pull a sheet
through the bypass tray, the feed roll and nudger roll one-way clutches over-run when the
sheet is dragged through. This disengages the motor and gear train from the drag requirement.
Once the sheets trail edge has been seen at the feed sensor, the presence of the next sheet
can be confirmed. The next sheet can then be acquired. This is repeated until either the
bypass tray runs out of media or all desired sheets have been fed. The stepper motor is then
reversed to raise the nudger and return the registration gate to the media load position. Note
that the nudger remains down on the stack throughout the full multiple sheet feeding
sequence.
Multifeed Prevention Pre-Separation Nip
When nudging sheets to the separation nip, the ideal situation is that only the top sheet is
moved each time. To help facilitate this, the bottom of the stack is retarded using a cork pad
positioned directly underneath the nudger. The high coefficient of friction of the media to the
pad prevents the stack as a whole moving forward, but slug feeds of multiple sheets above the
base of the stack can still occur.
The separation nip can feed these slugs one sheet at a time if:
•
the slug is 2 sheets in number, or
•
the slug is shingled with the top-most sheet further forward and each consecutive lower
sheet slightly further behind.
To aid in the shingling of any multiple sheet slug feeds, the bypass tray drives all sheets into a
steep sheet metal ramp between the nudger roll and the separation nip. The shingle ramp
angle, nudger load and distance between the nudger roll and the ramp have been optimized to
minimize miss-feeds whilst maximizing the ability to shingle multiple sheet slug feeds.
Multifeed Prevention at the Separation Nip
When feeding sheets the separation nip performs the following functions:
•
If a single sheet enters the nip it will feed the sheet.
•
If 2 sheets enter the nip it will feed the top sheet whilst retarding the bottom sheet.
The separation nip consists of a feed roll mounted on a feed shaft. The feed roll is driven by an
in-line mechanical one-way clutch only when the feed shaft is rotated in the feed direction. A
retard roll is then sprung loaded against the feed roll, with the pivot point a known X and Y dis-
tance from the feed roll centre line. The retard roll has an in-line mechanical slip clutch that will
rotate when a known torque has been achieved. If a single sheet enters the nip then there is
enough drive from the feed roll to overcome the retardation of the slip clutch. Therefore the
sheet is fed and the slip clutch rotates. If two sheets enter the separation nip then the drive
exerted from the top sheet to the bottom sheet is not enough to overcome the slip clutch
torque. Therefore the top sheet is feed over the bottom sheet which is retarded by the station-
ary retard roll.
‘D’ Solenoid
The solenoid at the ‘D’ nip rolls opens and closes the nip. This is to accommodate the trailing
edge of the second side prints and to assist the registration / preheat assembly operation.
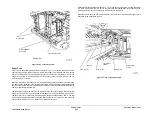
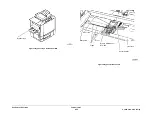
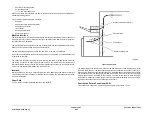
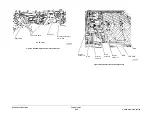
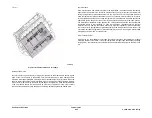
Figure 1
shows the bypass attached to the machine.
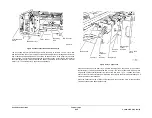
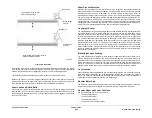
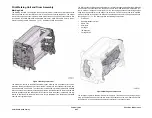
Figure 2
shows the rack assembly and
media width sensors.
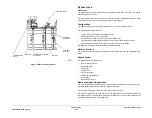
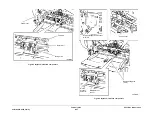
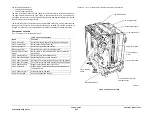
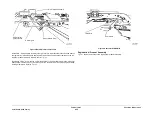
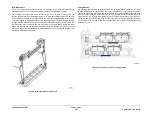
Figure 3
shows the media feeding components.
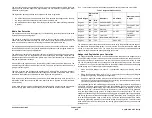
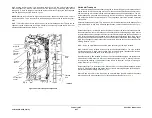
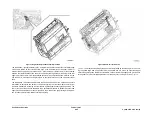
Figure 4
shows the
nudger home sensor, media present sensor and the feed sensor.
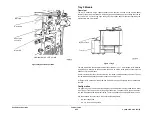
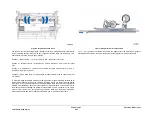
Figure 5
shows the ‘D’ and
sensor 16.
Summary of Contents for ColorQube 9303 Series
Page 1: ...Xerox ColorQube 9303 Family Service Manual 708P90290 February 2013...
Page 4: ...February 2013 ii ColorQube 9303 Family Introduction...
Page 18: ...February 2013 1 2 ColorQube 9303 Family Service Call Procedures...
Page 92: ...February 2013 2 68 ColorQube 9303 Family 05F Status Indicator RAPs...
Page 104: ...February 2013 2 80 ColorQube 9303 Family 12 701 00 65 Status Indicator RAPs...
Page 200: ...February 2013 2 176 ColorQube 9303 Family 12N 171 Status Indicator RAPs...
Page 292: ...February 2013 2 268 ColorQube 9303 Family 16D Status Indicator RAPs...
Page 320: ...February 2013 2 296 ColorQube 9303 Family 42 504 00 42 505 00 Status Indicator RAPs...
Page 500: ...February 2013 2 476 ColorQube 9303 Family 94B Status Indicator RAPs...
Page 648: ...February 2013 3 2 ColorQube 9303 Family Image Quality...
Page 653: ...February 2013 3 7 ColorQube 9303 Family IQ 1 Image Quality Figure 1 IQ defects 1...
Page 654: ...February 2013 3 8 ColorQube 9303 Family IQ 1 Image Quality Figure 2 IQ defects 2...
Page 655: ...February 2013 3 9 ColorQube 9303 Family IQ 1 Image Quality Figure 3 IQ defects 3...
Page 656: ...February 2013 3 10 ColorQube 9303 Family IQ 1 Image Quality Figure 4 IQ defects 4...
Page 657: ...February 2013 3 11 ColorQube 9303 Family IQ 1 Image Quality Figure 5 IQ defects 5...
Page 658: ...February 2013 3 12 ColorQube 9303 Family IQ 1 Image Quality Figure 6 IQ defects 6...
Page 660: ...February 2013 3 14 ColorQube 9303 Family IQ 1 Image Quality Figure 9 IQ defects 9...
Page 661: ...February 2013 3 15 ColorQube 9303 Family IQ 1 Image Quality Figure 10 IQ defects 10...
Page 662: ...February 2013 3 16 ColorQube 9303 Family IQ 1 Image Quality Figure 11 IQ defects 11...
Page 663: ...February 2013 3 17 ColorQube 9303 Family IQ 1 Image Quality Figure 12 IQ defects 12...
Page 664: ...February 2013 3 18 ColorQube 9303 Family IQ 1 Image Quality Figure 13 IQ defects 13...
Page 728: ...February 2013 3 82 ColorQube 9303 Family IQ 29 IQ 30 Image Quality...
Page 736: ...February 2013 3 90 ColorQube 9303 Family TP 15 Image Quality Figure 2 Media path test pages...
Page 758: ...February 2013 3 112 ColorQube 9303 Family IQS 7 IQS 8 Image Quality...
Page 778: ...February 2013 4 20 ColorQube 9303 Family REP 1 9 Repairs Adjustments...
Page 794: ...February 2013 4 36 ColorQube 9303 Family REP 3 10 Repairs Adjustments...
Page 1144: ...February 2013 4 386 ColorQube 9303 Family REP 94 1 Repairs Adjustments...
Page 1176: ...February 2013 4 418 ColorQube 9303 Family ADJ 62 3 ADJ 62 4 Repairs Adjustments...
Page 1182: ...February 2013 4 424 ColorQube 9303 Family ADJ 75 3 Repairs Adjustments...
Page 1184: ...February 2013 4 426 ColorQube 9303 Family ADJ 82 1 Repairs Adjustments...
Page 1186: ...February 2013 4 428 ColorQube 9303 Family ADJ 91 1 Repairs Adjustments...
Page 1552: ...February 2013 6 260 ColorQube 9303 Family dC140 General Procedures Information...
Page 1576: ...February 2013 6 284 ColorQube 9303 Family dC640 General Procedures Information...
Page 1578: ...February 2013 6 286 ColorQube 9303 Family dC708 dC715 General Procedures Information...
Page 1600: ...February 2013 7 2 ColorQube 9303 Family Wiring Data...
Page 1696: ...February 2013 8 2 ColorQube 9303 Family Principles of Operation...
Page 1808: ...February 2013 8 114 ColorQube 9303 Family Principles of Operation...
Page 1809: ...XEROX EUROPE...
Page 1810: ...XEROX EUROPE...
Page 1811: ...XEROX EUROPE...
Page 1812: ...XEROX EUROPE...


