Clarus SQ 8 MS Hardware Guide
94
6.
Confirm that the Source is fully installed in the instrument. If it is not, install the
source into the instrument. See
Removing and Returning the Source
on page
7.
Insert the column into the MS Transfer Line tube and carefully slide it toward
the source.
8.
With the column partially inserted, engage the threaded column nut onto the
Transfer Line tube fitting until it is finger-tight.
9.
Carefully continue inserting the column into the Transfer Line tube until it hits
the far side of the source. Be careful to avoid forcefully jamming the column
into the side of the source. Doing so may damage the cleanly cut end of the
column resulting in poor chromatography.
10.
With the column positioned as described in Step 9, slide the septum toward the
column nut until it touches the nut.
11.
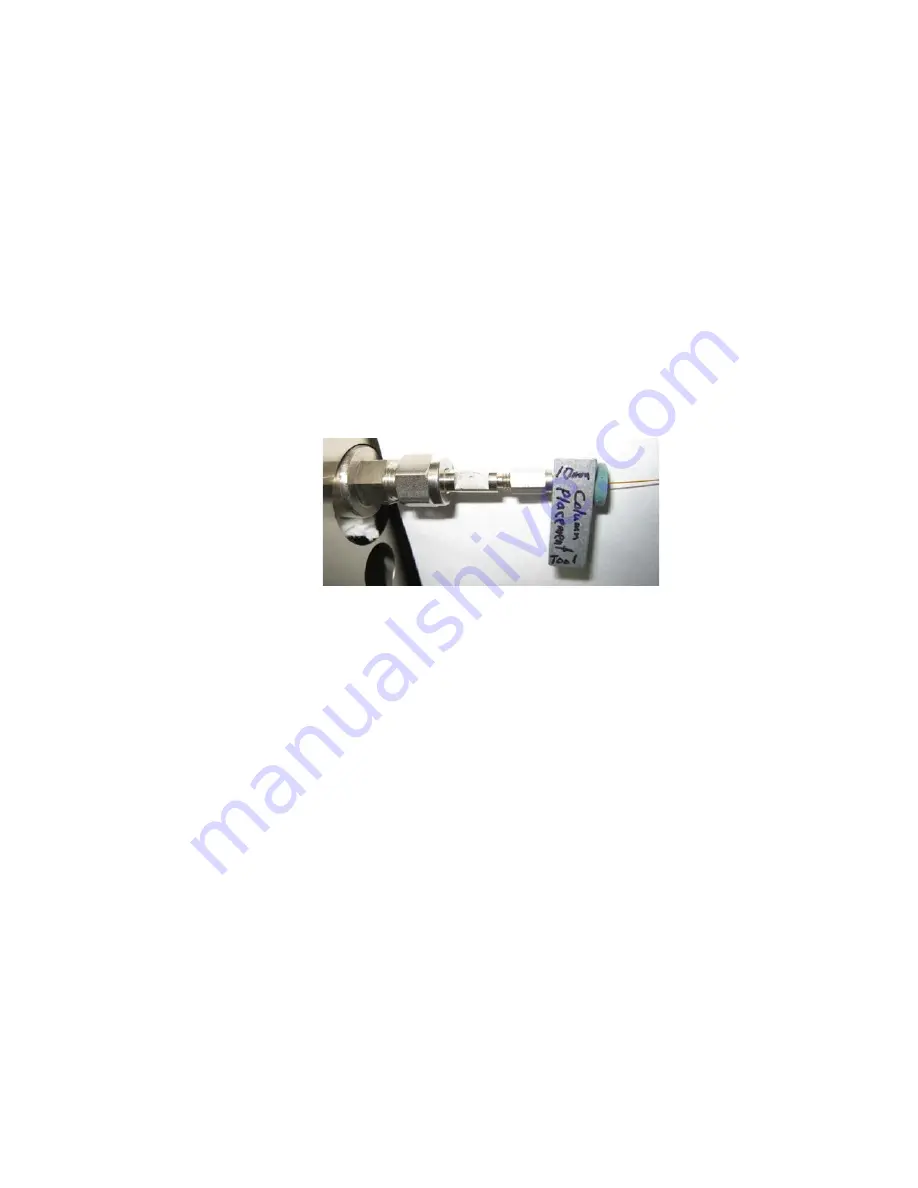
Pull the column back 10 mm. Then use the 10 mm positioning tool (Gauge) to
set the column nut at this position by placing the slot in the 10 mm Gauge over
the column between the nut and the septum. At this point be careful to avoid
moving the septum from its position on the column. See Figure 18.
Figure 18 The 10 mm positioning tool (Gauge) in place.
12.
Using the 5 mm and 1/4 inch crescent wrenches, tighten the column nut until
the ferrule is crimped onto the column making sure that the 10 mm spacing is
retained between the end of the column nut and the septum.
13.
Remove the 10 mm Gauge.
The column is now installed and the MS may be pumped down. Confirm that the
proper vacuum level is reached (on the TurboMass software Tune Page).
Summary of Contents for Clarus SQ 8 MS Series
Page 1: ...CLARUS SQ 8 MS Hardware Guide GAS CHROMATOGRAPHY ...
Page 2: ......
Page 3: ...Clarus SQ 8 MS Hardware Guide ...
Page 8: ......
Page 9: ...Warnings and Safety Information 1 ...
Page 10: ......
Page 18: ...Label Location and Content Figure 1 Front View of Clarus SQ 8 T ...
Page 46: ......
Page 47: ...Introduction 2 ...
Page 48: ......
Page 52: ......
Page 53: ...About the Clarus GC MS System 3 ...
Page 54: ......
Page 64: ......
Page 67: ...Maintenance 65 Maintenance 4 ...
Page 68: ......
Page 69: ...Maintenance 67 ...
Page 98: ...Clarus SQ 8 MS Hardware Guide 96 Figure 19 Inserting the Plug Handle and Sight ...
Page 148: ...Troubleshooting 5 ...
Page 149: ...Troubleshooting 147 ...
Page 178: ...TurboMass Software Installation 176 ...
Page 179: ...Index ...
Page 180: ......
Page 183: ......


