Augment3d
495
Adding Fixtures Manually
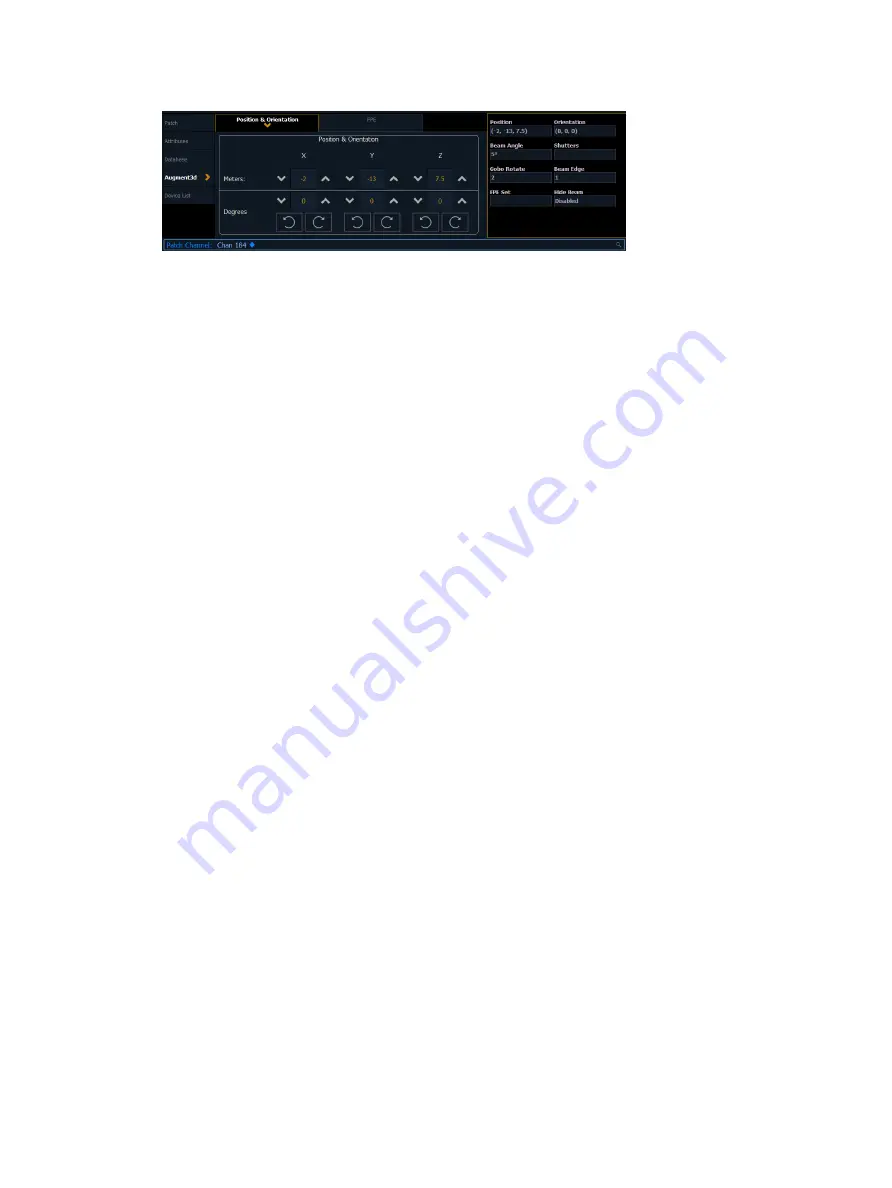
Under the Augment3d section in Patch, fixtures have fields for XYZ Position and Orientation. If
the fixture is nested, this data is relative to the parent. World Position and Orientation are
absolute, relative to the scene overall. If nested, an arrow indicator will apear next to the
position and orientation fields. For more information about nesting, see
.
You can also edit the following additional properties:
•
Beam Angle - set the beam angle from 1-179 degrees
•
0 will reset back to the default (36 degrees) and clear the field
•
Shutters - see
•
Gobo Rotate - set the gobo rotation
•
Beam Edge - set the beam edge from 0-100 (empty/default is 50)
•
FPE Set - see
•
Hide Beam - when enabled, the fixture's beam will not appear in Augment3d
Entering Fixture Position & Orientation Data
Select the channel of a fixture for which you have position and orientation data, and navigate
to the Position & Orientation section of the Augment3d tab in Patch. Selecting one of the
position or orientation fields opens a keypad to input specific values.
Alternatively, keyboard syntax can be used. Use [/] to separate X, Y, and Z when typing in
multiple values, and [Thru] to enter information for multiple fixtures at once.
•
[Chan] [1] [Select] [5] [/] [5] [/] [5] [Enter] sets the position of Channel 1 to 5,5,5.
•
[Chan] [1] [Select] [/] [2] [/] [Enter] sets the Y coordinate of Channel 1 to 2. No changes
are made to the X and Z coordinates.
•
[Chan] [1] [Select] [+] [3] [/] [/] [Enter] adds 3 to the current X coordinate of Channel 1.
No changes are made to the Y and Z coordinates.
•
[Chan] [1] [Select] [+] [/] [1] [/] [-] [5] [Enter] adds 1 to the current Y coordinate of
Channel 1, and subtracts 5 from the Z coordinate. No change is made to the
X coordinate.
•
[Chan] [1] [Thru] [5] [Select] [0] [/] [0] [/] [5] [Thru] [10] [/] [10] [/] [5] [Enter] sets the
position of Channel 1 to 0,0,5 and the position of Channel 5 to 10,10,5. The positions of
Channels 2, 3, and 4 are evenly distributed between the two.
•
[Group] [10] [Select] [5] [/] [/] [Thru] [10] [/] [/] [Enter] distributes the X coordinate of all
channels in Group 10 between 5 and 10. No changes are made to the Y and Z
coordinates.
All trailing slashes are optional. [Chan] [1] [Thru] [10] Position [5] [Thru] auto-completes to
[Chan] [1] [Thru] [10] Position [5] [/] [*] [/] [*] [Thru].
The corresponding fixture is automatically added to the Augment3d model. Repeat the
process for any additional channels or fixtures, or edit fixture position and rotation using tools
available in the toolbar or the Inspector.
Summary of Contents for Element Classic
Page 1: ...Ion Classic User Manual Version 3 1 1 4310M1210 3 1 1 RevA 2022 03...
Page 92: ...78 Ion Classic User Manual...
Page 212: ...198 Ion Classic User Manual...
Page 274: ...260 Ion Classic User Manual...
Page 275: ...Mark 261 Chapter 9 Mark About Mark 262 AutoMark 262 Referenced Marks 263...
Page 308: ...294 Ion Classic User Manual...
Page 346: ...332 Ion Classic User Manual...
Page 364: ...350 Ion Classic User Manual...
Page 378: ...364 Ion Classic User Manual...
Page 384: ...370 Ion Classic User Manual...
Page 426: ...412 Ion Classic User Manual...
Page 438: ...424 Ion Classic User Manual...
Page 444: ...430 Ion Classic User Manual...
Page 450: ...436 Ion Classic User Manual...
Page 458: ...444 Ion Classic User Manual...
Page 479: ...Magic Sheets 465...
Page 480: ...466 Ion Classic User Manual...
Page 530: ...516 Ion Classic User Manual...
Page 558: ...544 Ion Classic User Manual...
Page 578: ...564 Ion Classic User Manual...


