


Chapter 71 Static Route
XS3800-28 User’s Guide
528
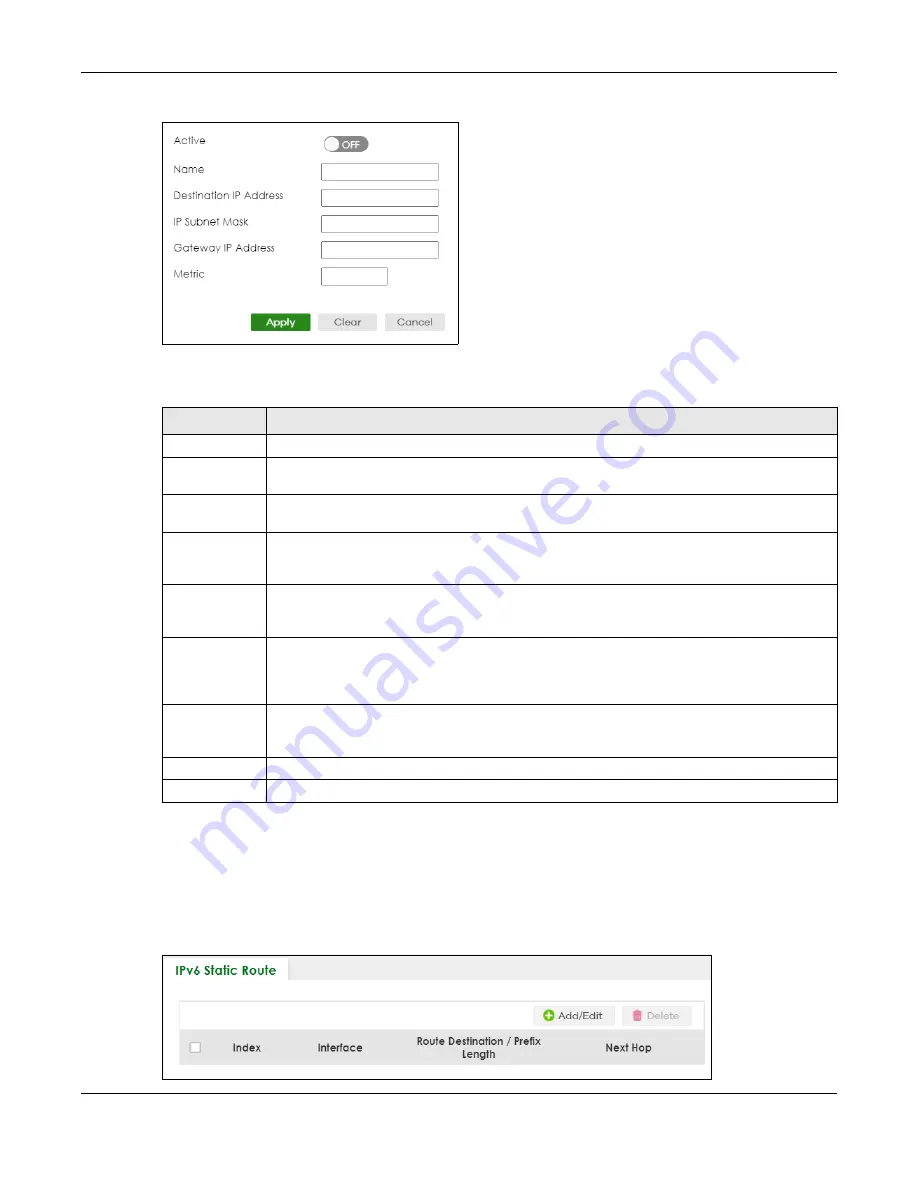
Figure 417
NETWORKING > Static Routing > IPv4 Static Route > Add/Edit
The following table describes the related labels you use to create a static route.
71.3 IPv6 Static Route
Click
NETWORKING
>
Static Routing
>
IPv6 Static Route
to display the screen as shown.
Figure 418
NETWORKING > Static Routing > IPv6 Static Route
Table 283 NETWORKING > Static Routing > IPv4 Static Route > Add/Edit
LABEL
DESCRIPTION
Active
This field allows you to activate or deactivate this static route.
Name
Enter a descriptive name (up to 10 printable ASCII characters except [ ? ], [ | ], [ ' ], [ " ] or [ , ]) for
identification purposes.
Destination IP
Address
This parameter specifies the IP network address of the final destination.
IP Subnet Mask
Enter the subnet mask for this destination. Routing is always based on network number. If you
need to specify a route to a single host, use a subnet mask of 255.255.255.255 in the subnet mask
field to force the network number to be identical to the host ID.
Gateway IP
Address
Enter the IP address of the gateway. The gateway is an immediate neighbor of your Switch that
will forward the packet to the destination. The gateway must be a router on the same segment
as your Switch.
Metric
The metric represents the “cost” of transmission for routing purposes. IP routing uses hop count as
the measurement of cost, with a minimum of 1 for directly connected networks. Enter a number
that approximates the cost for this link. The number need not be precise, but it must be between
1 and 15. In practice, 2 or 3 is usually a good number.
Apply
Click
Apply
to save your changes to the Switch’s run-time memory. The Switch loses these
changes if it is turned off or loses power, so use the
Save
link on the top navigation panel to save
your changes to the non-volatile memory when you are done configuring.
Clear
Click
Clear
to clear the fields to the factory defaults.
Cancel
Click
Cancel
to not save the configuration you make and return to the last screen.
Summary of Contents for XS3800-28
Page 29: ...29 PART I User s Guide...
Page 54: ...54 PART II Technical Reference...
Page 88: ...Chapter 4 Web Configurator XS3800 28 User s Guide 88 Figure 51 Online Web Help...
Page 148: ...Chapter 20 Cloud Management XS3800 28 User s Guide 148 Figure 94 SYSTEM Cloud Management...
Page 263: ...Chapter 36 OAM XS3800 28 User s Guide 263 Figure 182 PORT OAM OAM Status OAM Details...
Page 540: ...Chapter 72 VRRP XS3800 28 User s Guide 540 Figure 434 VRRP Example 2 VRRP Status on Switch B...
Page 581: ...Chapter 77 Policy Rule XS3800 28 User s Guide 581 Figure 456 Policy Example...