50FY Series
ISSUE 3
PK 80391
4 Honeywell
•
MICRO SWITCH Sensing and Control
Step 4 - Wire logic amplifier as follows:
•
Connect 100 to 128 VAC to logic amplifier
terminals L1 and L2.
•
Connect load to logic amplifier relay contact
terminals R1 and R2.
Step 5 - Perform troubleshooting procedure as
required:
(see logic amplifier indicators)
IMPROPER SYSTEM PERFORMANCE
If the red ATTENTION INDICATOR LED, located on
the logic amplifier is flashing, DO NOT OPERATE.
Failure to comply with these instructions could
result in death or serious injury.
LOGIC AMPLIFIER INDICATORS
1. If the 50FY Series system appears to be
operational, but the red ATTENTION
INDICATOR LED is flashing, do the following:
•
Ensure the sensors are wired to the logic amplifier
correctly.
•
Ensure the 22 K
Ω
resistors are installed in their
proper locations on the logic amplifier.
•
Manually actuate sensors and ensure the
corresponding red SWITCH OUTPUT LEDs
above the logic amplifier terminal turn off.
•
Ensure sensors and magnet actuators are aligned
and within specified sensing distance.
•
Shut amplifier power OFF and wait until the
ATTENTION INDICATOR LED is completely
OFF, then turn the amplifier power ON (power on
reset).
•
If the red ATTENTION INDICATOR LED is still
flashing, disconnect the logic amplifier and call the
MICRO SWITCH Application Center (1-800-537-
6945).
2. If the 50FY Series system is not operating and
the red ATTENTION INDICATOR LED is not
illuminated, do the following:
•
Ensure the installed fuses are rated properly and
not blown (0.630A and 1/8A slow blow).
•
Ensure the sensors and logic amplifier are wired
correctly.
•
Ensure the 22 K
Ω
resistors are installed in their
proper locations on the logic amplifier.
•
Ensure the sensors and magnet actuators are
aligned and within specified sensing distance.
•
Remove and restore power (power on reset).
•
If the 50FY Series system is still OFF, disconnect
the logic amplifier and return to Honeywell.
Step 6 - Perform functional check as follows:
(see logic amplifier indicators)
1. If the 50FY Series is operating and the red
ATTENTION INDICATOR LED is not illuminated,
do the following:
•
If any or all of the sensors are not actuated,
observe the corresponding red SWITCH OUTPUT
LEDs above the logic amplifier terminals for each
sensor are illuminated. Also observe the red
RELAY CONDITION OPEN LEDs are illuminated
(logic amplifier contacts are open).
•
Actuate each sensor and observe the
corresponding red SWITCH OUTPUT LED turns
off.
•
If all twelve of the red SWITCH OUTPUT LEDs
are off (all sensors are actuated), observe the red
RELAY CONDITION OPEN LEDs are NOT
illuminated. Also observe the green RELAY
CONDITION CLOSED LEDs are illuminated (logic
amplifier contacts are closed).
•
If the 50FY Series system performs as indicated
above (step 3), the system is operating correctly.
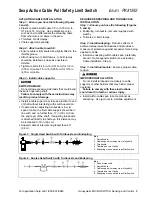
Attention
Indicator
Switch Output
Indicator LEDs
Summary of Contents for SYA14 Series
Page 2: ...2 107031 23 EN FR26 GLO 1199 Printed in France This page has been left intentionally blank ...
Page 6: ...6 107031 23 EN FR26 GLO 1199 Printed in France This page has been left intentionally blank ...
Page 26: ...26 107031 23 EN FR26 GLO 1199 Printed in France This page has been left intentionally blank ...
Page 62: ...62 107031 23 EN FR26 GLO 1199 Printed in France This page has been left intentionally blank ...
Page 70: ...70 107031 23 EN FR26 GLO 1199 Printed in France This page has been left intentionally blank ...
Page 76: ...76 107031 23 EN FR26 GLO 1199 Printed in France This page has been left intentionally blank ...
Page 78: ...78 107031 23 EN FR26 GLO 1199 Printed in France This page has been left intentionally blank ...
Page 79: ...107031 23 EN FR26 GLO 1199 Printed in France 79 8 CE Declaration of Conformity ...
Page 80: ...80 107031 23 EN FR26 GLO 1199 Printed in France This page has been left intentionally blank ...
Page 84: ......
Page 158: ......
Page 160: ......
Page 161: ...For application help call 1 800 537 6945 Honeywell MICRO SWITCH Sensing and Control 80 ...
Page 165: ...3 107022 14 EN FR26 GLO 0100 Printed in Germany This page has been left intentionally blank ...
Page 201: ...39 107022 14 EN FR26 GLO 0100 Printed in Germany This page has been left intentionally blank ...
Page 205: ...43 107022 14 EN FR26 GLO 0100 Printed in Germany This page has been left intentionally blank ...
Page 207: ...45 107022 14 EN FR26 GLO 0100 Printed in Germany This page has been left intentionally blank ...
Page 208: ...107022 14 EN FR26 GLO 0100 Printed in Germany 46 9 Declaration of Conformity ...
Page 219: ...11 107006 11 EN FR26 GLO 0300 Printed in Germany This page has been left intentionally blank ...
Page 229: ...21 107006 11 EN FR26 GLO 0300 Printed in Germany This page has been left intentionally blank ...
Page 257: ...49 107006 11 EN FR26 GLO 0300 Printed in Germany This page has been left intentionally blank ...
Page 260: ...107006 11 EN FR26 GLO 0300 Printed in Germany 52 9 3 Declaration of conformity ...
Page 340: ...Safety Perimeter Guarding Installation Manual FF SPS4 Series Safety Perimeter Guarding ...
Page 536: ...2 107004 15 EN FR26 ROW 0899 Printed in France This page has been left intentionally blank ...
Page 538: ...4 107004 15 EN FR26 ROW 0899 Printed in France This page has been left intentionally blank ...
Page 542: ...107004 15 EN FR26 ROW 0899 Printed in France 8 This page has been left intentionally blank ...
Page 620: ...86 107004 15 EN FR26 ROW 0899 Printed in France This page has been left intentionally blank ...
Page 624: ...90 107004 15 EN FR26 ROW 0899 Printed in France This page has been left intentionally blank ...
Page 626: ...92 107004 15 EN FR26 ROW 0899 Printed in France This page has been left intentionally blank ...
Page 627: ...107004 15 EN FR26 ROW 0899 Printed in France 93 8 CE Declaration of Conformity ...
Page 628: ...94 107004 15 EN FR26 ROW 0899 Printed in France This page has been left intentionally blank ...


